So that your full product catalog is available when quoting customers, when adding products that are inactive in the portal, they will be set as active line items on quotes. This ensures that these products are included in the quote details when emailing or generating quote PDFs for customers.

Two tabs have been added to Orders in the Portal - Delivery (Custom Fields) and Delivery (Development). This allows users to view delivery settings on an order, such as DDA info on the status tapped in the app, timestamp and user that tapped it.

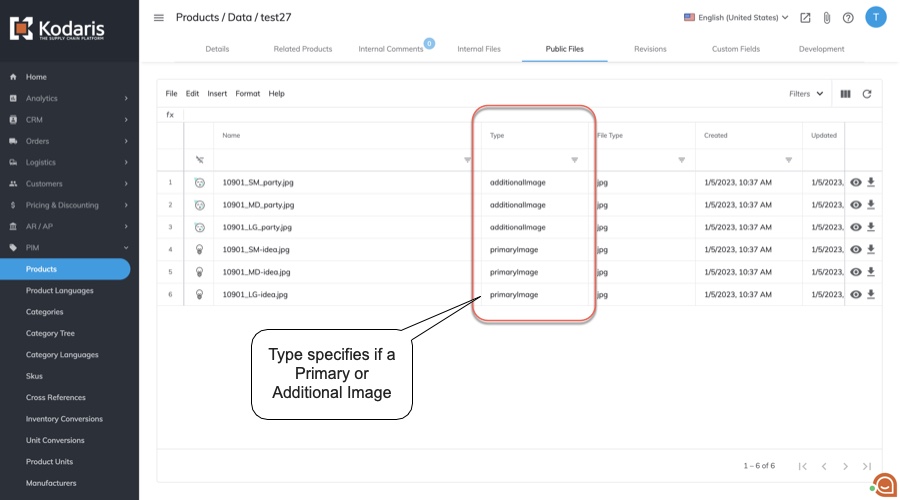
To more easily identify which image is the Primary image displayed for products, the Type column under Public Files on a product now displays if an image is a primaryImage or additionalImage.
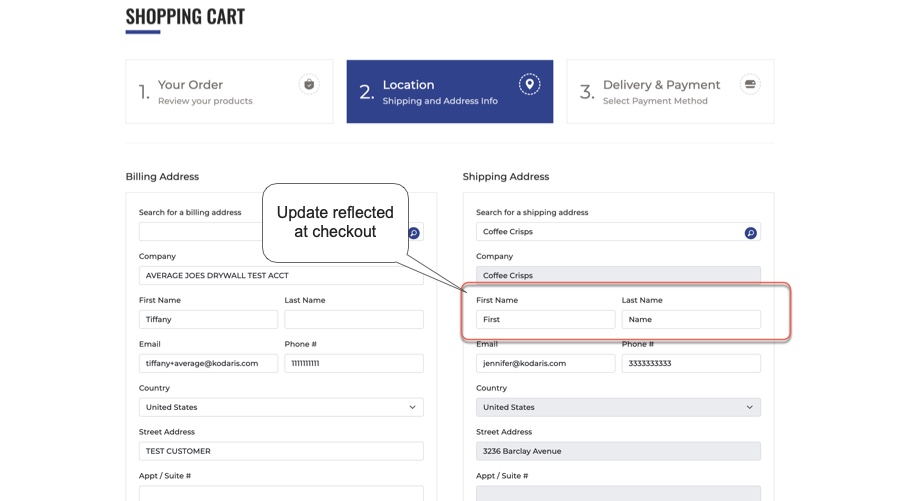
Making updates to the First & Last Name fields on Company Addresses is now available. This allows users to add or update the name which will be reflected to the customer at checkout. When selecting a Delivery address, the name in these fields will be populated on the Commerce site.

The Web Payment ID column on the Accounts Receivable screen is now populated with data. This is designed so that invoices the payment is applied to can be tracked.

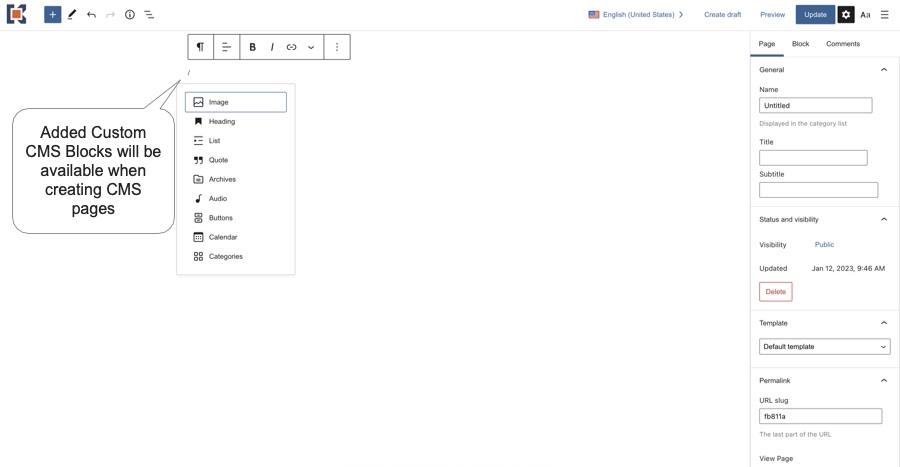
Developers can add their own custom blocks to the Gutenberg CMS editor so they’re not limited to what is available by default. This is available for Vanilla JS blocks and developer docs will be created to walk through the process.
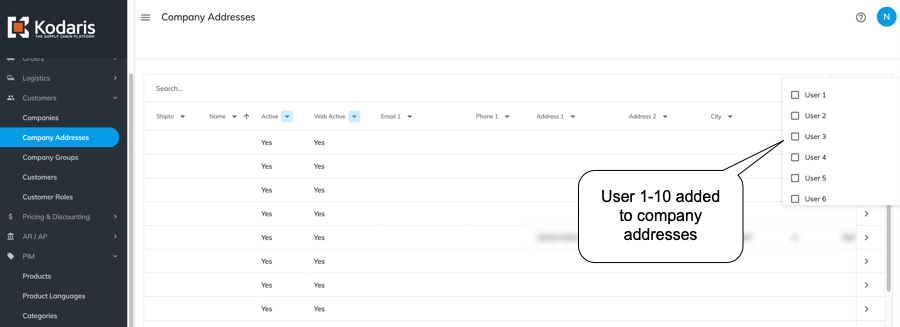
User 1-10 fields for addresses have been added to the Companies > Addresses data grid. This allows for flexibility in displaying additional item data. User fields can be added to the view on the Addresses screen tab.

This update to emails helps support copying and pasting of multiple email addresses from Outlook into the Kodaris Portal. You can easily copy your contacts from Outlook and send an email through the Portal without having to replace the semicolons with commas as previously required. This feature is supported in fields throughout the portal, such as the Primary Email on a company.

For instances when customers need a statement, an option has been added to easily email to the customer. This can be done from the Companies > Details screen by clicking on the Generate Statement PDF icon. Once clicked on, you’ll see two options, Generate and Generate & Send. The Generate creates a statement pdf that is saved under Internal Files. Generate & Send will create the pdf and automatically email it to the customer with the email going directly to the contact in the Company Primary Email field. Some configuration of pdfs and emails for statements may be needed, so please let us know if you are interested in this feature.

A new data grid/view has been added to the Products screen for SKUs. The user can now view and export all SKUs associated with that product.

Users can now not only see all available data fields for SKUs, but also edit those fields in the Operations Portal under PIM > SKUs. This enables the user to fully manage all SKUs in the system.

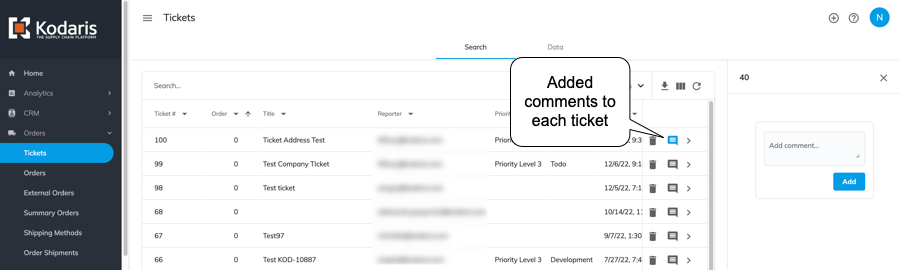
An employee can now add comments to each individual ticket on the global Tickets screen. This will enable employees to communicate important information for a job ticket quickly and easily within the Operations Portal.
Order entry in the Operations Portal has now been optimized for use on the iPad using the Safari browser.
New screens have been added for Development and Custom Fields to quote and order items. This enables advanced users to review and edit all information tied to the order and quote items along with the ability to add new custom settings and fields.

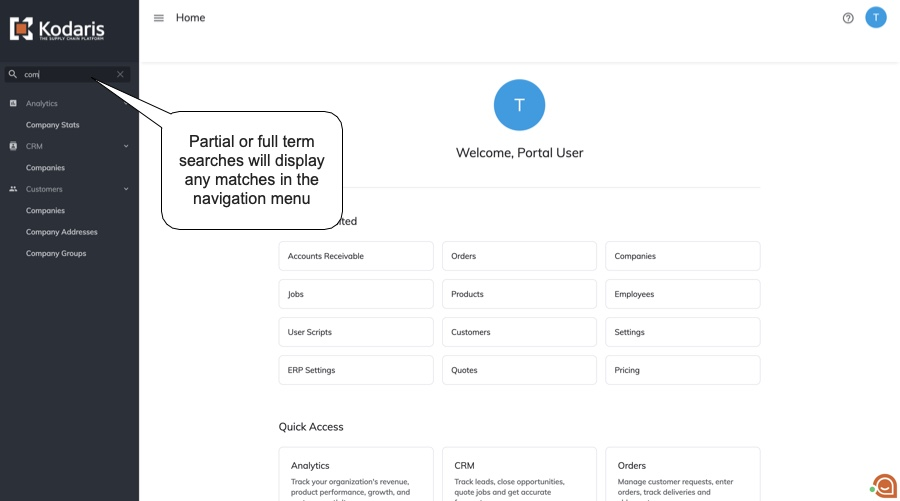
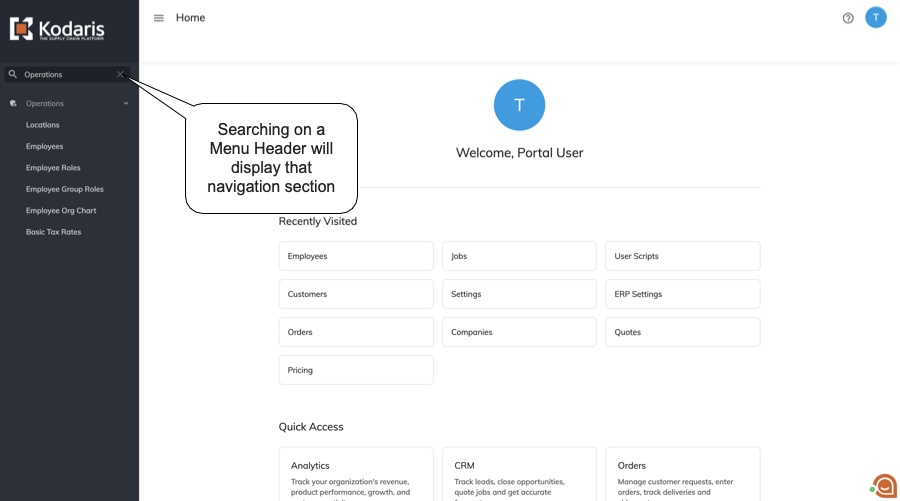
A search field has been added to the Employee Portal navigation panel. This allows users to quickly search for the section or a specific screen they are looking to access in the Portal - saving users time from clicking into each section to find what they are looking for. If you search for a term, any sections containing the term will be displayed. You can also search by header, which will then display that section and all screens available below it.
The Transaction Type field has been added to the Orders screen in the Employee Portal. An employee viewing orders can now view the transaction type by toggling it on under the filter menu.

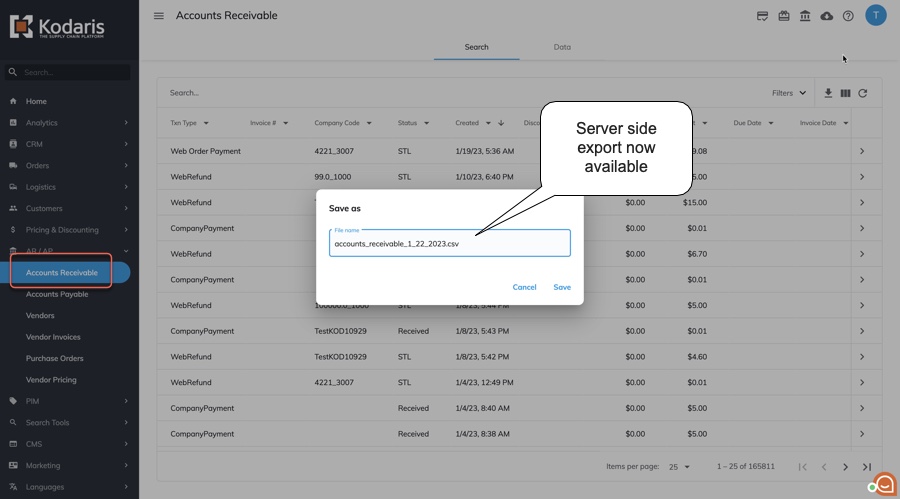
Export on the Accounts Receivable screen now is exported via server side function. This upgrade enables a more powerful export process not limited by record amounts.
A new Data tab has been added to the Accounts Receivable screen in the Employee Portal. This new data grid will allow users to always view and search all available AR records in the system without worrying about any possibly missed by not being indexed.

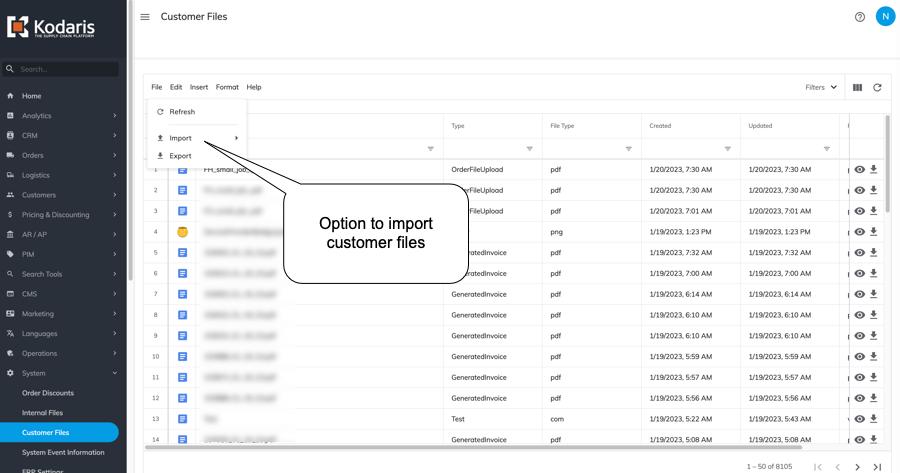
An employee can now import files directly into the Customer Files table under the Products > Public Files screen without requiring the upload of an image. This enables the creation of customer files that have images from external content delivery networks.
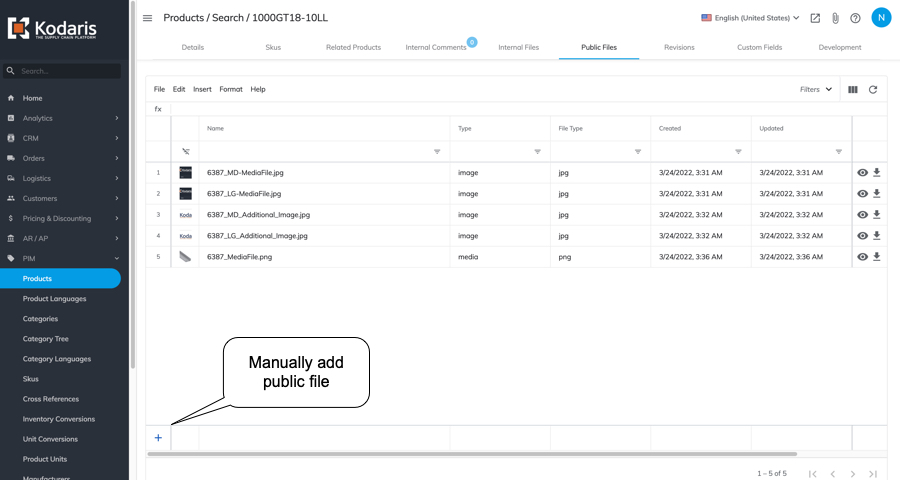
A new "Add Row" has been added to the public files grid. A user can add their own public files to the grid using this new function. This enables a user to manually add a public file without having to upload an image at the same time.
The CMS Media screen has been upgraded to support upload of multiple files at once through the Upload Icon. It also now supports the drag-and-drop function allowing users to simply drag images onto the page to upload into the media bucket. This enables users a much faster method of uploading many images to the bucket.

As part of the Guest Checkout feature, users can assign a company to a guest order in the Employee Portal before releasing the order to the ERP. To assign, you can click on the "Assign to Company" icon, then select a company to assign the order to. The Assign a Company dialog is type as you search to help easily find the company you'd like to assign.
When a customer places an order via checkout, this update holds the order from going to the ERP if it is a guest order. This is for ERPs where a customer number is required. This allows Operations Portal users to assign these orders to a company so no errors are triggered when inserting the orders.

On orders in the Invoiced & Paid stages, an invoice PDF can be generated and sent in just a click - with the email going to the contacts in the Primary Email field on the Company. This can be done from the Order > Details screen by clicking on the Send Invoice icon. Clicking on this icon creates an invoice pdf, saved under Internal Files, and emails the invoice to the customer. A scheduled task is also available to run automatic invoicing and send to customers at a set interval and time - saving you time and enabling invoicing to be fully digital. To utilize this feature, additional configuration may be needed. If you are interested in options for sending invoices, please reach out to your account manager.

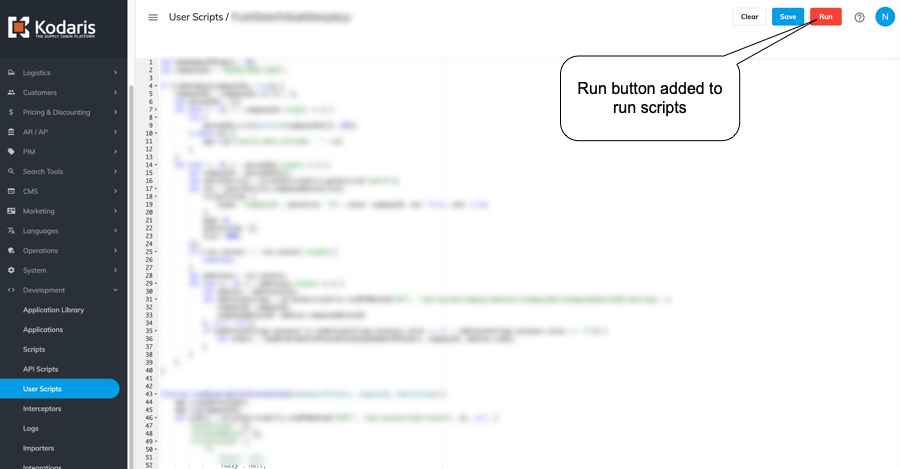
A new run button has been added to the User Scripts screen in the Employee Portal. This new function will allow advanced users to run and test their own scripts right in the employee portal.
A new screen under System in the Employee Portal named System Event Information. This enables employees to access detailed information on a wide variety of system events which will help them service their own customers and employees more efficiently.

This update allows you to transform incoming cXML files from your partners to allow for customizations. A custom setting with the XLST required for the customization can be added to the company and will be applied so that orders placed through PunchOut from an eProcurement system are added correctly.

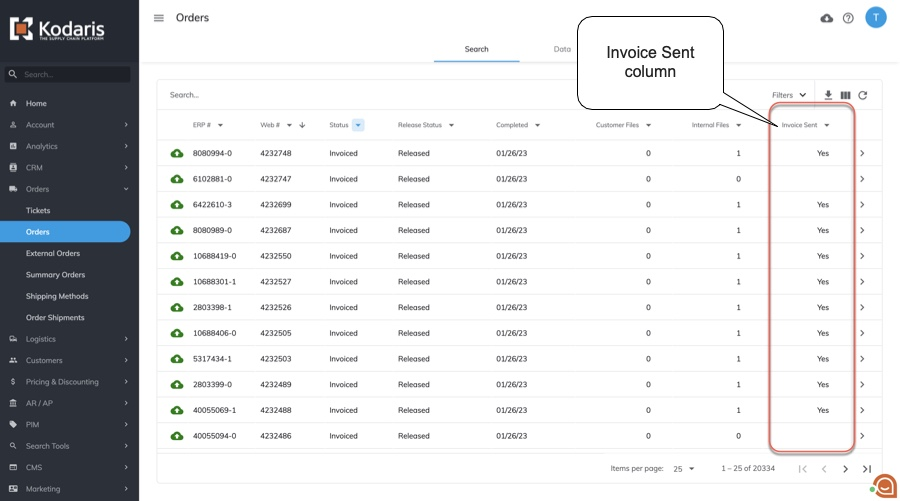
To easily see which orders have had an invoice sent, an Invoice Sent column is available to add on the Orders > Search screen. If an invoice has been sent for an order, the value will be set as "Yes" in this column and blank for orders where an invoice hasn't been sent. This column is sortable and filterable.
User 1-10 fields for addresses have been added to the Companies Addresses data grid. This allows for flexibility in displaying additional item data. User fields can be added to the view on the Addresses screen tab.
Records on the Pricing Types screen are now exported via server side function. This allows a full export of all pricing types in a format where users can make updates in the exported sheet and easily import back into the Portal.

Importing has been added to the Pricing Types screen. This allows for easier mass management of data with options to be able to update and/or create Price Type records.

This allows developers to customize the search preprocessing for a customer product search to better fine-tune and enhance customer product searches on the commerce site.

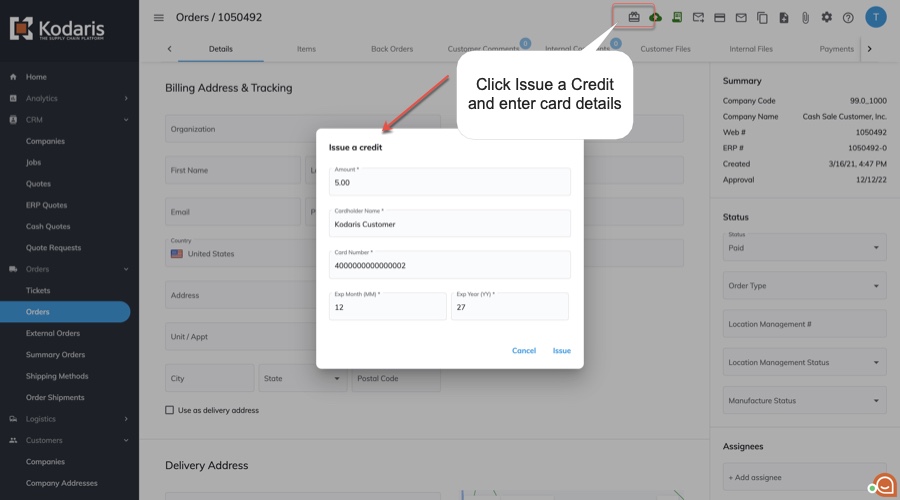
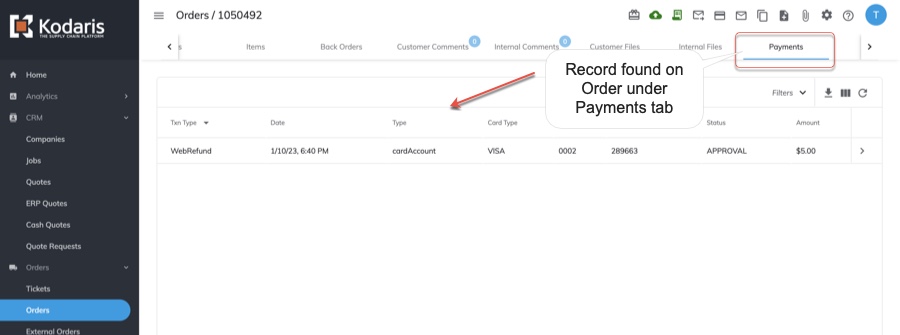
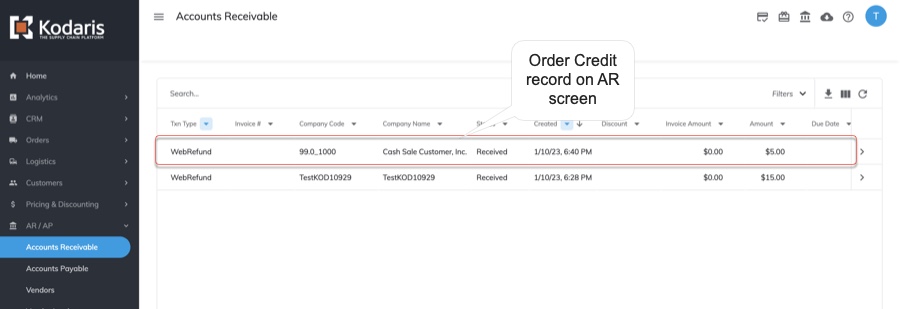
Updates to be able to issue Charges or Credits in the Portal were released to provide additional Virtual Terminal options for different customer scenarios. These updates are outlined below.


COD payment links can now be sent to customers to pay for their order using CenPOS as the payment provider. This enables yet another method to receive payment for an order.

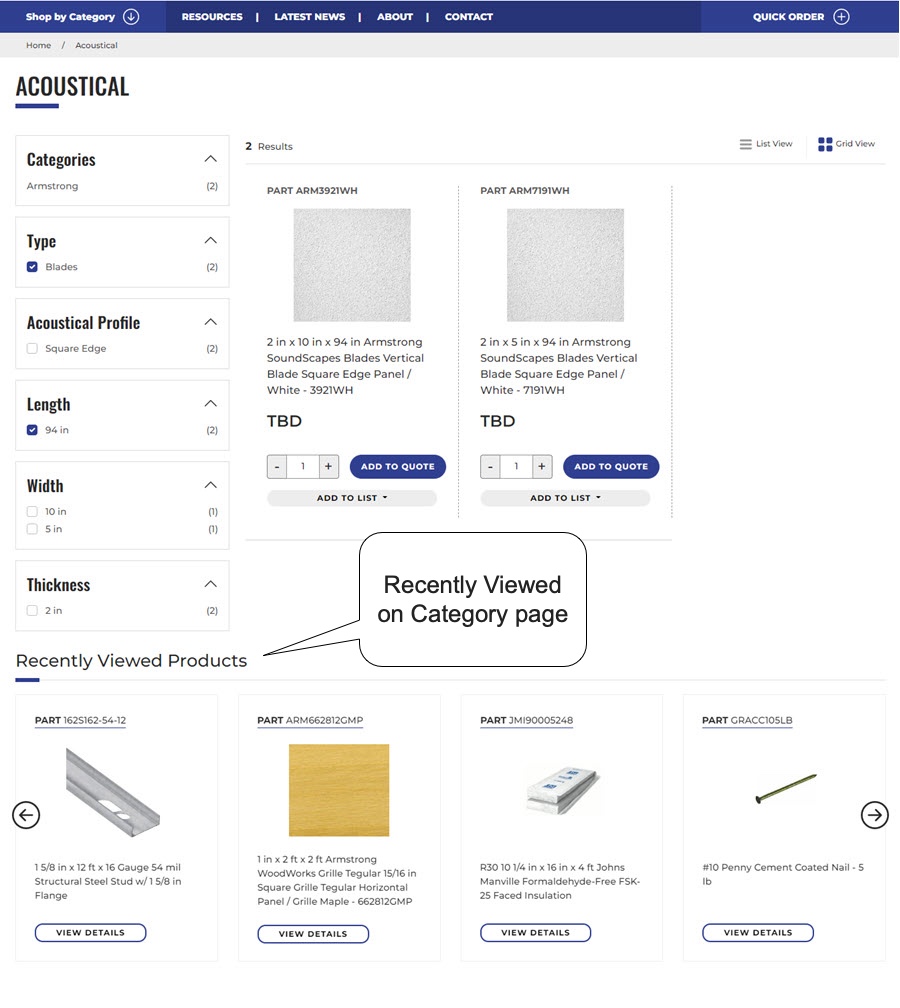
Recently viewed products will now display in the new commerce layouts for product categories and search. After a customer has browsed four products, the Recently Viewed Products section will automatically appear in a carousel, populated with the last 10 products viewed by the customer, on both the Category & Search screens. This added function will allow a customer to more easily compare products or revisit a product more efficiently.
To help comply with regulations, an option to display a cookie consent prompt to website users is now available. When navigating to the website, customers will see a message displayed informing them of use of cookies on the website and prompting them to Accept or Decline. If they click accept or decline, the customer's choice is stored in a browser cookie for 90 days. The cookie consent resets after 90 days upon which the message will be displayed again to customers to accept or decline.

Added function to enable customers to place an order on the site as a "guest" and complete checkout without supplying payment information. This enables the receiving of unpaid orders that can then be modified if needed before reaching out to the customer for payment via any available method.

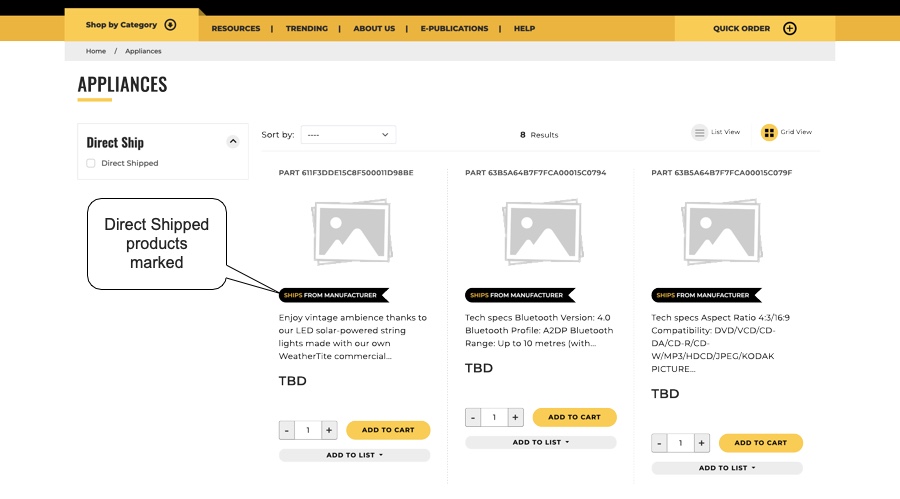
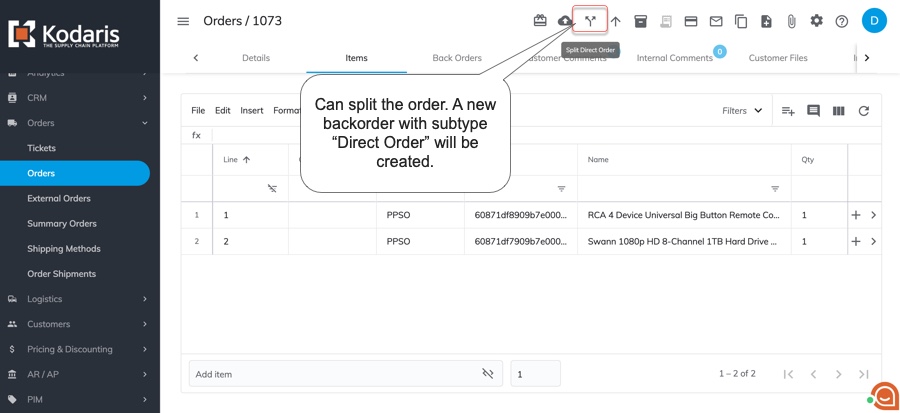
A new feature has been implemented to enable the splitting of orders and the drop-shipping of those orders direct from the manufacturer or supplier. This allows customers to offer products for sale that they do not stock. Products on the site can be marked as Direct Ship. After receiving the order, the items can be split by clicking on the ‘Split Direct Order’ button. A backorder with the items will be created and marked as a ‘Direct Order'. The order can then be released to the ERP, in addition to releasing it to the Direct Ship Vendor. This is all part of a larger direct / drop ship program.

Inventory display on product page updated to show "available quantity" instead of "on hand" quantity with a configuration update. This eliminates the occurrence of back orders that sometimes happened due to "on hand" quantity only accounting for current and not all allocated stock when desired.

To more easily customize the portal for your customers, a role is available where employees can create views systemwide. You can adjust columns and filters as needed, click on Views, then Add view. The Add View dialog will have a System option to make it available to customers across all companies. To be able to set a system view, employees will need the Customer Portal Customizer role and a customer login username that matches their employee login. This feature allows you to build the portal in a way you know your customers will utilize, helping to drive adoption, with no coding necessary.

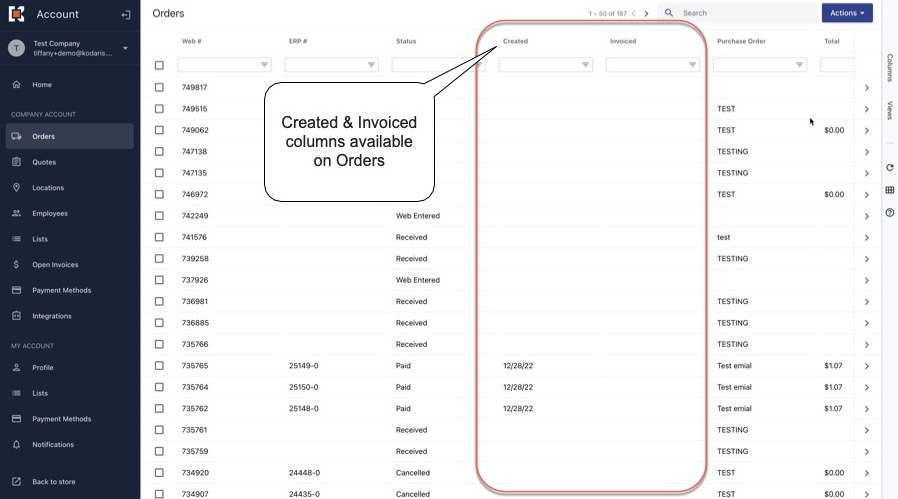
Created and Invoiced date columns are now available for customers to view and apply filters to on the Orders screen. Created is displayed in the default view and Invoiced can be added as an additional column when users are customizing their view.
So customers can view and pay Open Invoices by a specific Location, a filter has been added to the Location Code column. Selecting a Location and clicking "Apply" will then display only the open invoices for that Location.

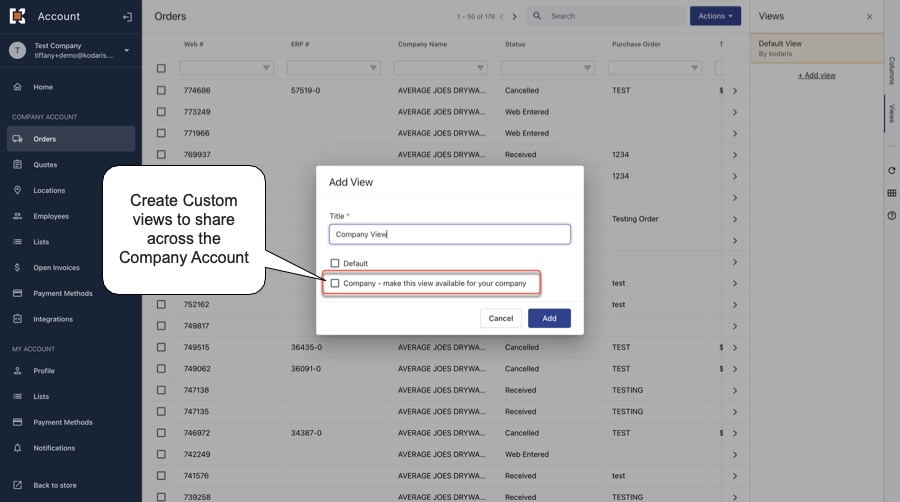
Company Views can be created to share customized Customer Portal views to all users under a company. This feature is available to any users on the account with Company Administrator access. When adding a view, you'll see a "Company" option to make it available for your company. You can also select "Default" so the view is automatically loaded whenever a customer’s employees navigate to the screen.
To reduce the number of columns needed to view which locations are active and set to display on the web, the Active and Display columns on the Locations screen have been combined into one Active column. This column is included in the default view and will automatically filter to "yes" for locations that are active and displayed for the web.
