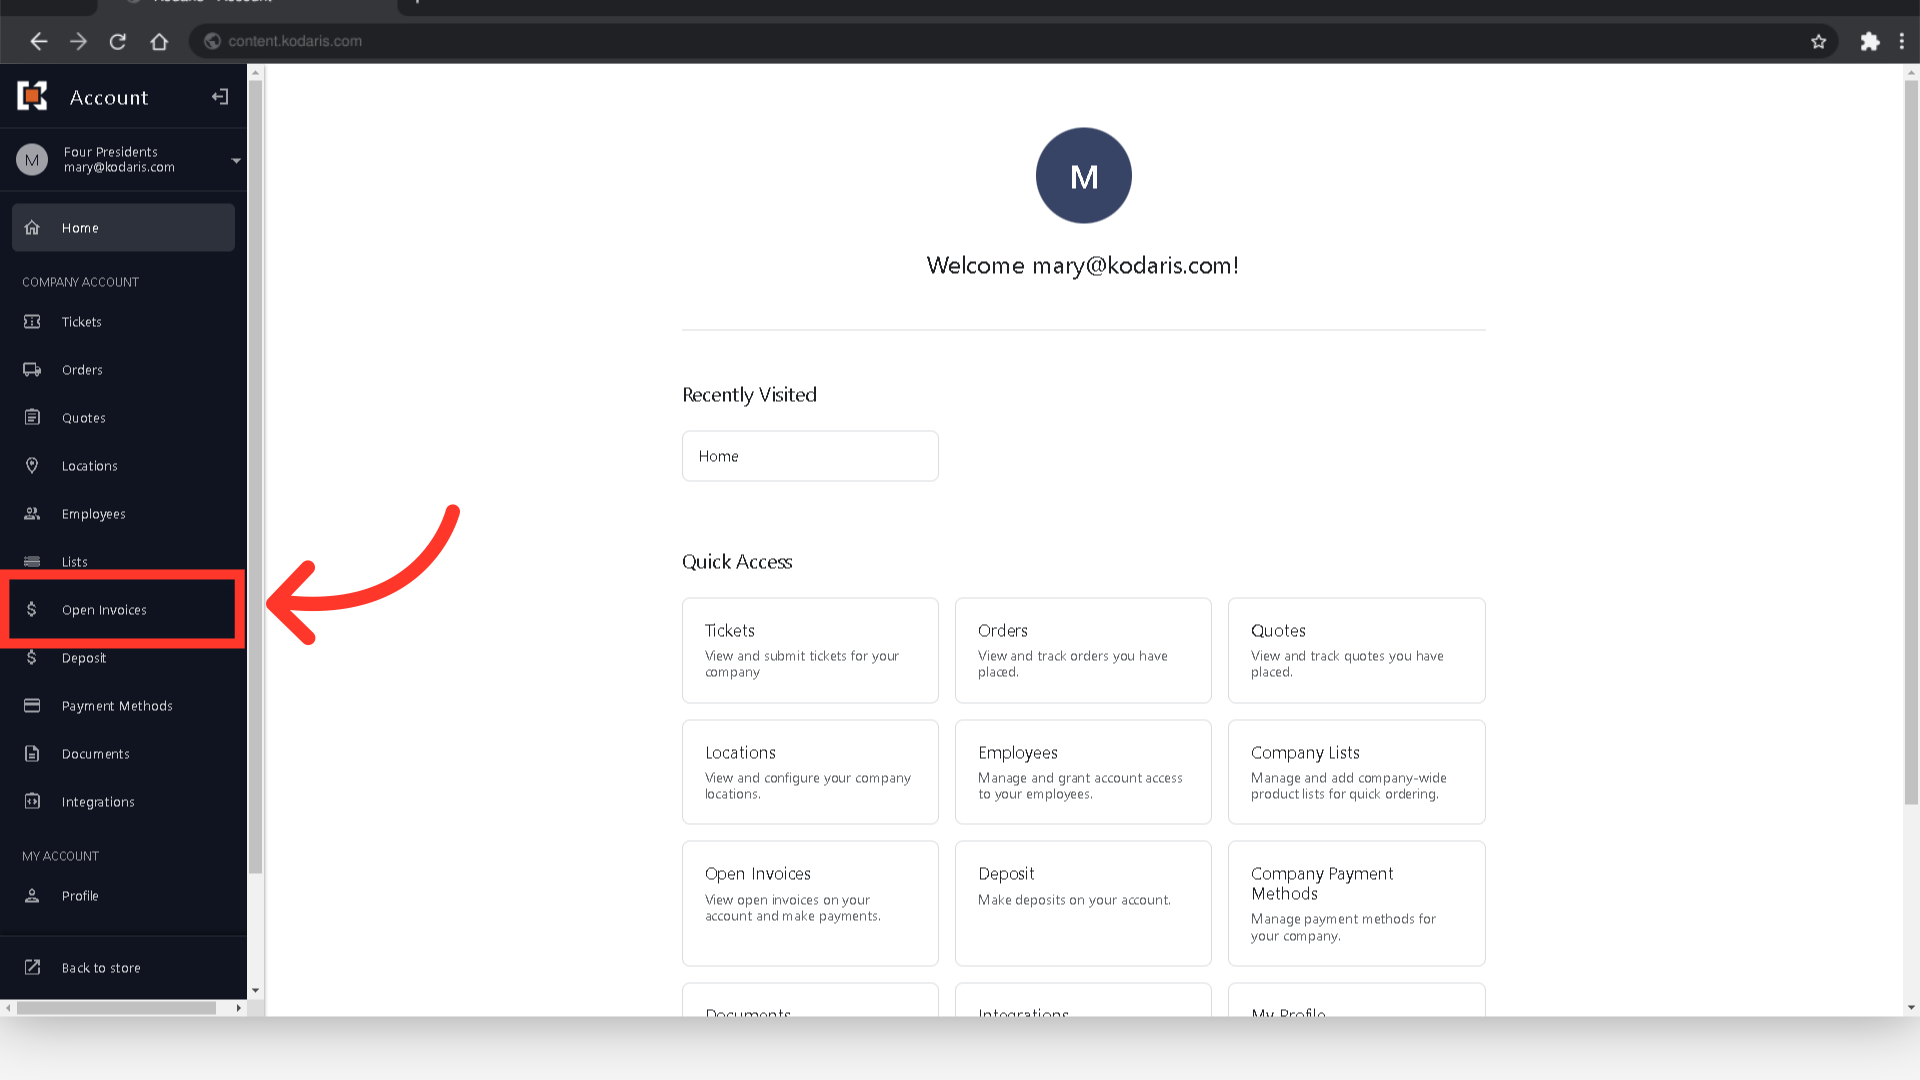
Once the schedule pay feature has been configured, customers can then schedule a payment by logging into their customer portal. To start, navigate to "Open Invoices". In order for customers to access this feature, they will need the "Accounts Payable" permission.
Select one invoice or multiple invoices to pay by checking the box next to the invoice number.

Now, click the "Actions" button to view different payment options.

Choose the "Schedule payment for selected invoices" option and a dialog box will appear.

To select the date of your payment, click on the calendar icon.
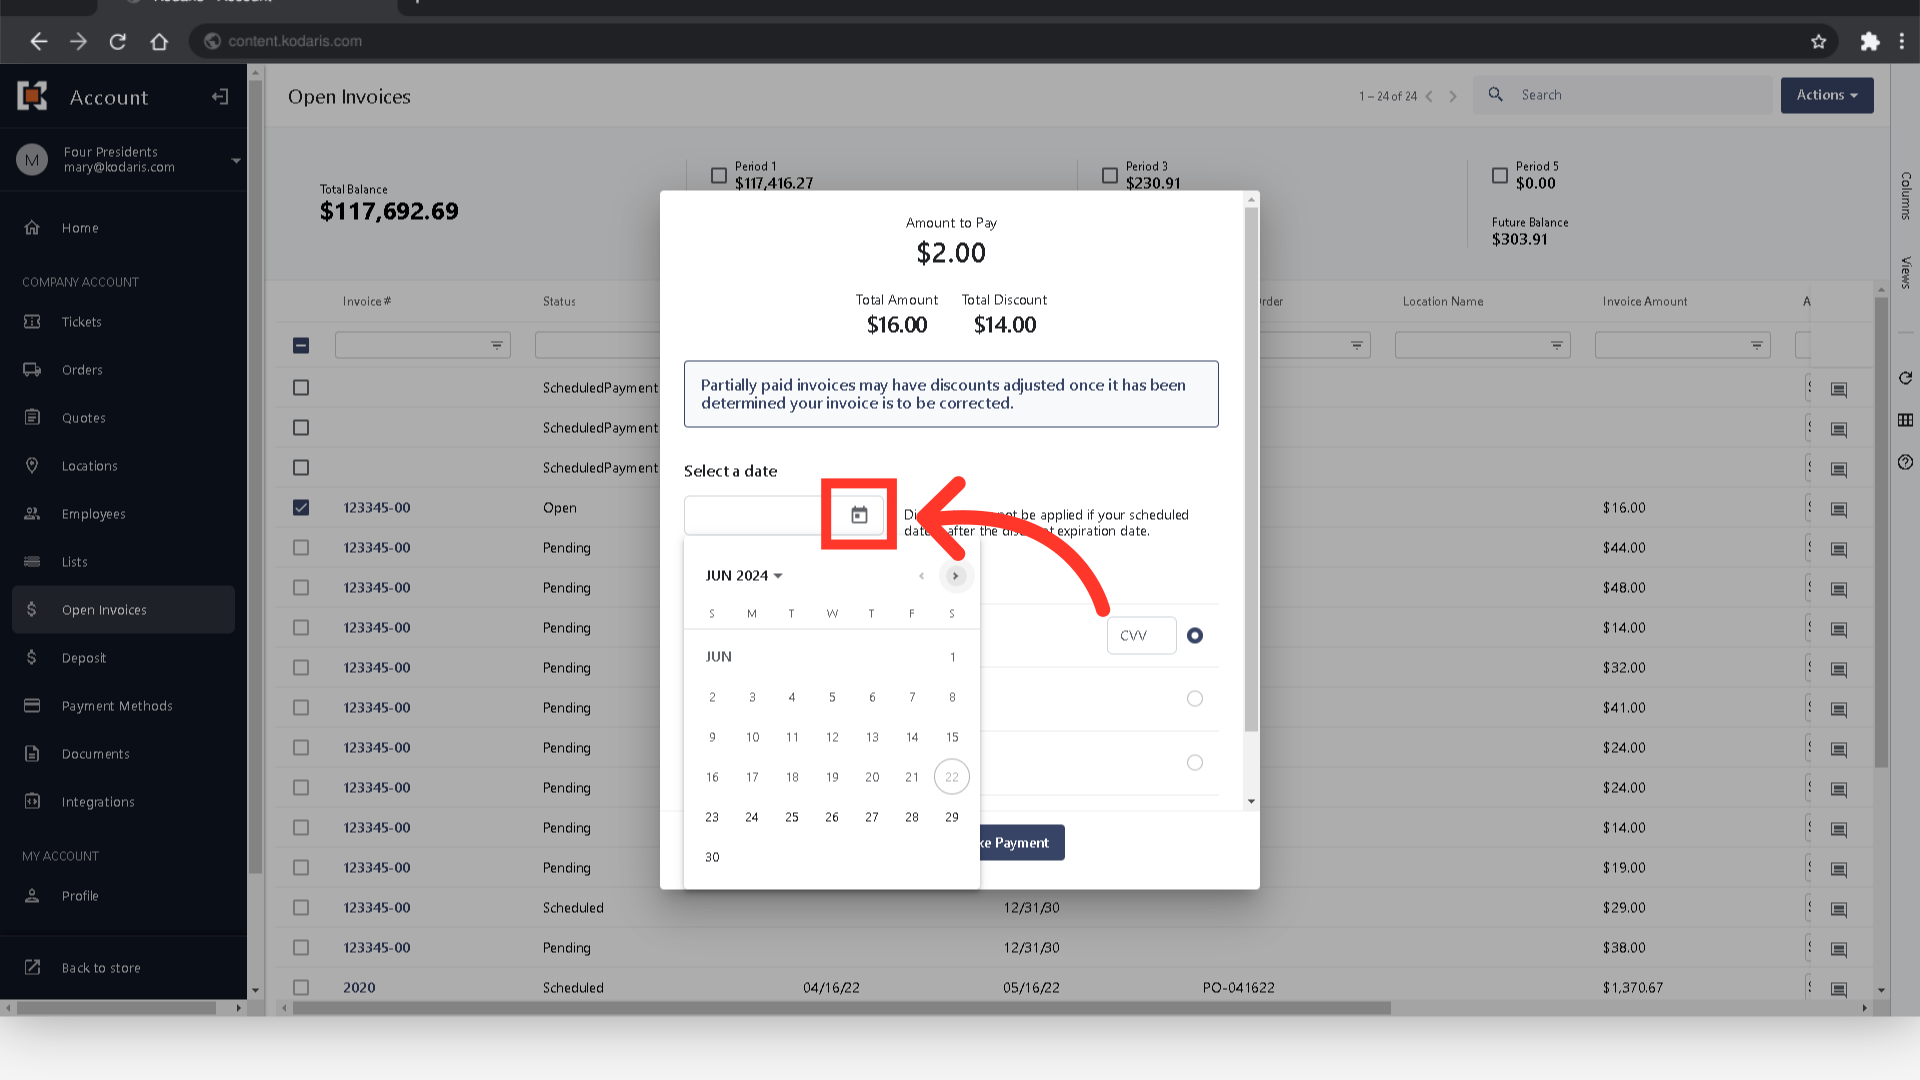
You may need to use the dropdown and the arrow buttons to search for the month and year.

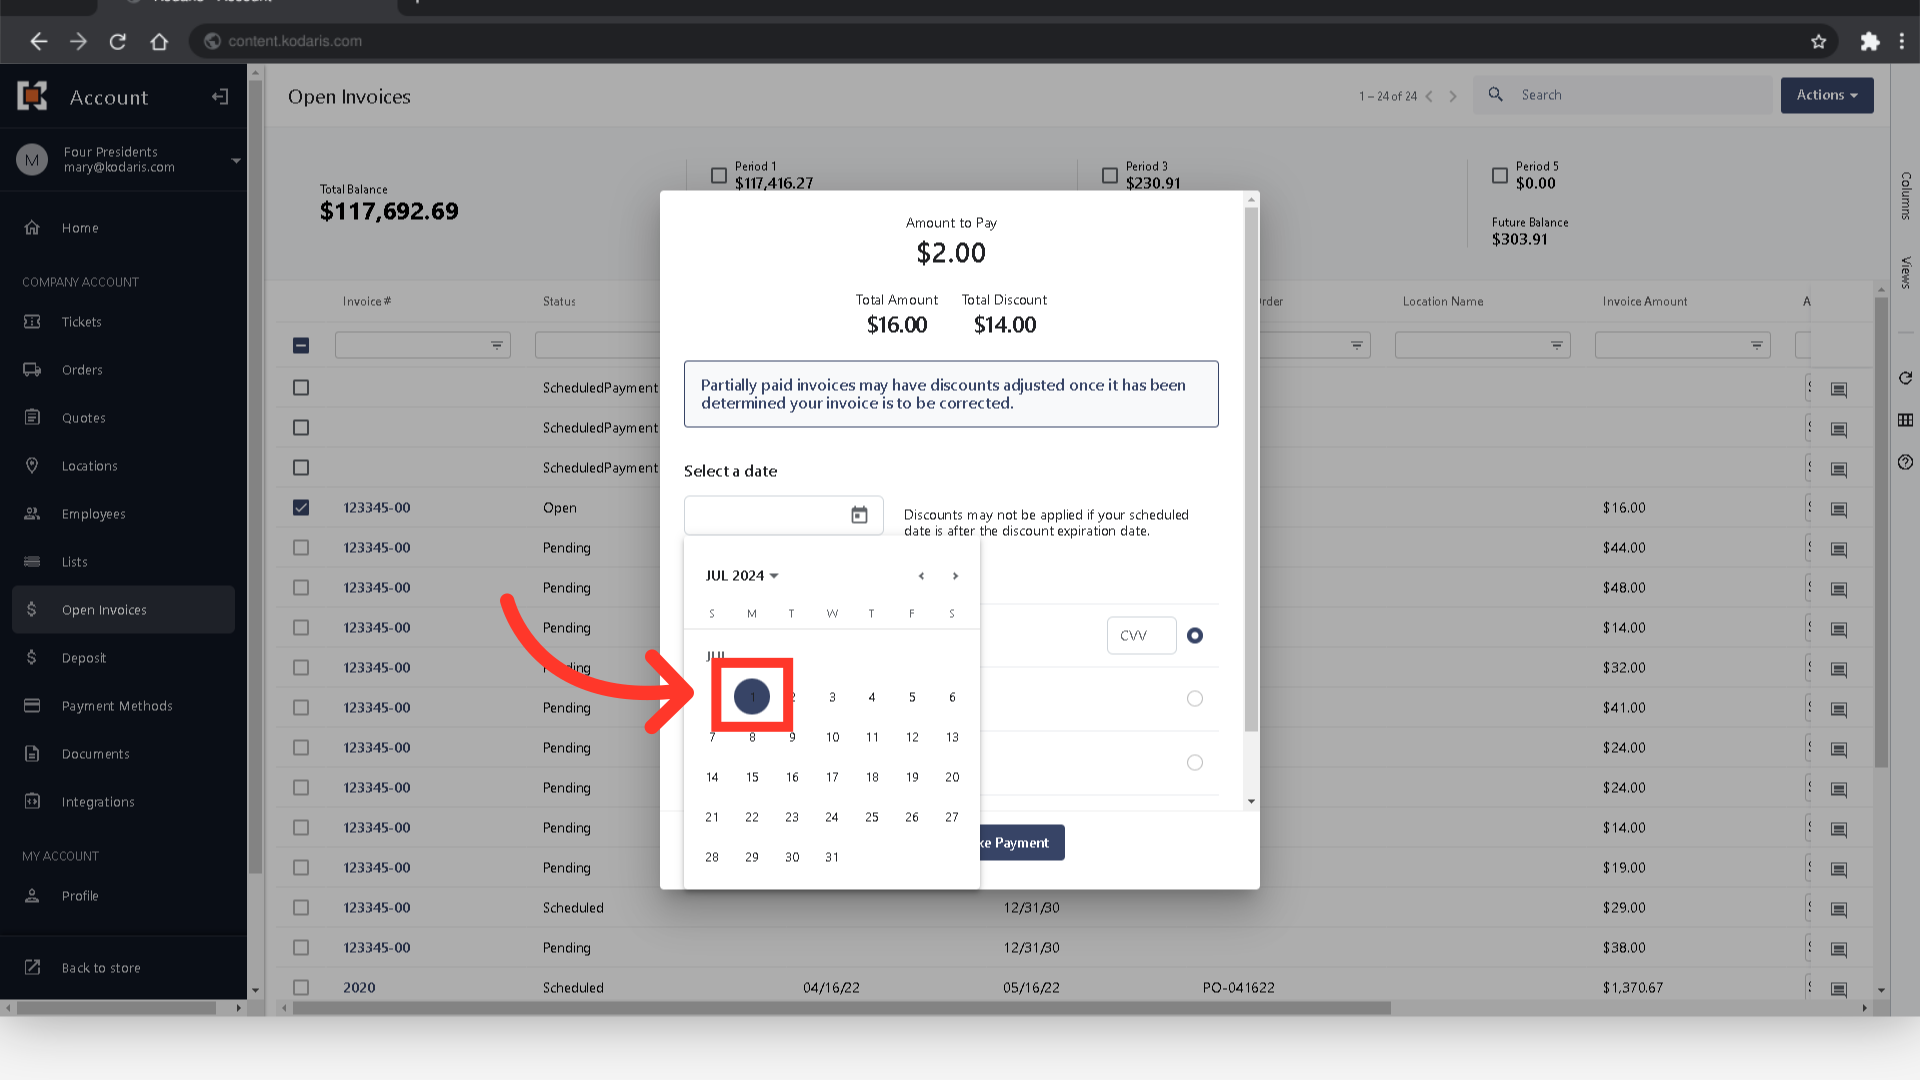
Then, click on the exact date you would like your payment to be scheduled.
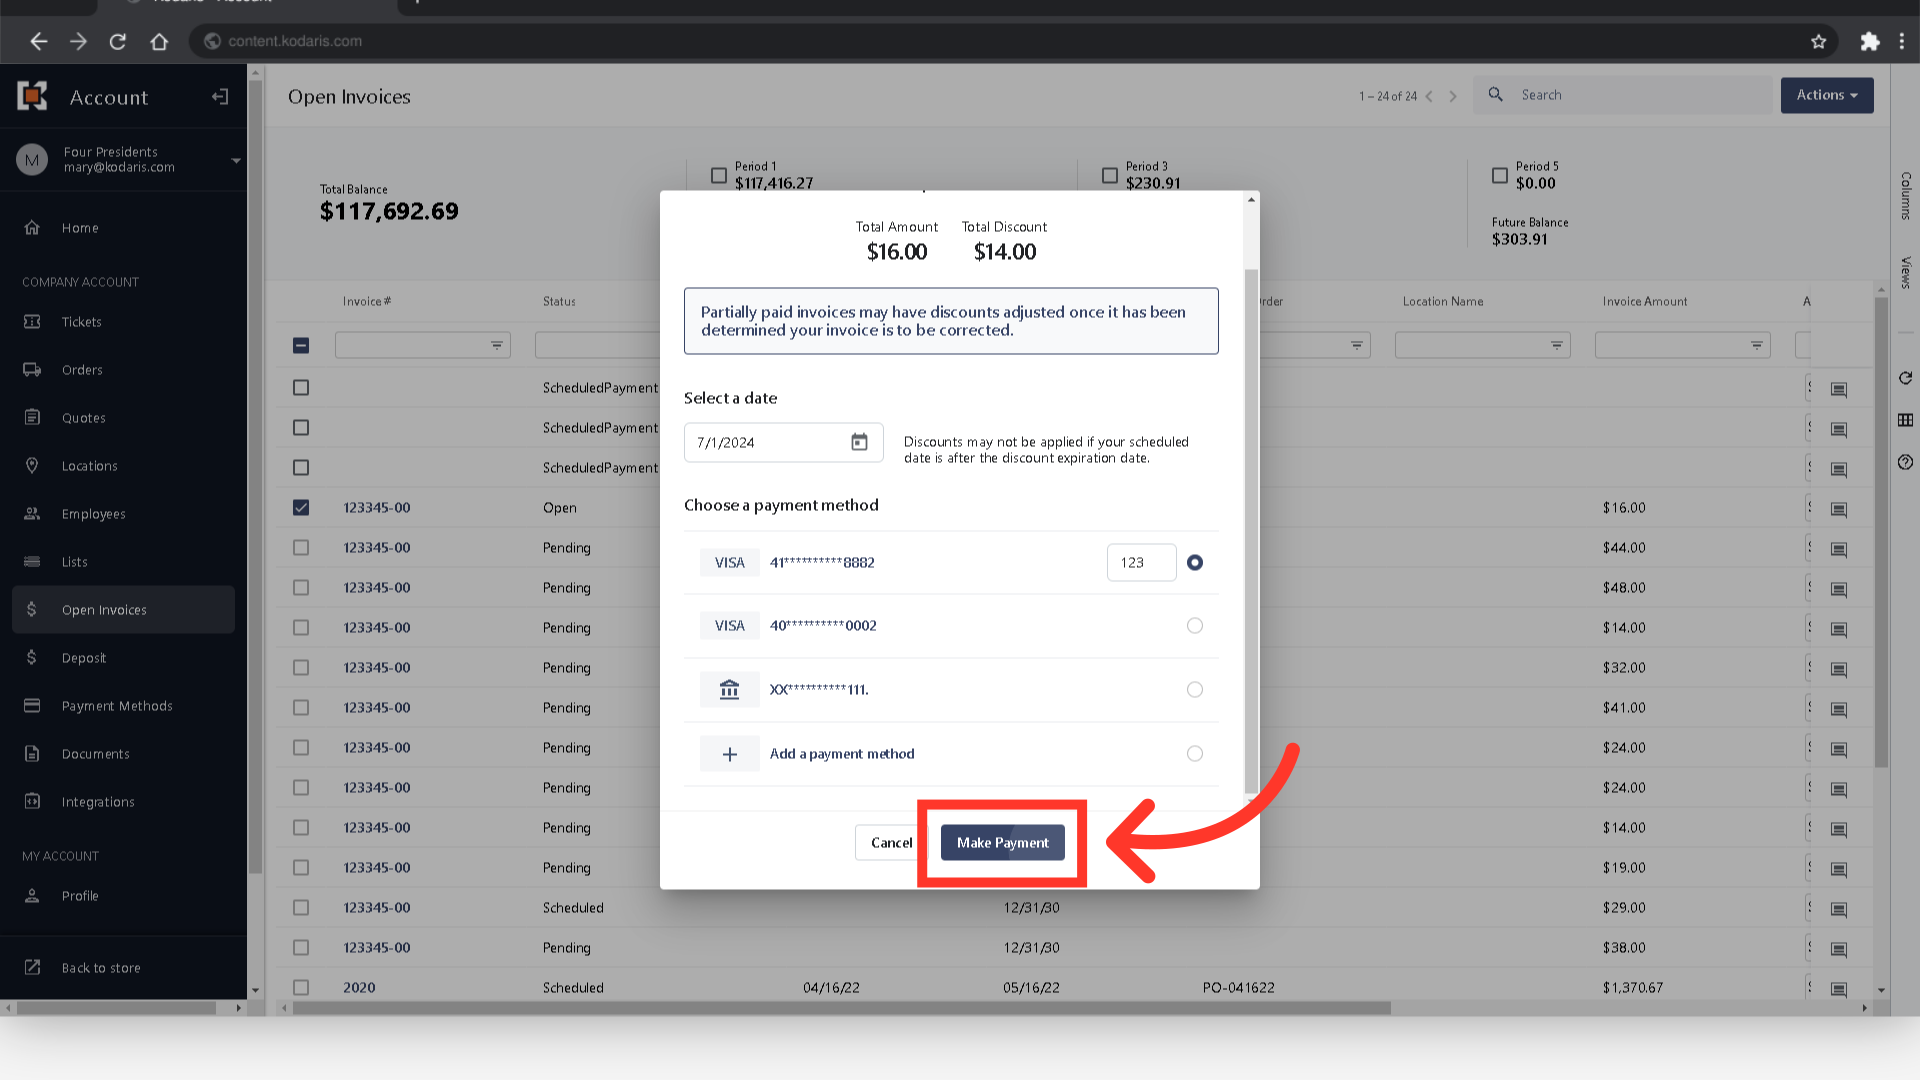
Choose a payment method.

Then, click the "Make Payment" button and the selected invoices will be scheduled for payment.