You can complete the checkout process directly in the Customer Mobile App. To begin, start by opening the app.

Select the "Shopping Cart" icon.

The shopping cart will display all the items that were added to your cart. Please note that you will need to add items to your cart before checking out. On this screen, you have the ability to adjust the quantity of items in your cart. To do so, tap on the quantity number.
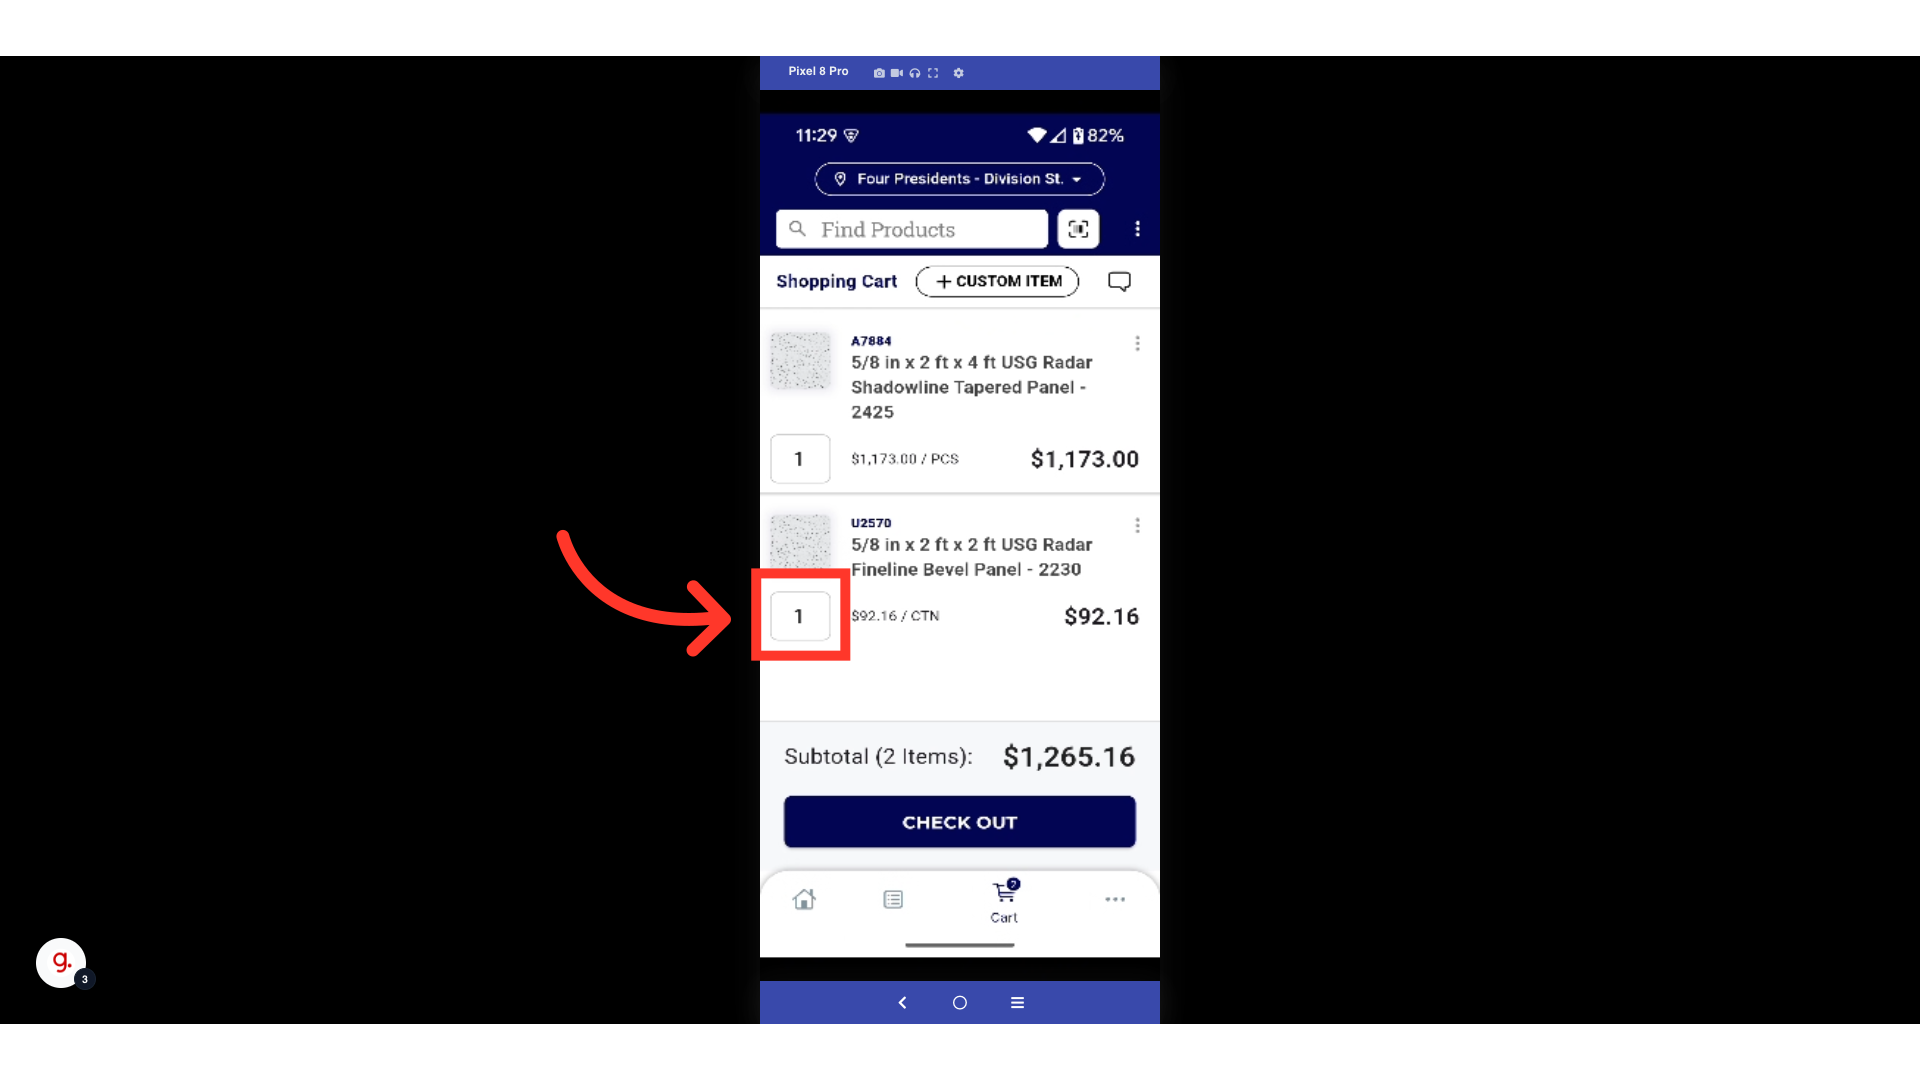
Use your device to type the new quantity.

Tap the "Enter" button to save your changes.

Once you are satisfied with the item(s) in your cart, select the "Check Out" button to continue.

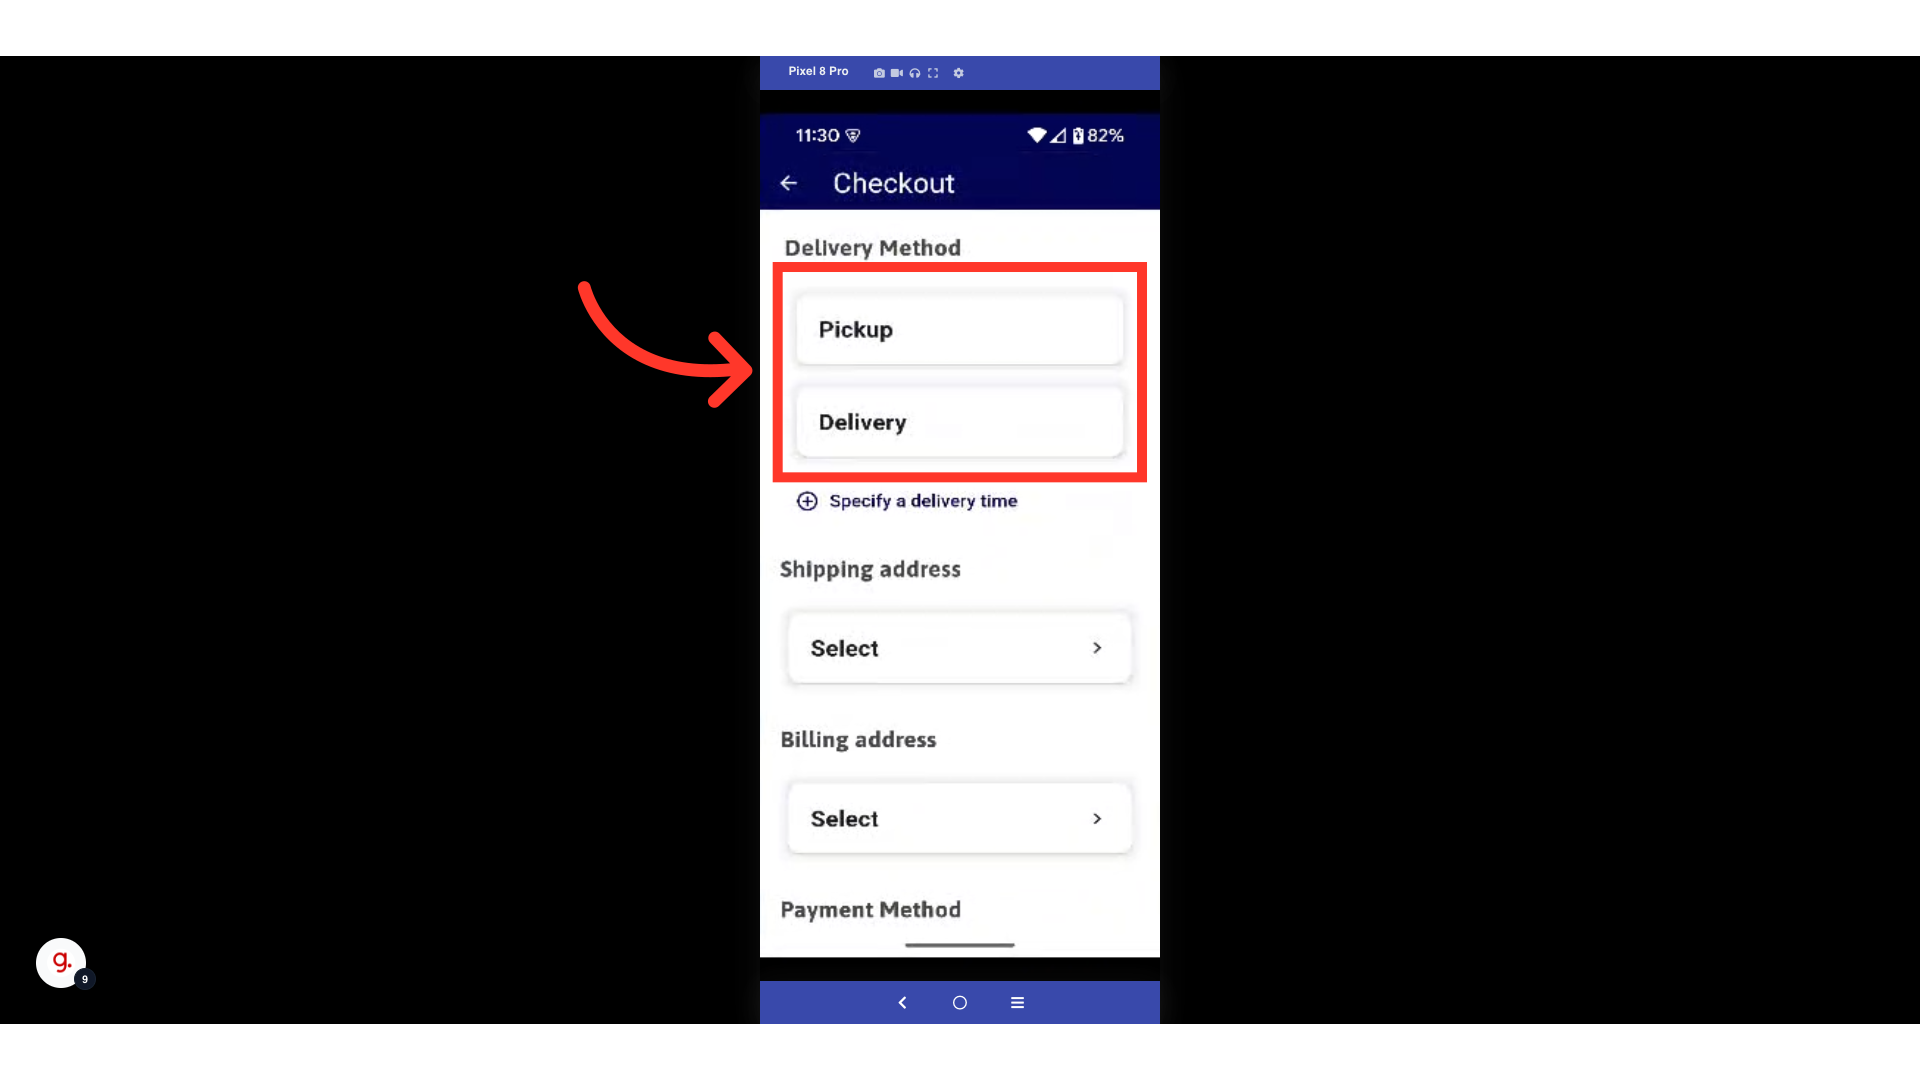
Select a delivery method under the "Delivery Method" section. In this example, we will choose "Delivery".
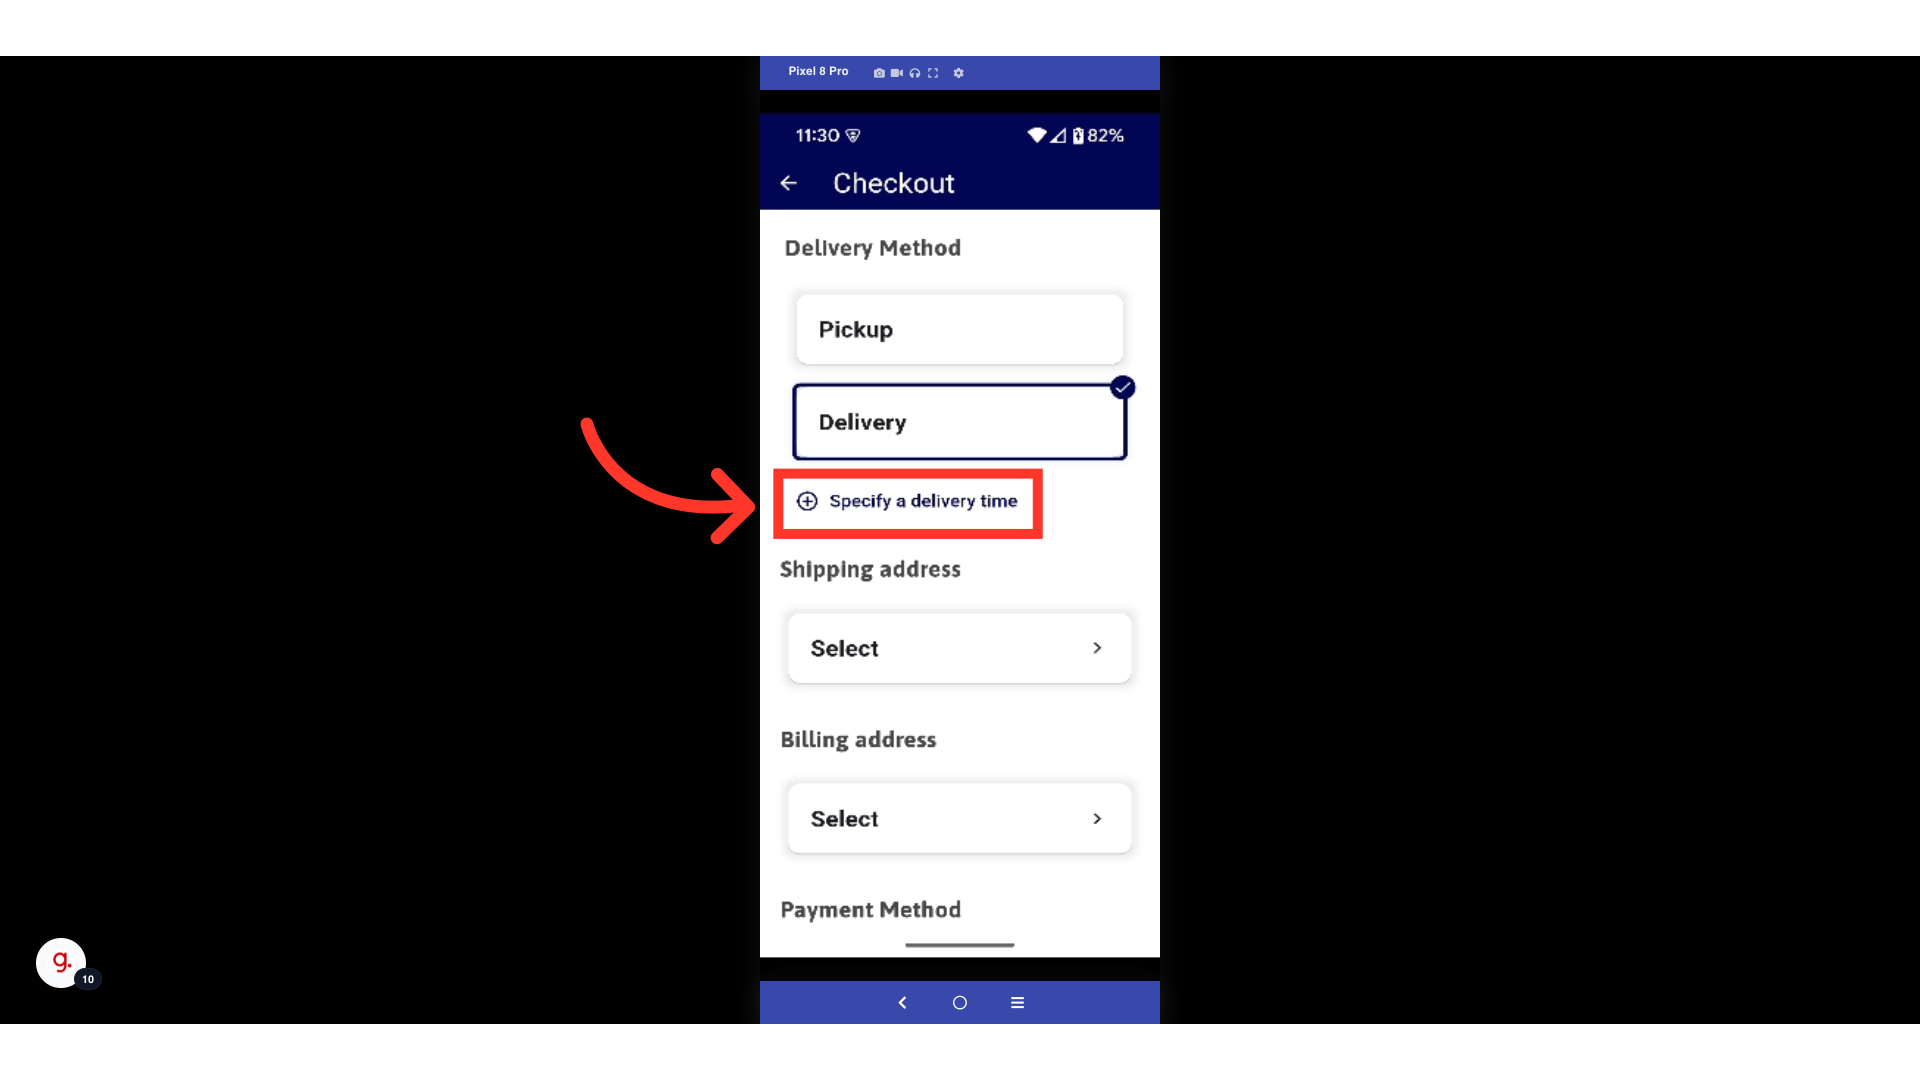
Once you've chosen a delivery method, you can specify a time for the delivery or pick up. Tap on "Specify a delivery time" or "Specify a pickup time" depending on the option you chose.
Tap on a date to select it.
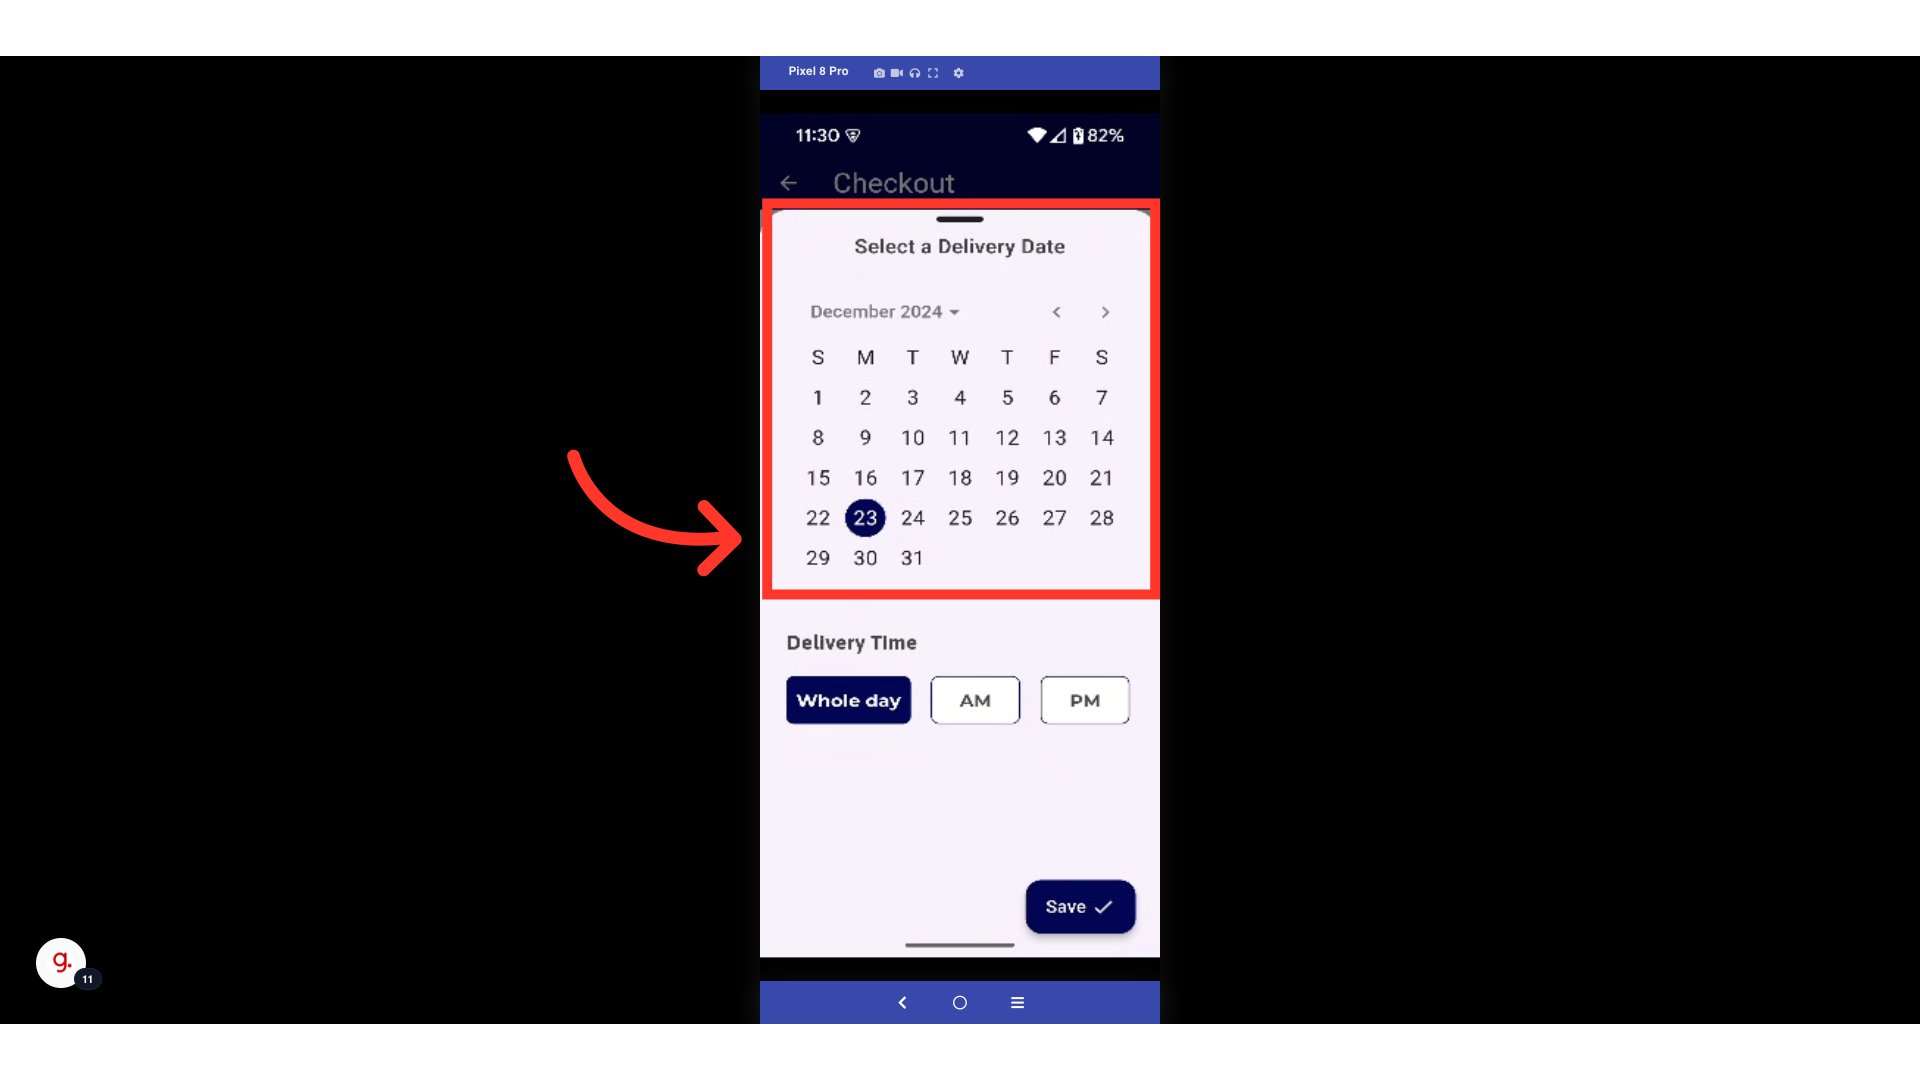
Select a delivery time from the options.
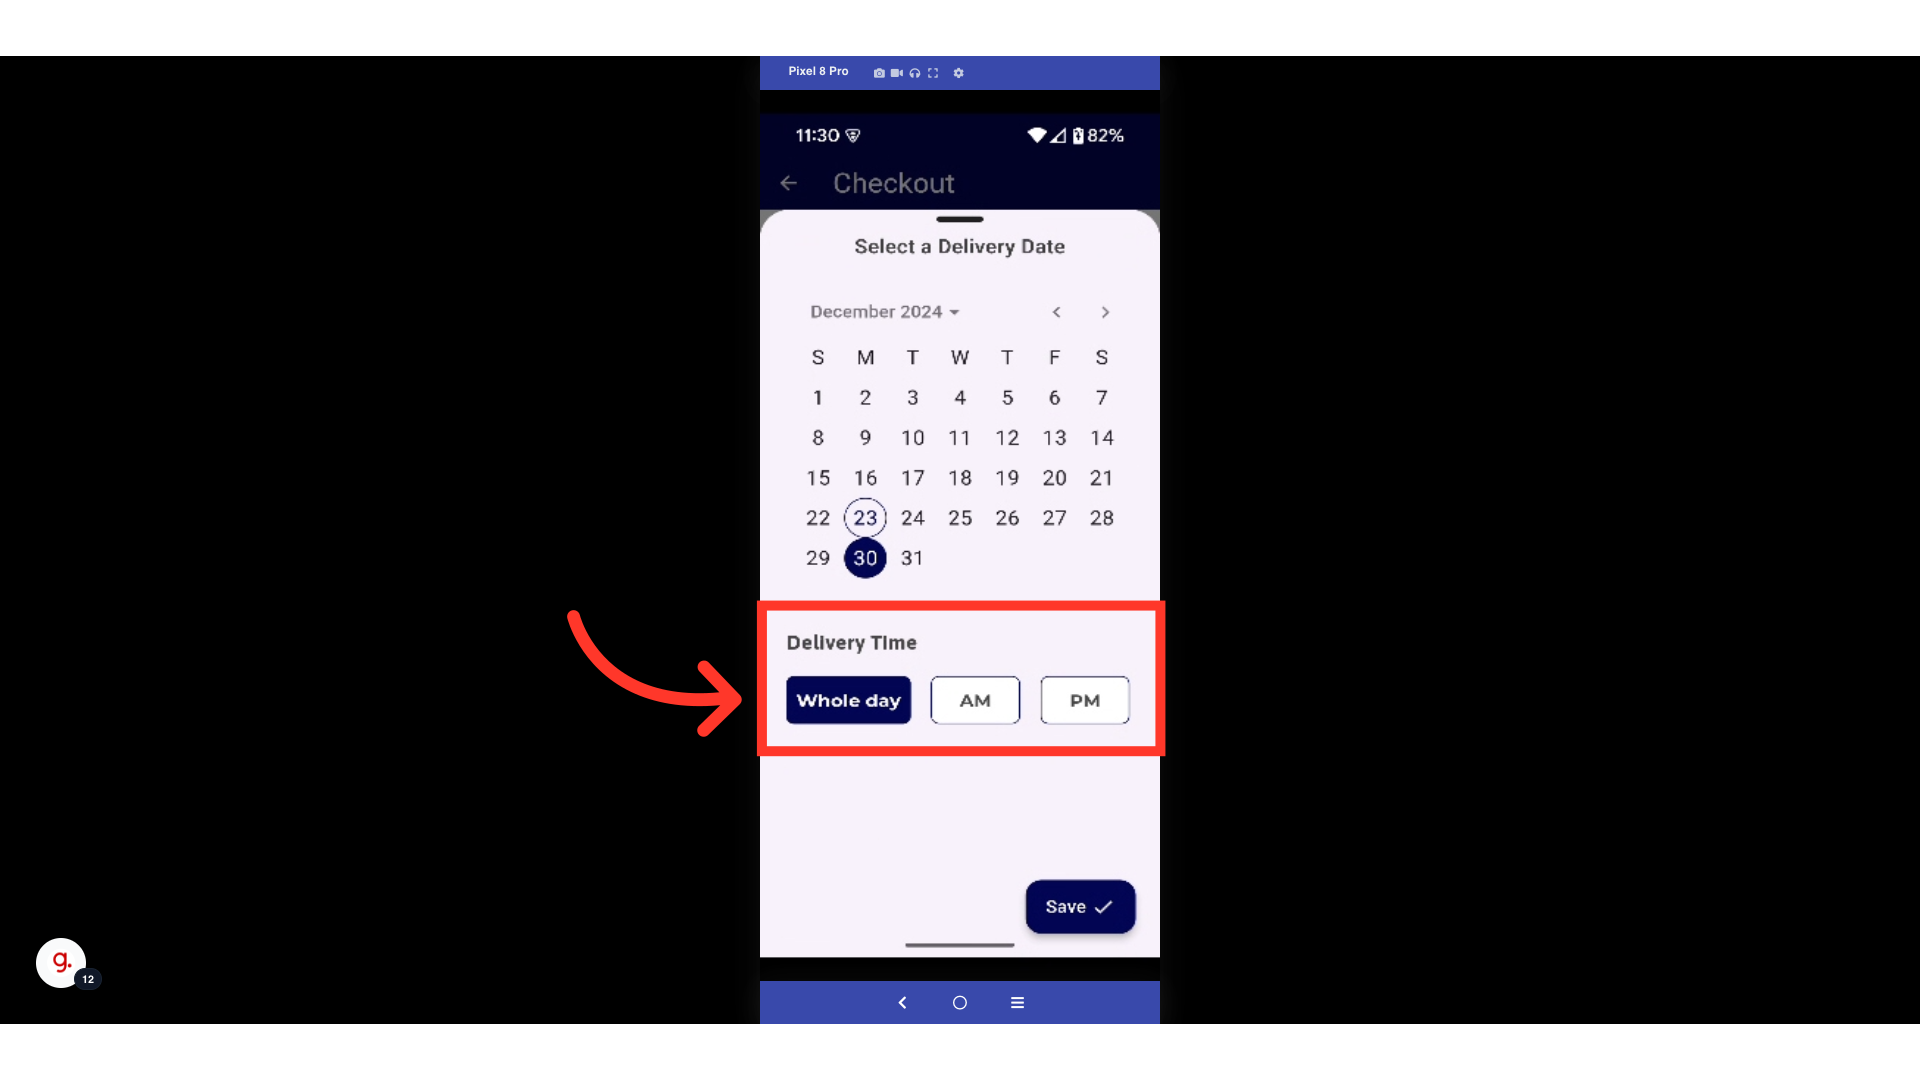
Tap on the "Save" button to save your preference.

Tap on the "Shipping Address" tile to select an address.

Tap on "Change".

Select an address from the list of existing locations.

Tap on the "Save" button to save your changes.

Tap on the "Billing Address" tile to select an address.
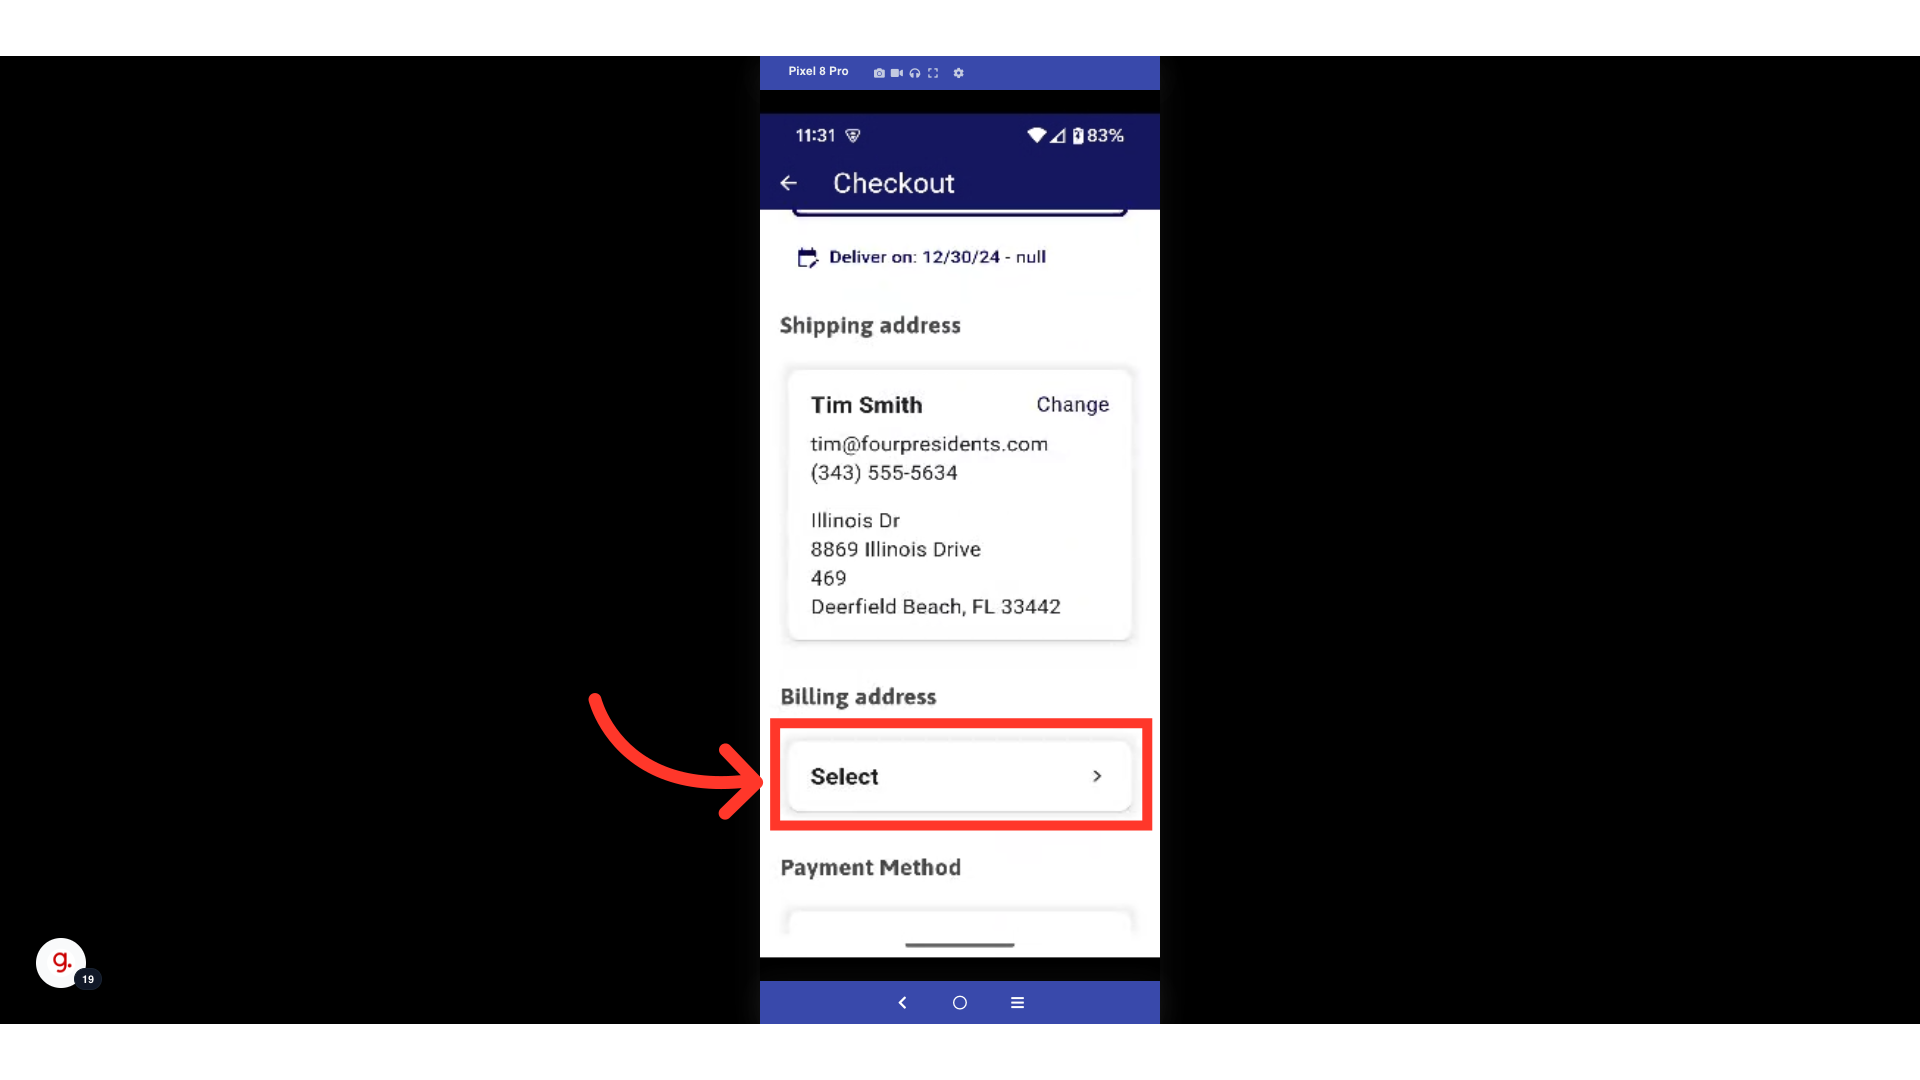
Tap on "Change".
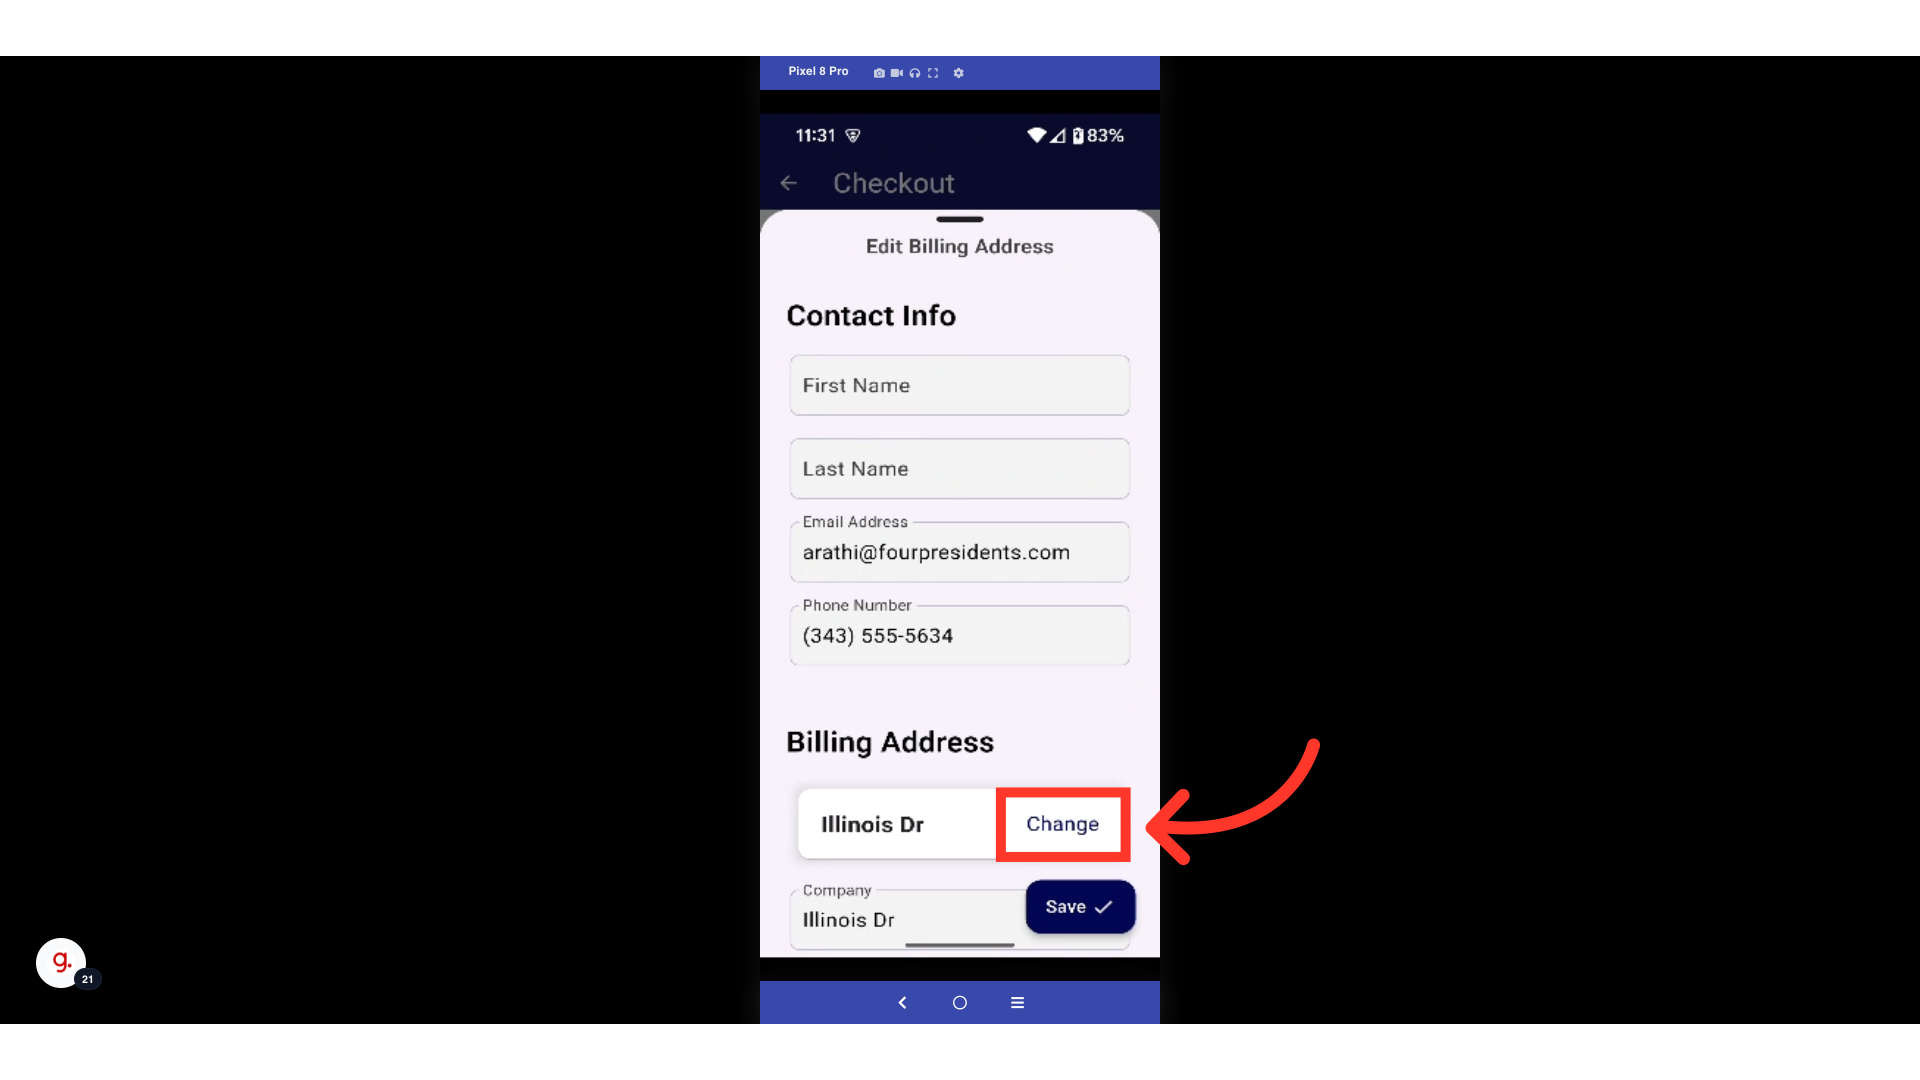
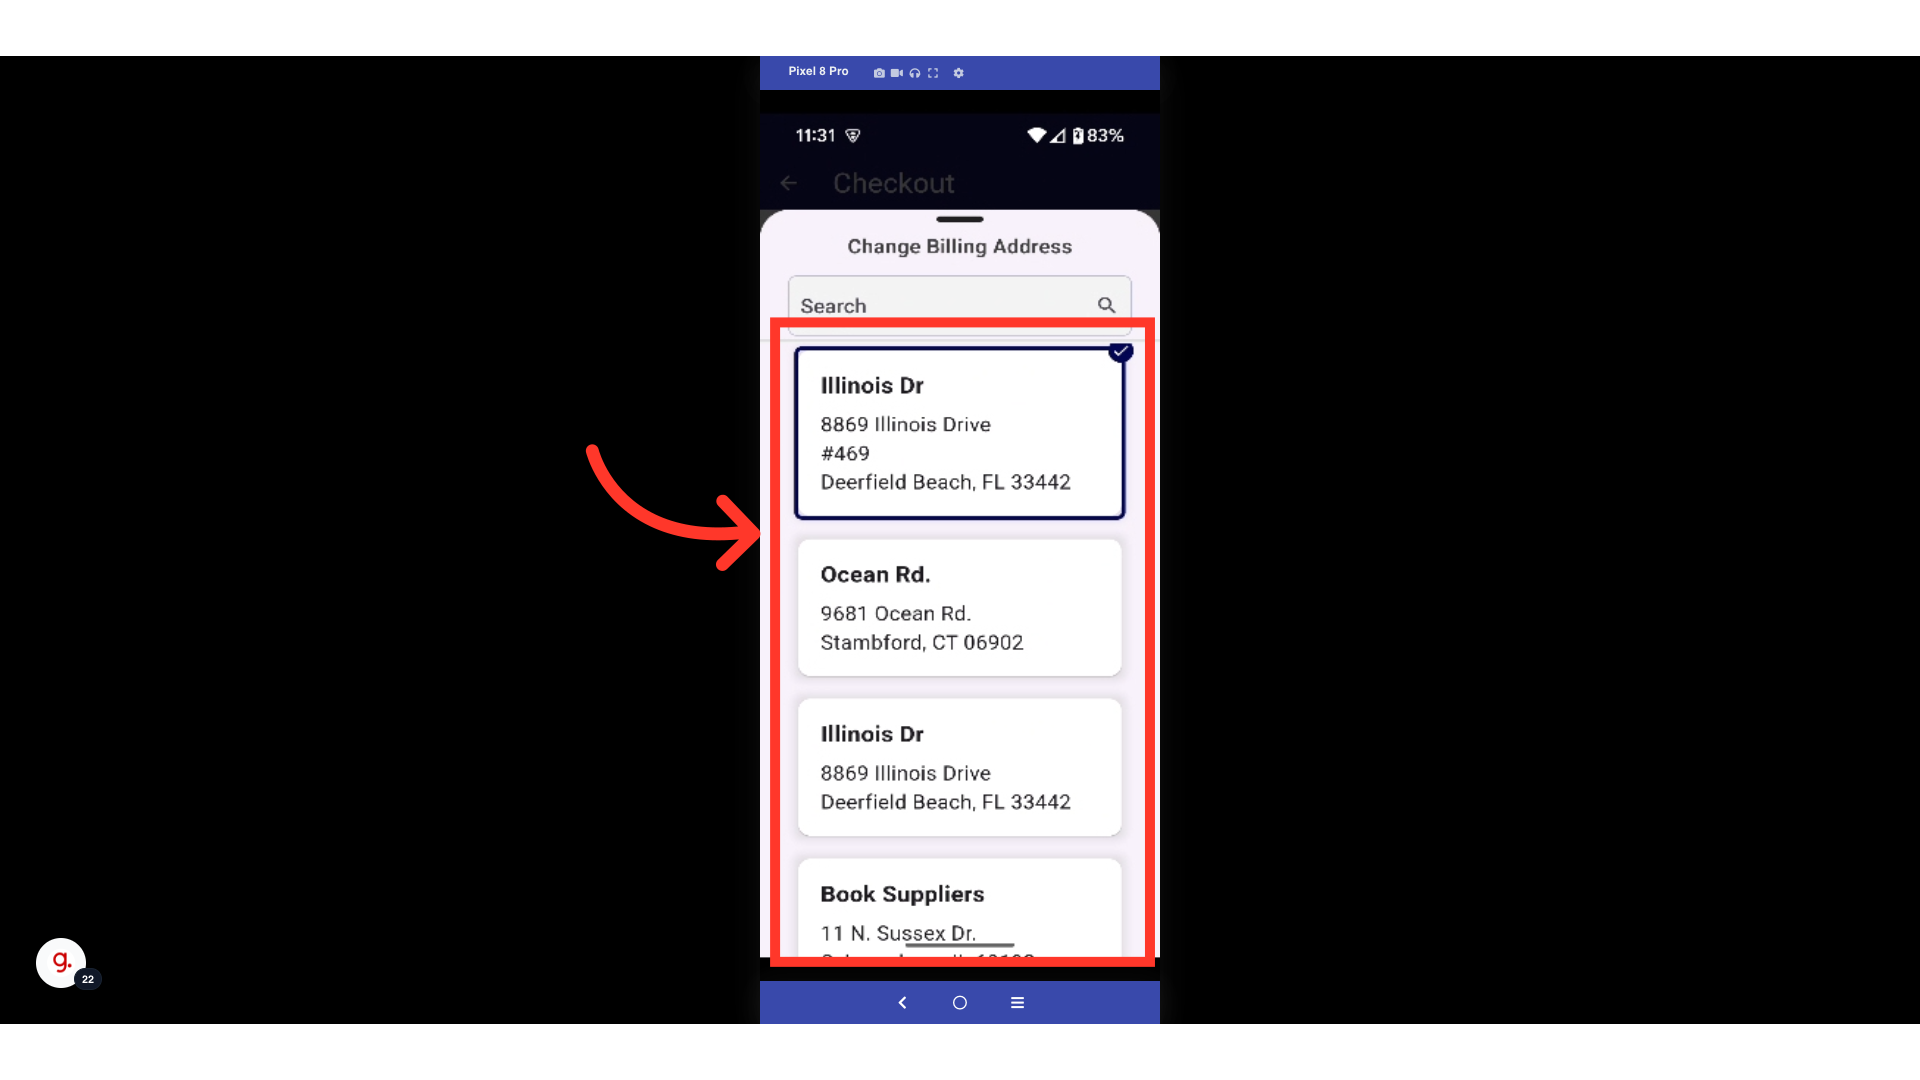
Select an address from the list of existing locations.
Tap on the "Save" button to save your changes.

Tap on the "Payment Method" tile to select a payment method.

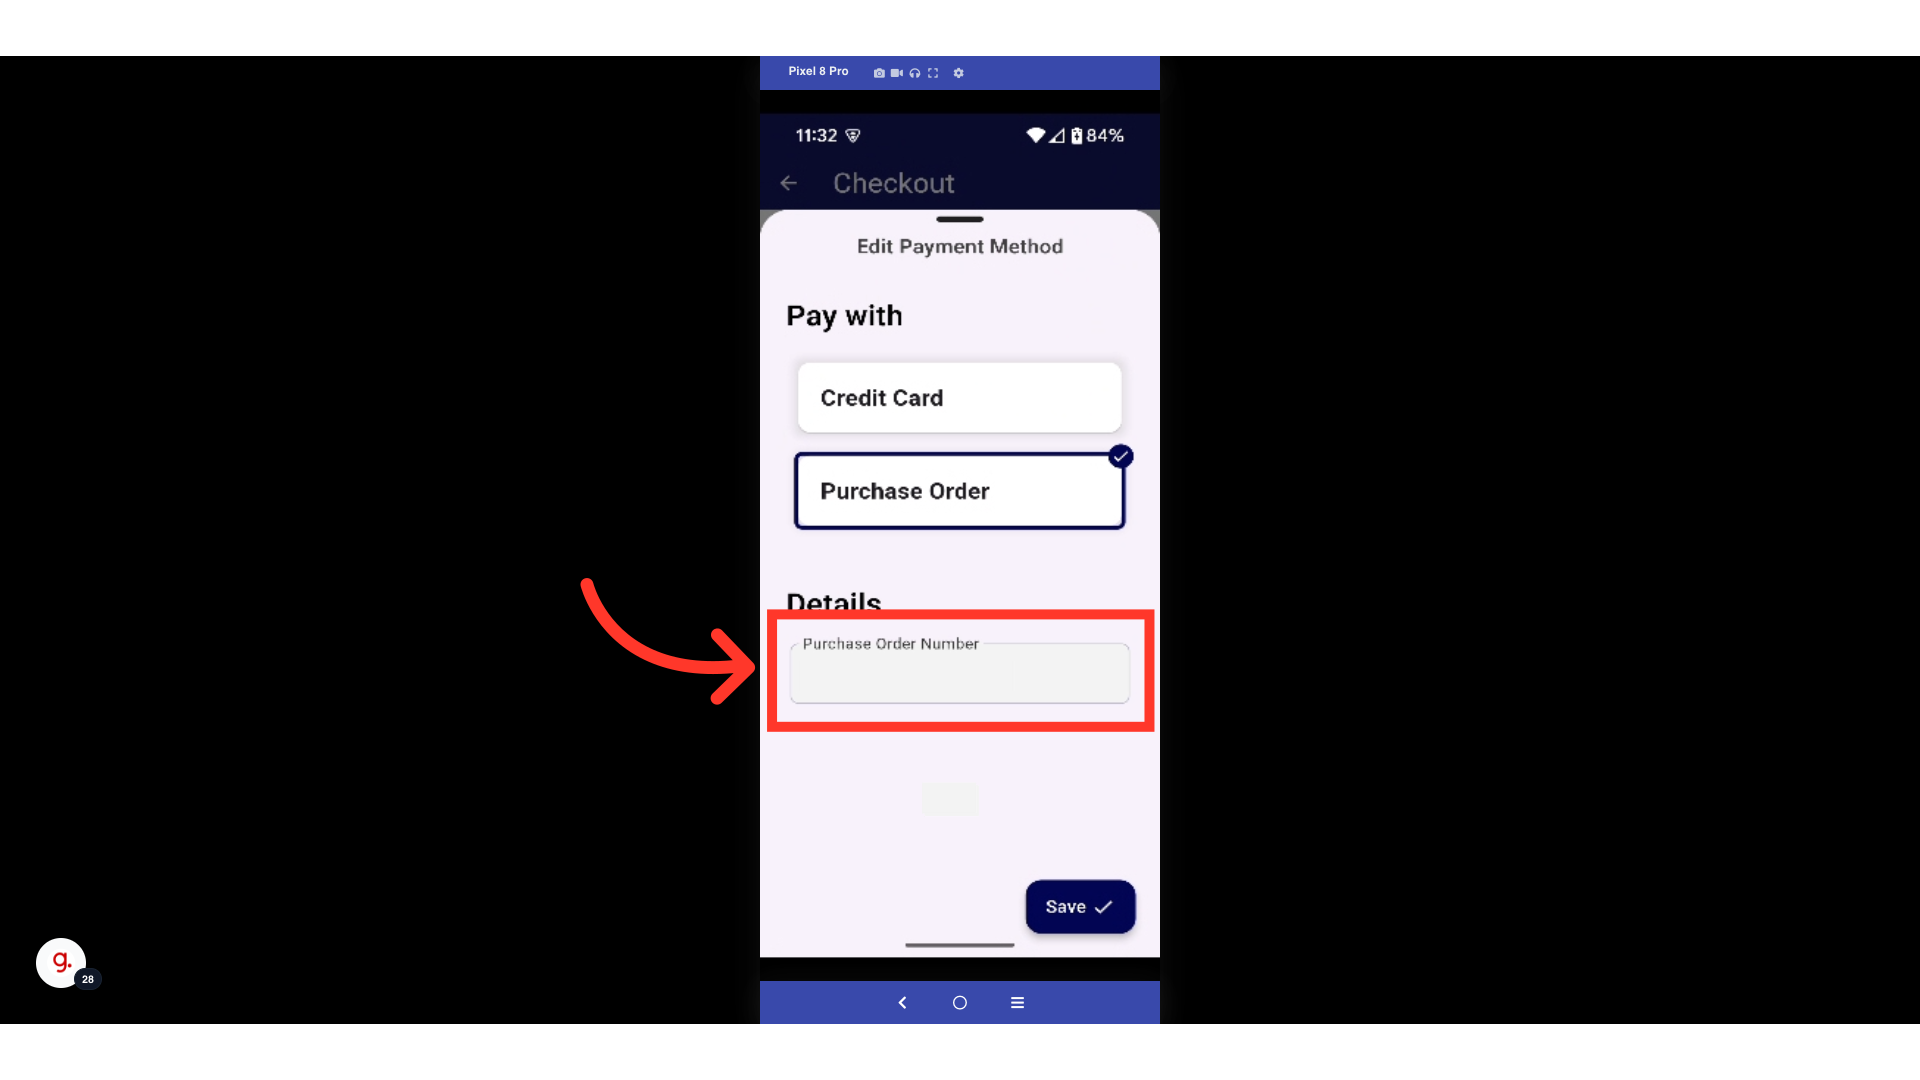
Select a payment method from the options. In this example, we will select "Purchase Order".

Tap on the "Purchase Order Number" textbox to add your PO number.
Use your device's keyboard to type a purchase order number.

Tap the "Enter" button to save your changes.

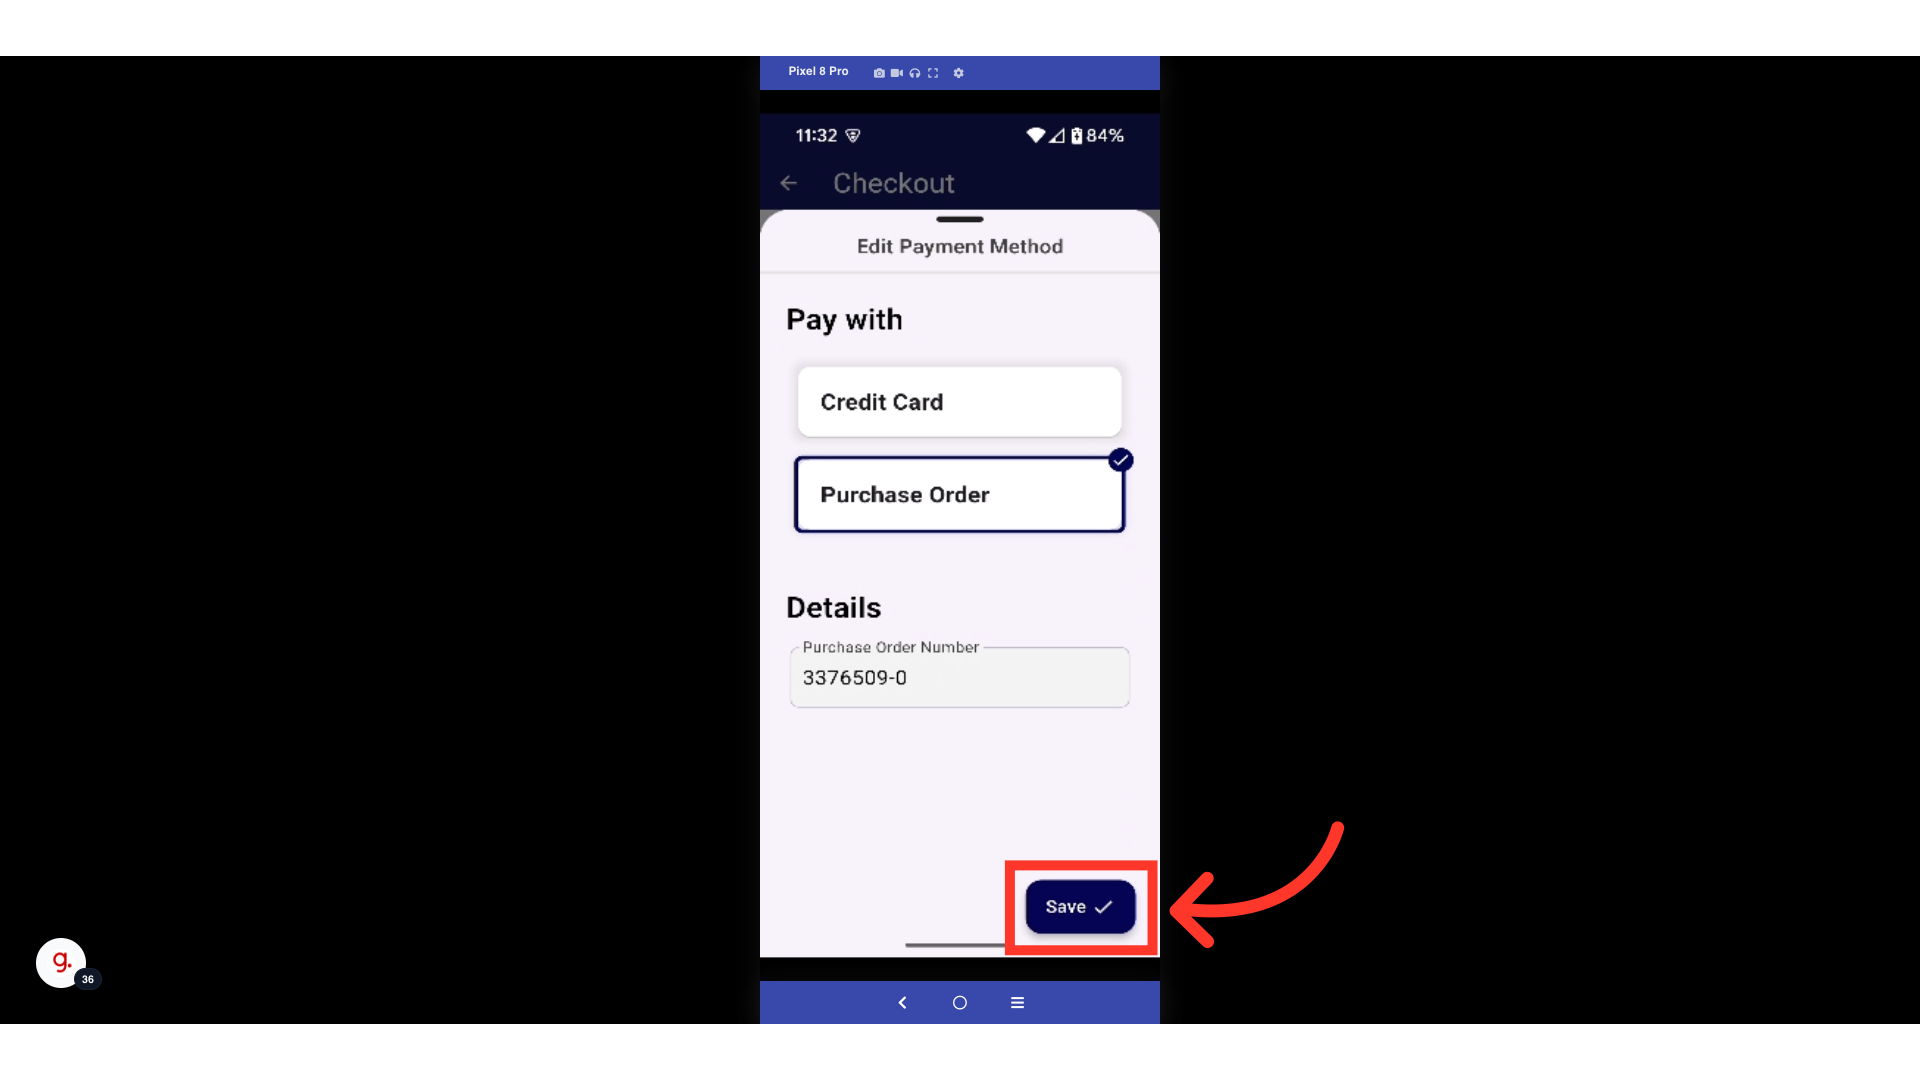
Select the "Save" button to save your chosen payment method.
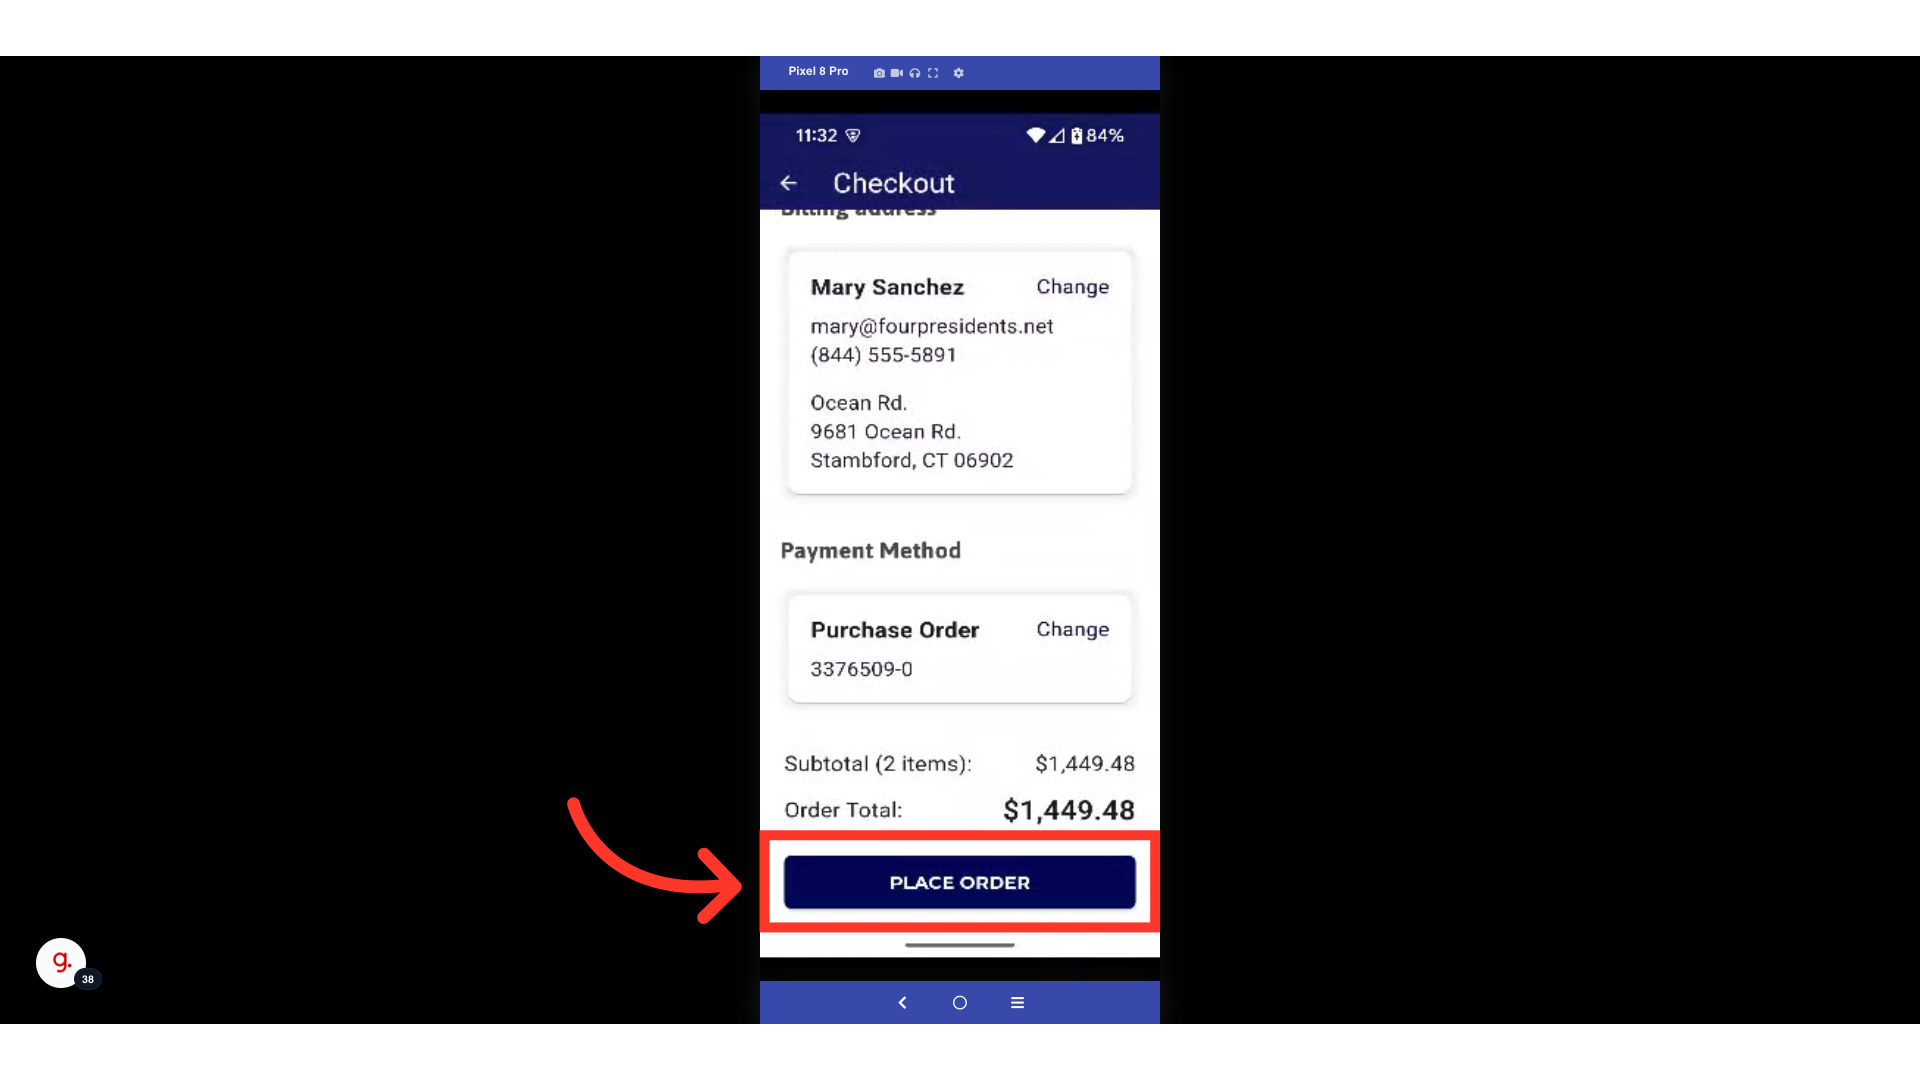
Once all the information is complete on the Checkout screen, tap on the "Place Order" button to place your order.
