To add new languages to your website, navigate to the "Languages" section in the Operations Portal.
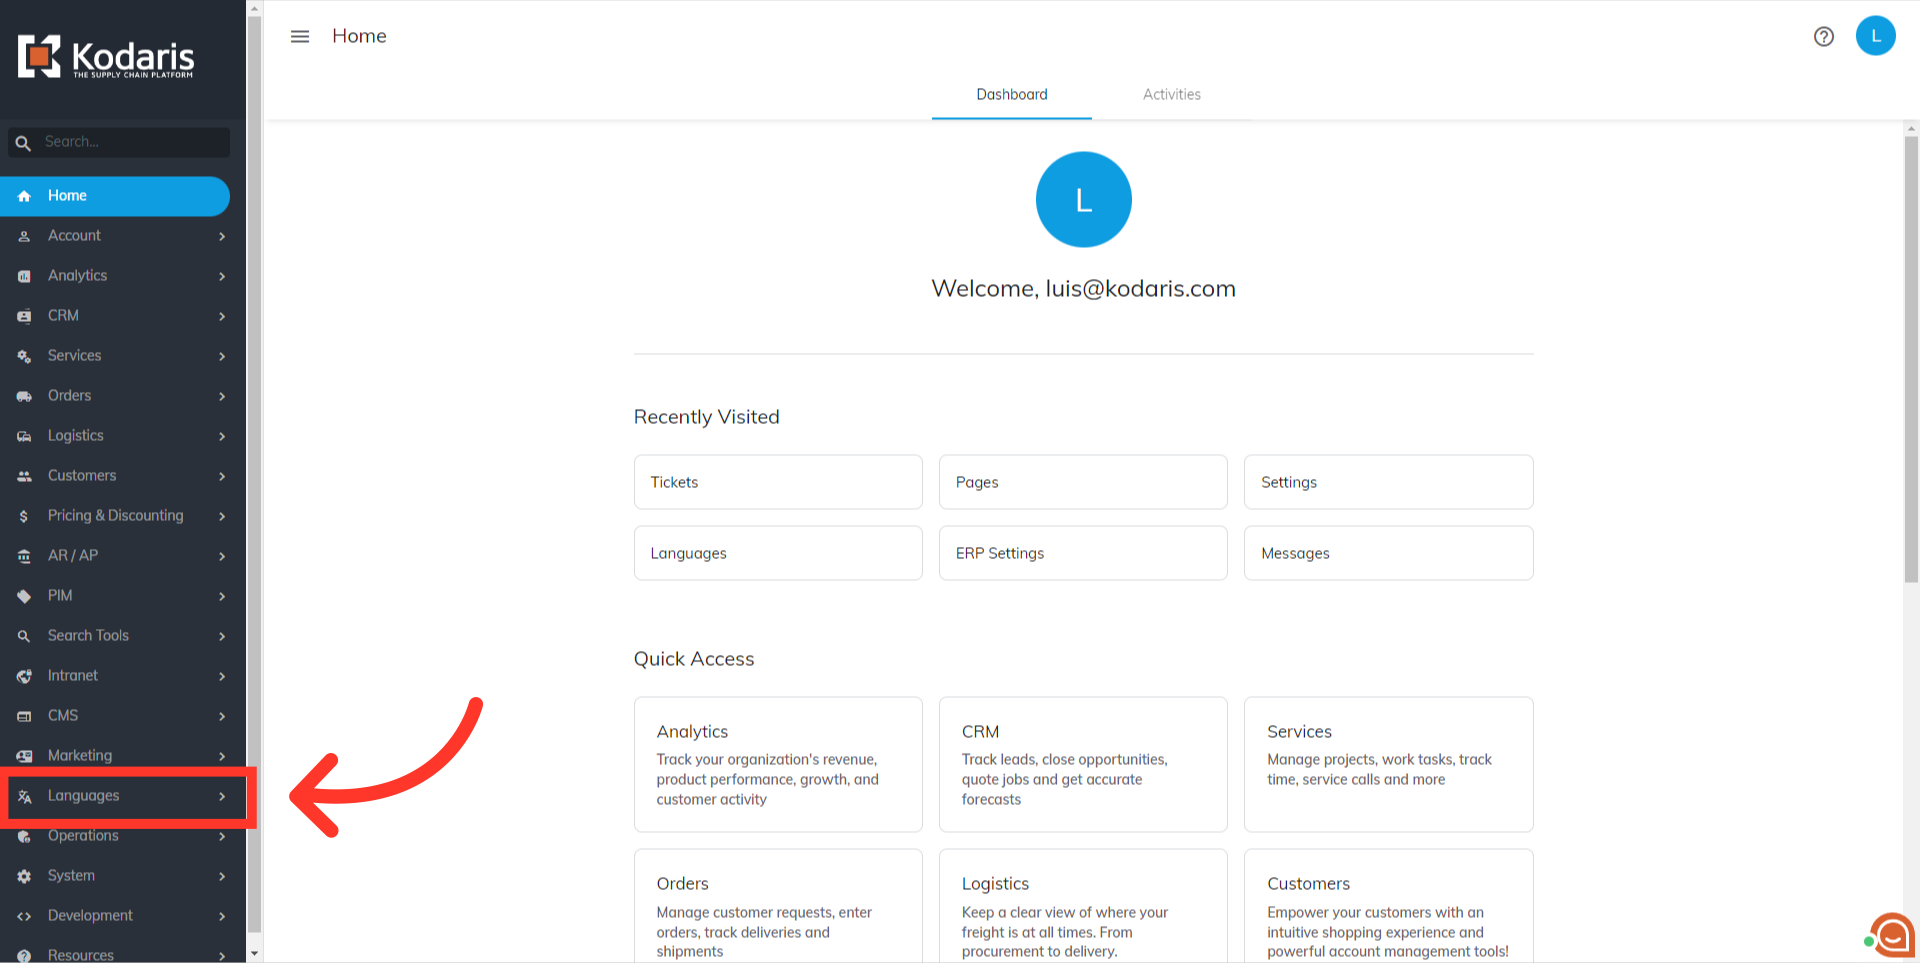
Then, select "Languages". In order to access and update “Languages” you will need to be set up either as an “administrator” or a “superuser”, or have the roles of: “languageView” and “languageEdit”.

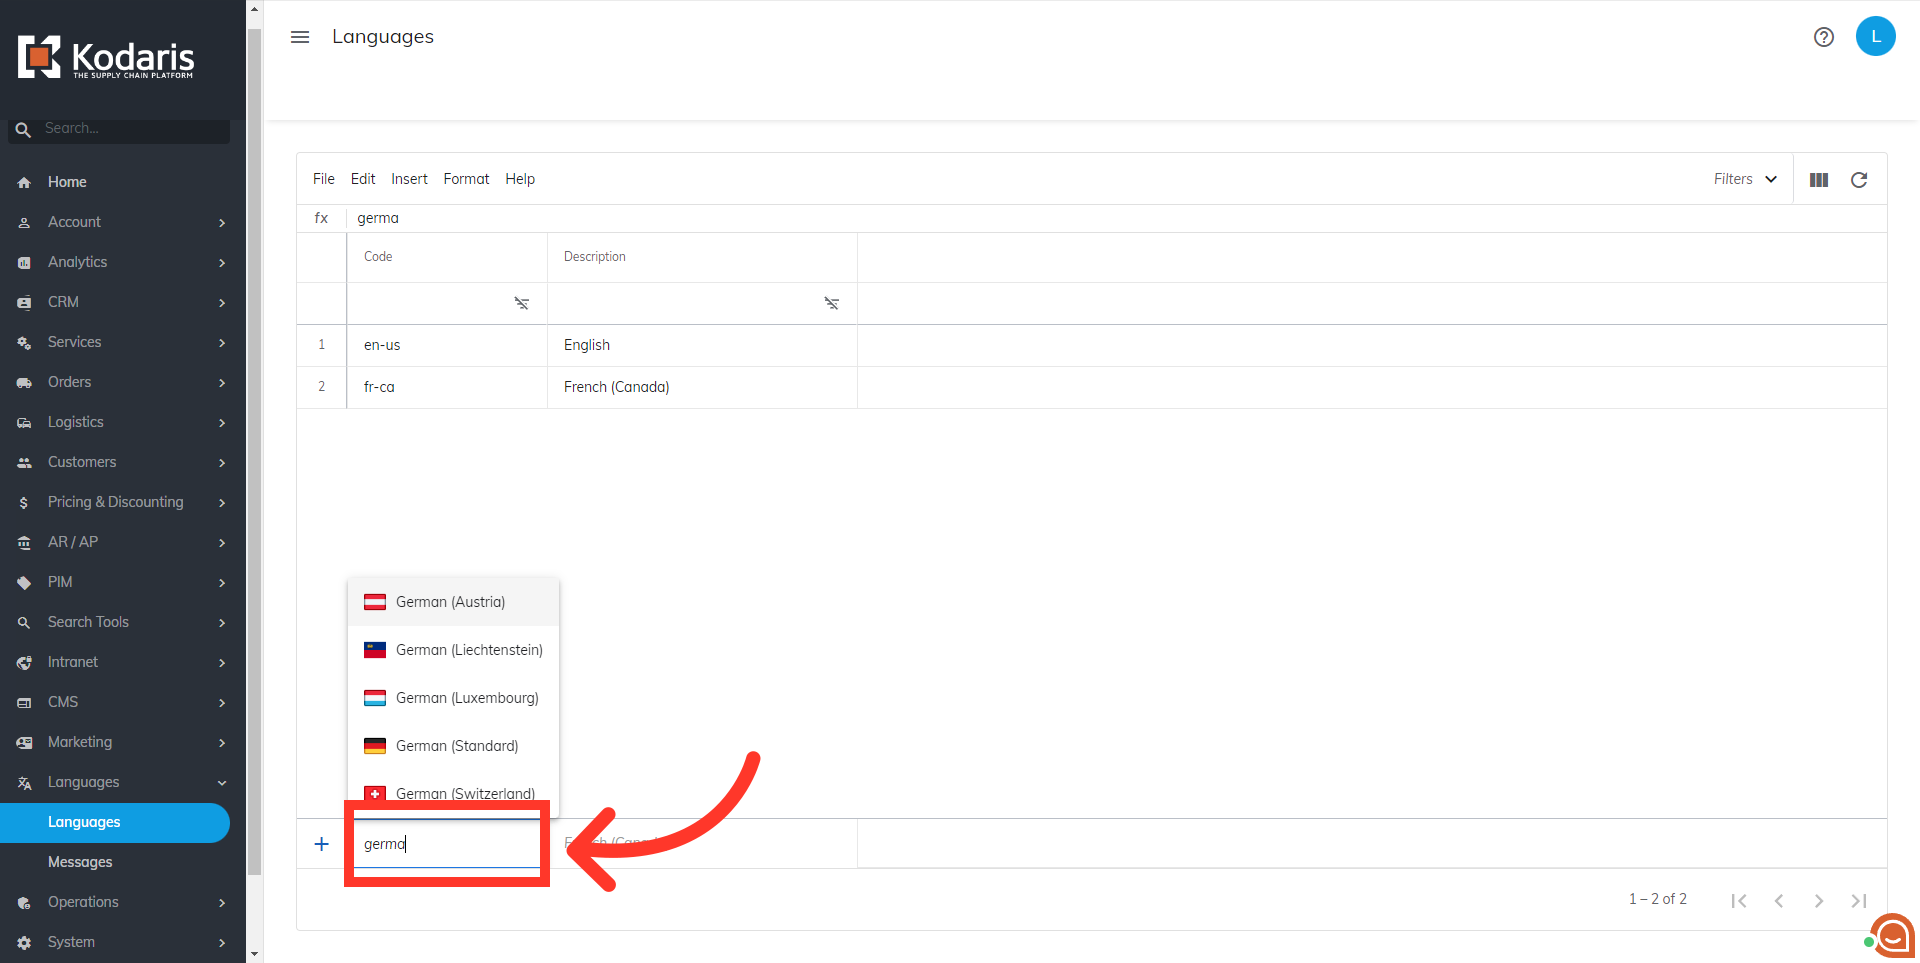
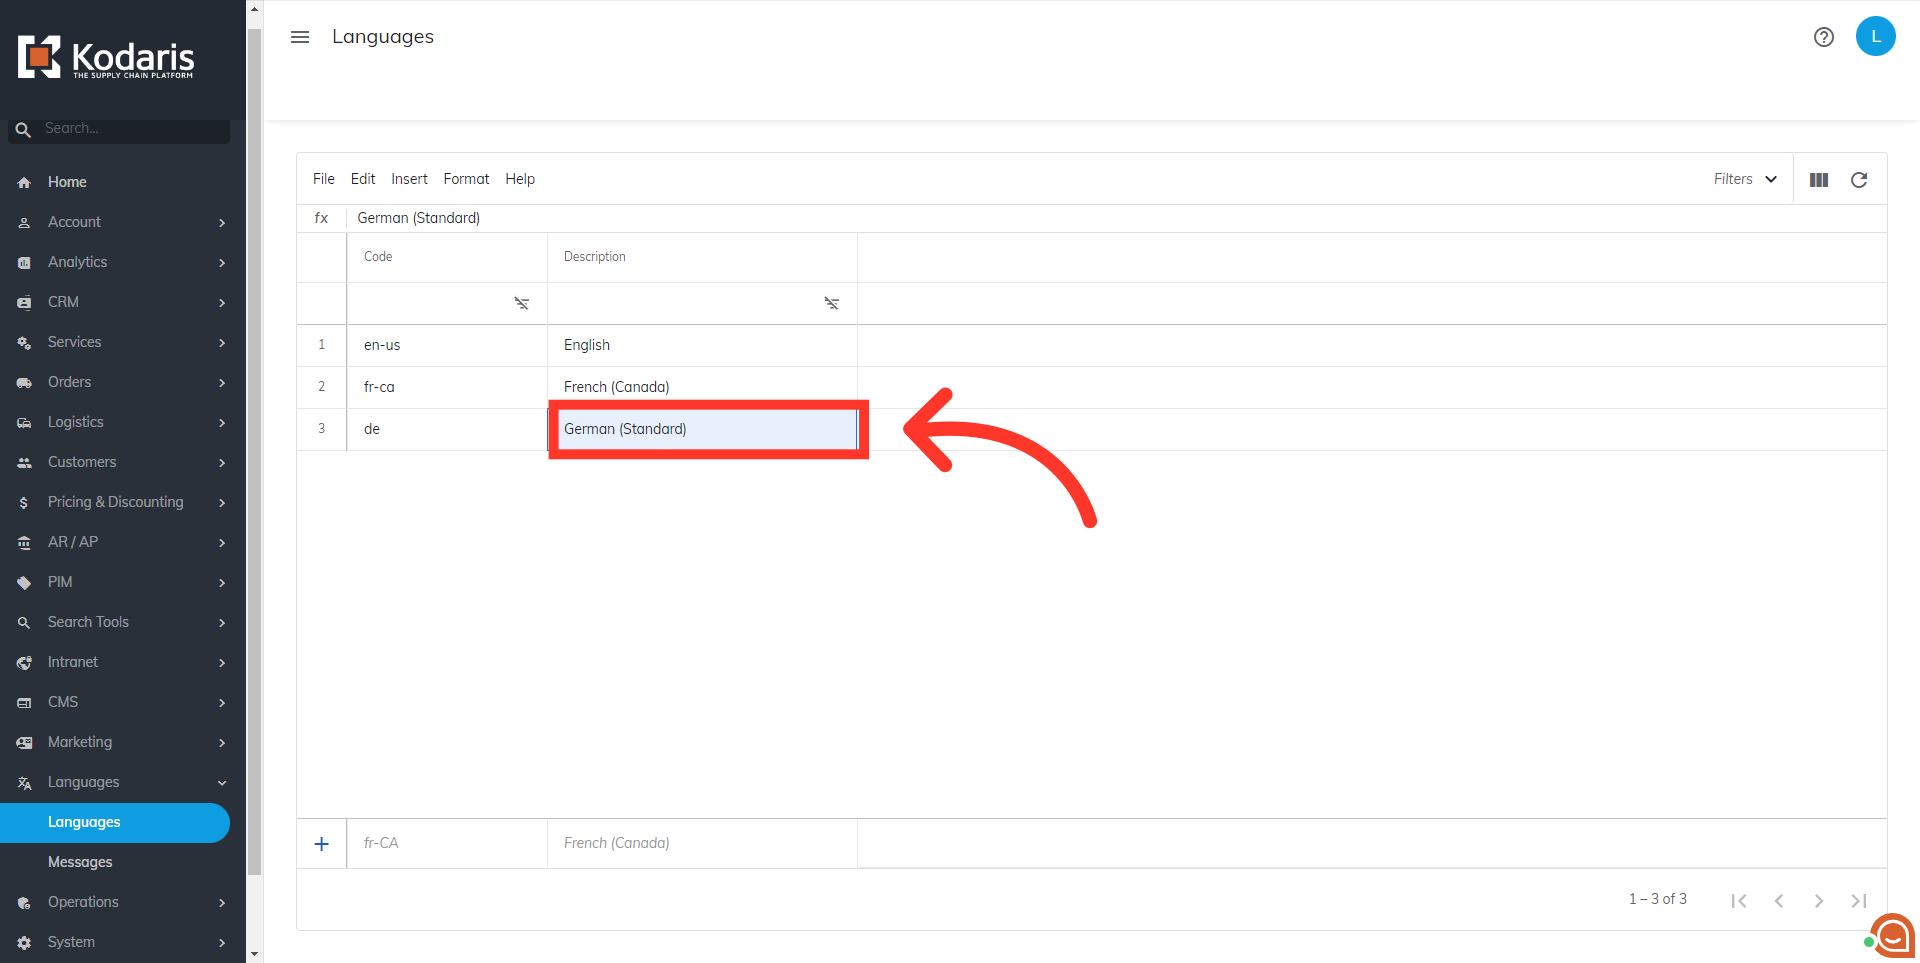
All of the languages that are currently available on your website are displayed in this table. To add another language to your site, click the "Code" field in the "Add row" section.

The first ten language options will be displayed when clicking into the field. Start typing the language you would like to add to narrow down the options.
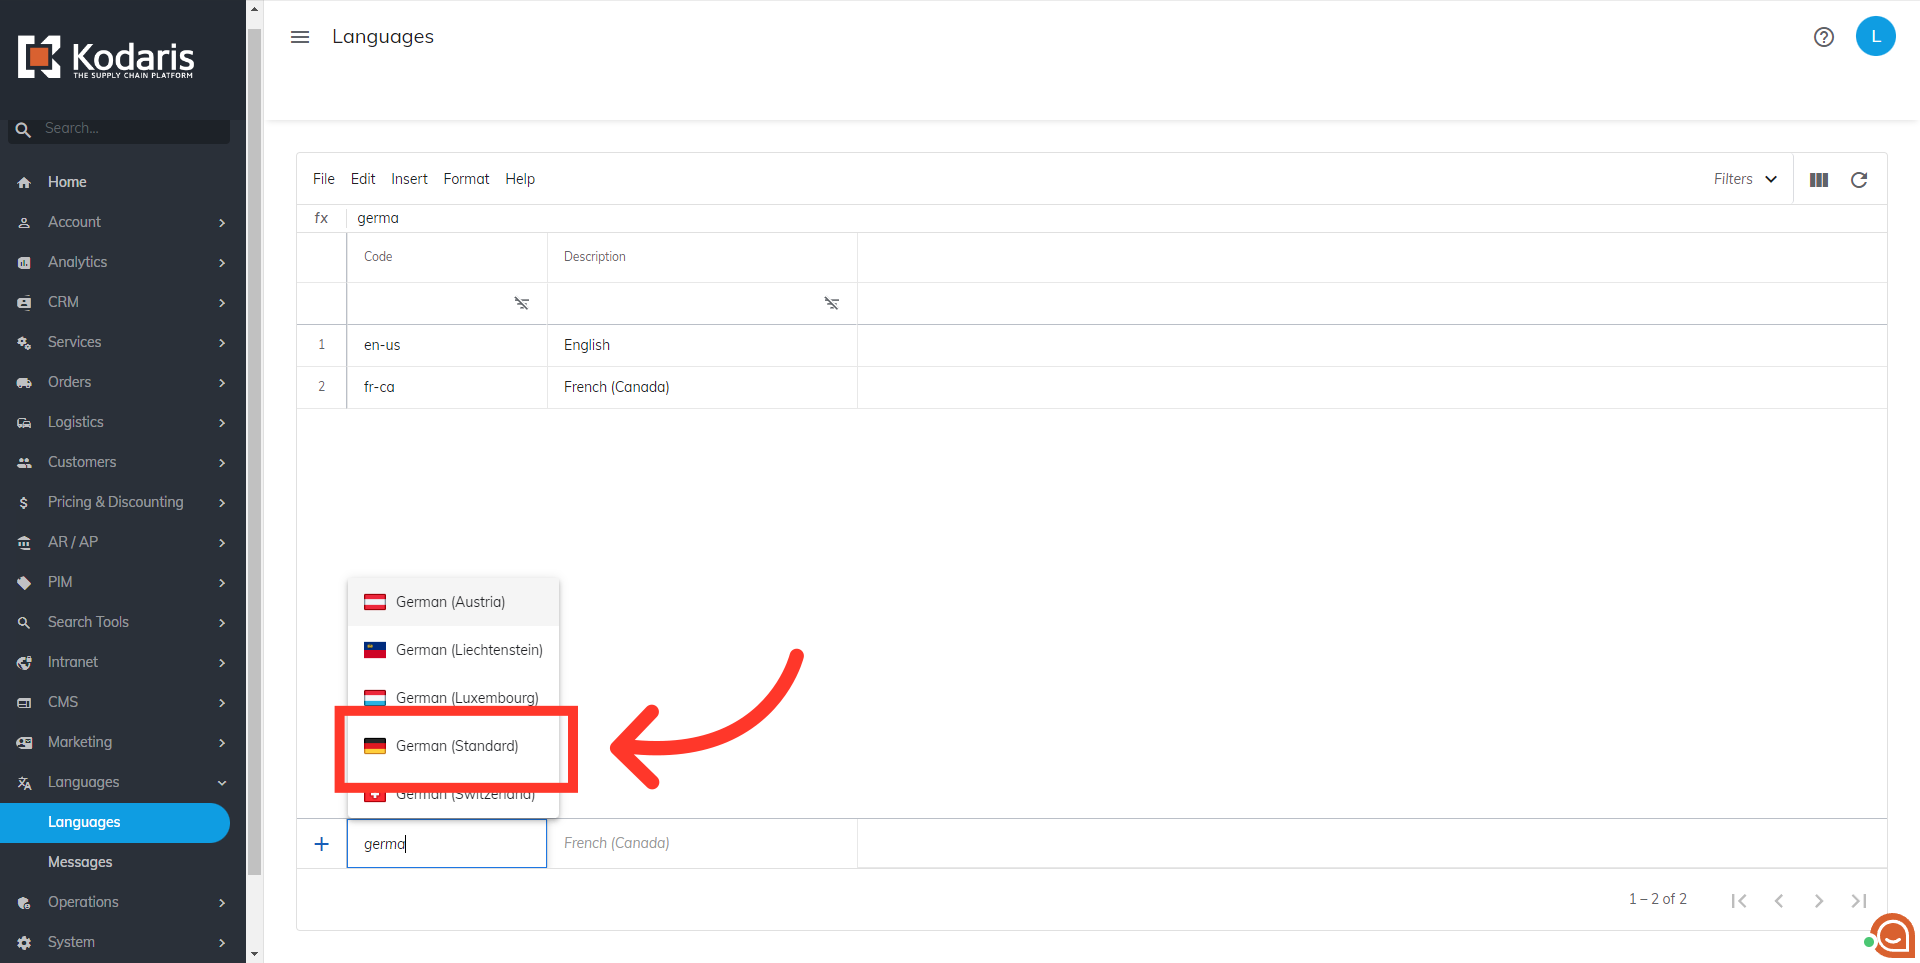
Then, select the language you would like to add.
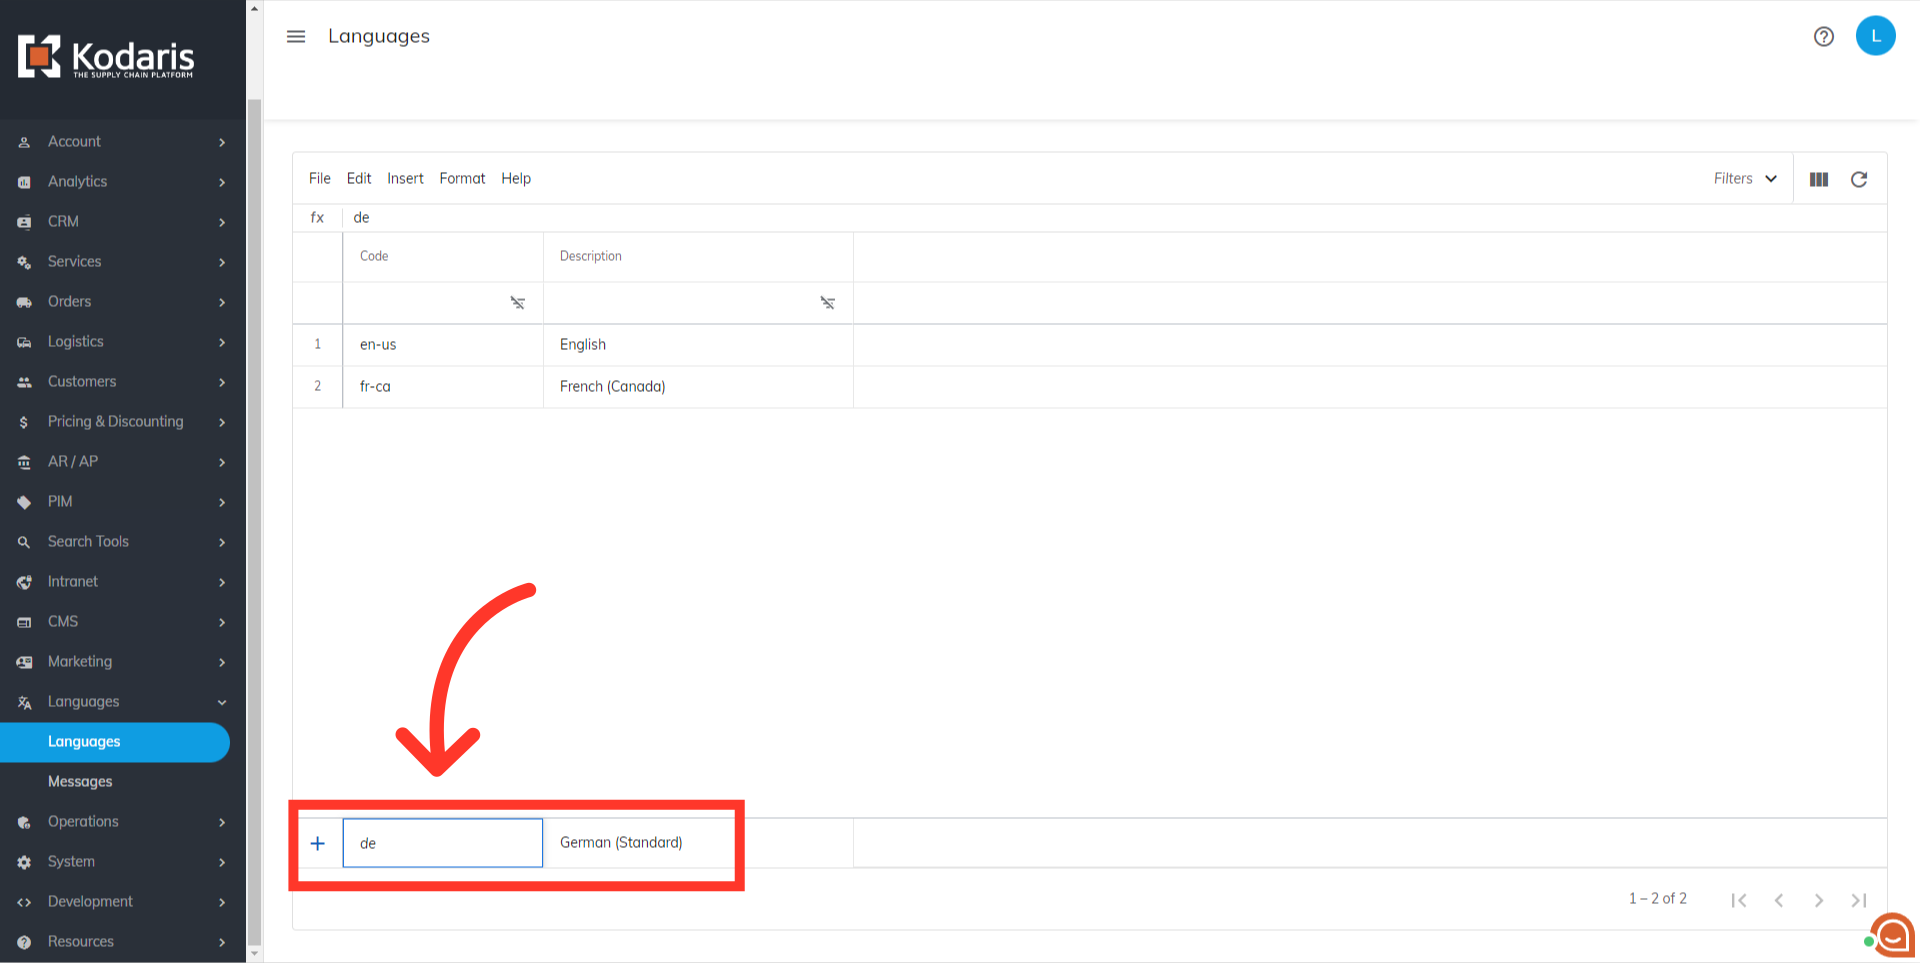
The system will populate the language code and description fields. Now, press enter to add the language.
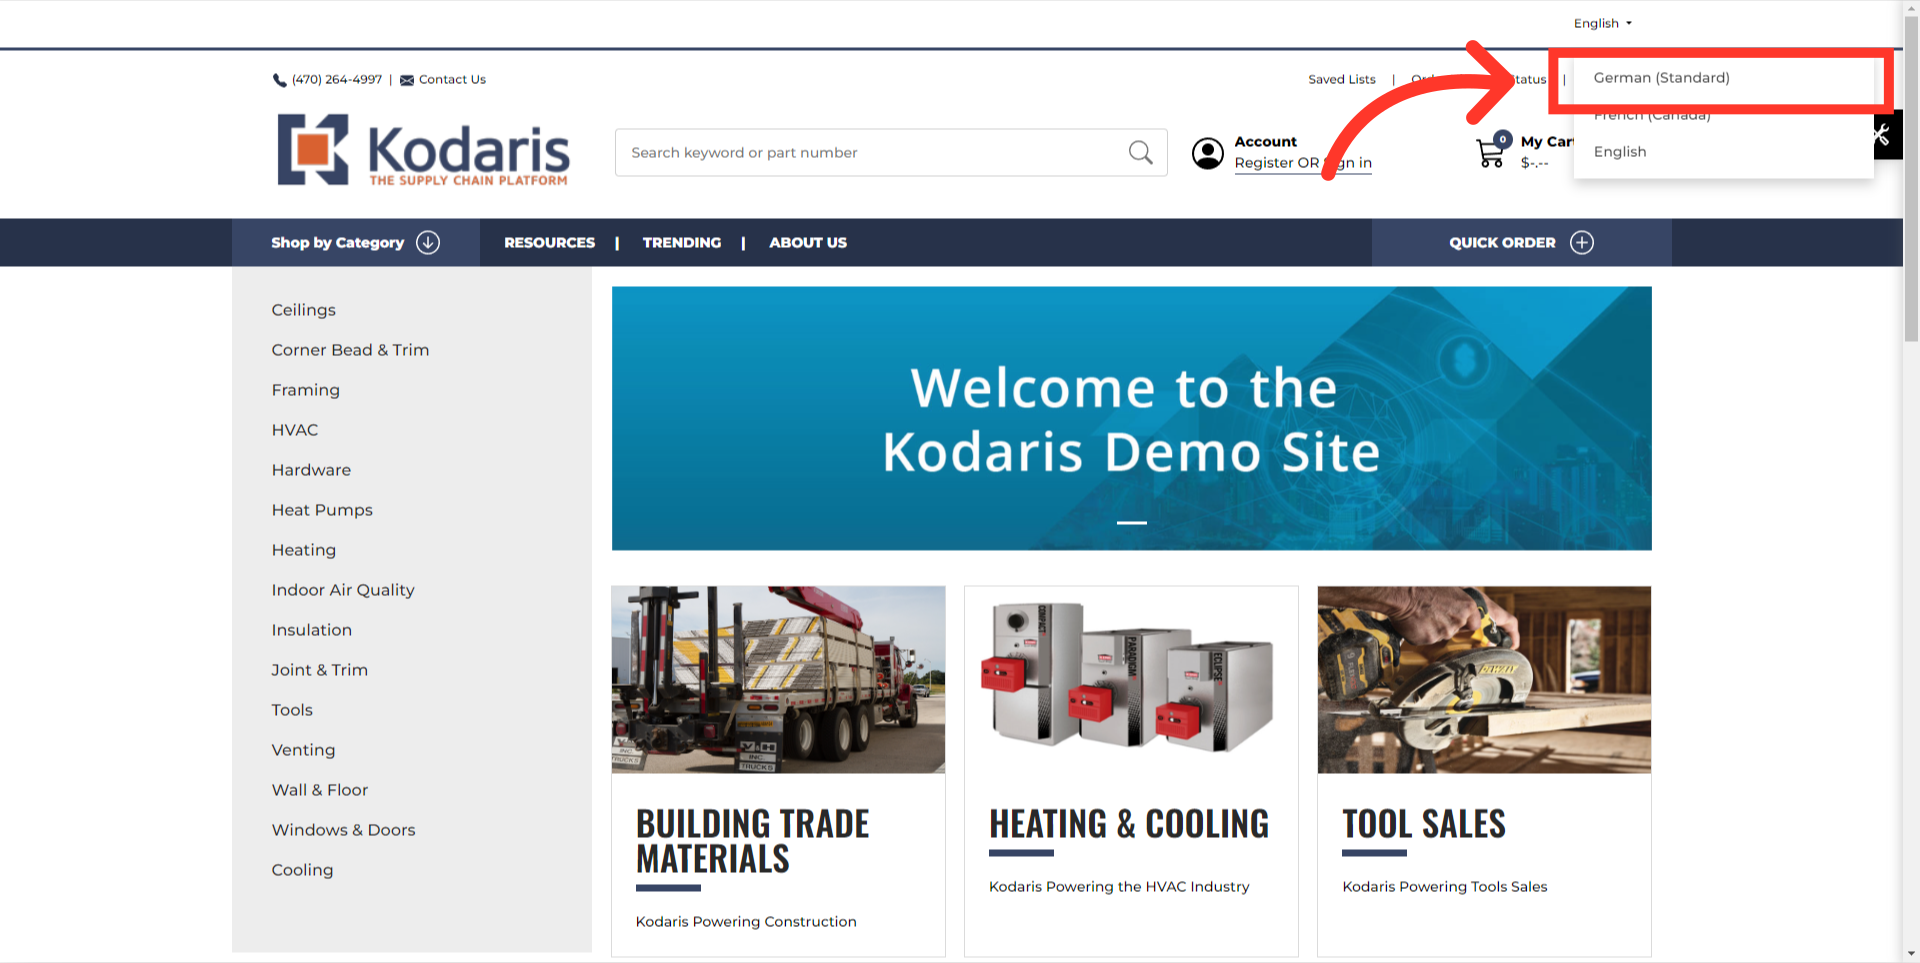
You can navigate to the customer side of the website and check that the language has been added to the dropdown selection.
If you would like to modify the name of the language that appears on your website, just double-click the "Description" field of the language and simply update based on your preference.
To delete a language, click the row number to select the entire row.

Then, click "Edit" from the menu.

Select "Delete selected rows" or you can hold down Ctrl and press --{|minus}-- from the keyboard.
