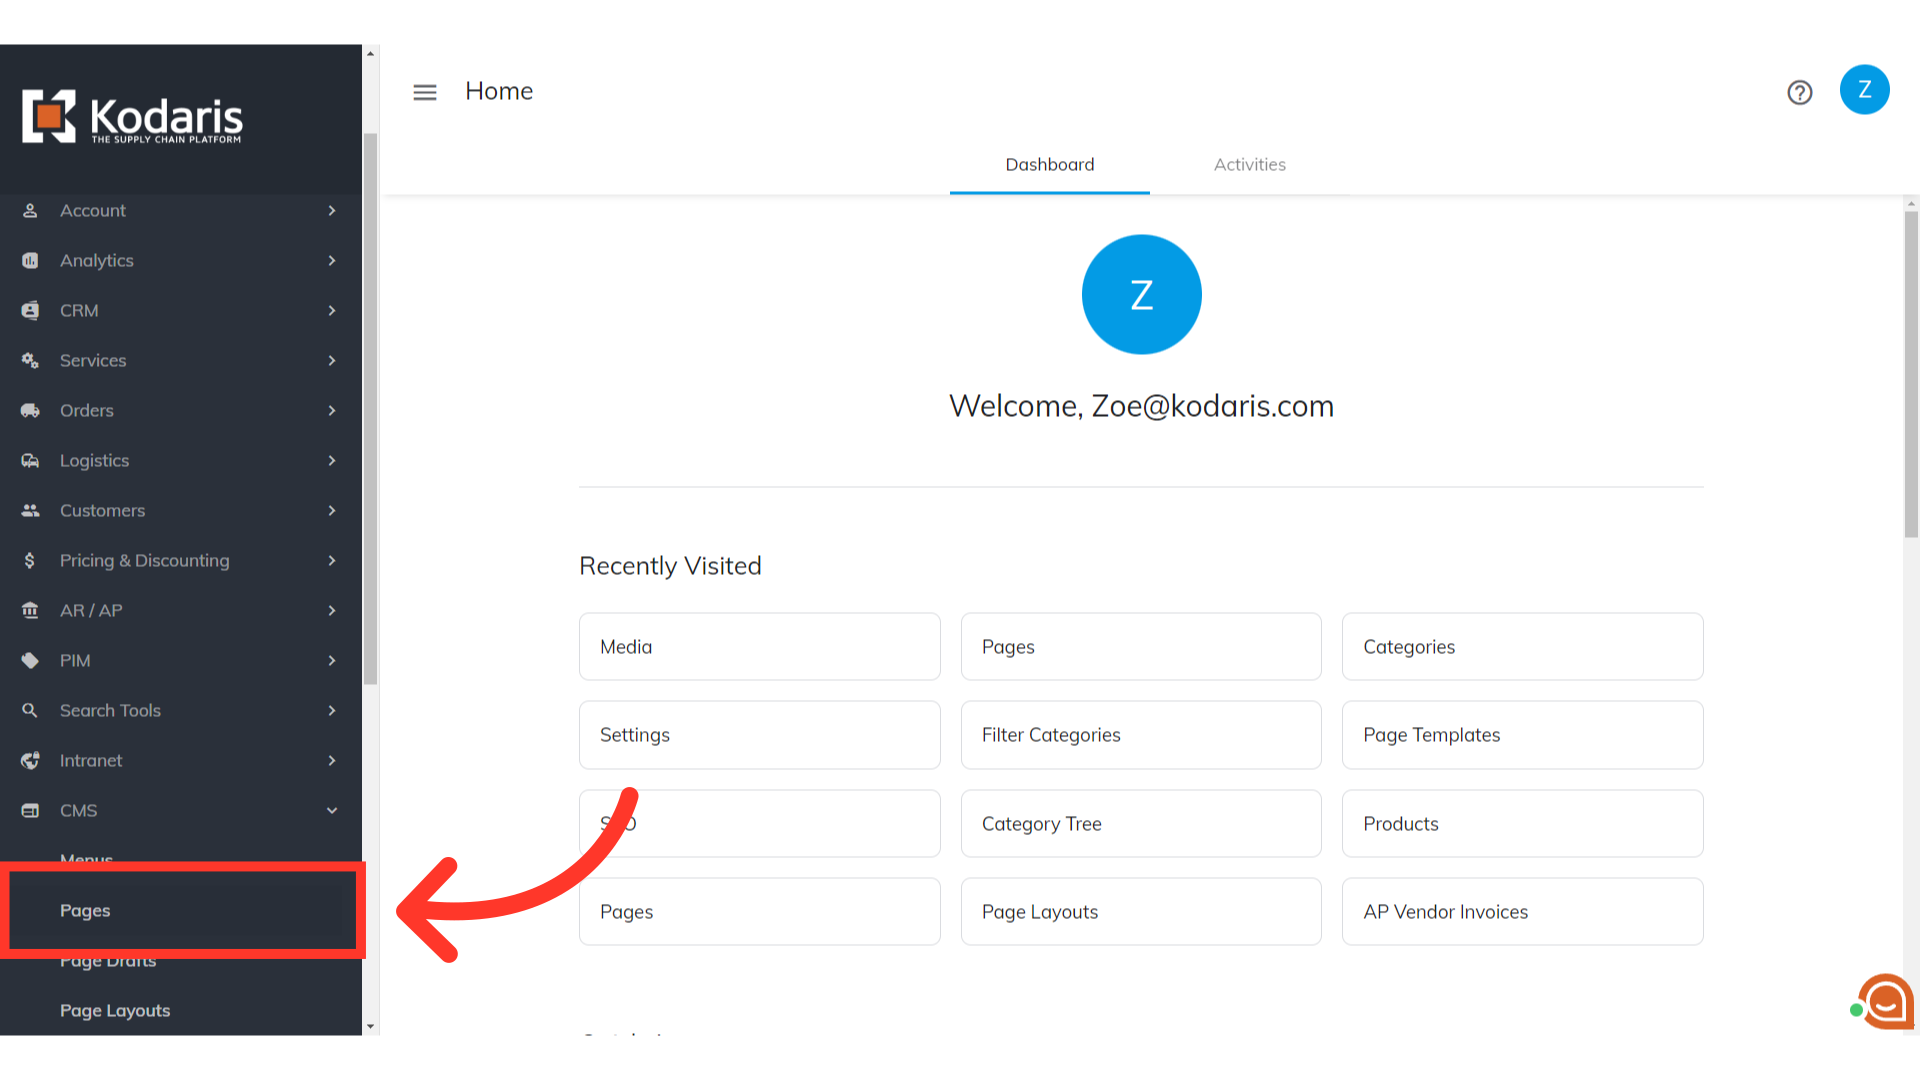
To upload a customized tile image for your blog post, start by navigating to "CMS" section in the operations portal.

Click "Pages". In order to access, edit, and publish CMS pages, you will need to have the role of: "administrator" or "superuser", or have the roles of: "contentView" and "contentEdit" and “cmsView”.
Find the blog post to which you would like to add a tile image.

Click the "Edit page" icon.

Click "Select featured image" button.
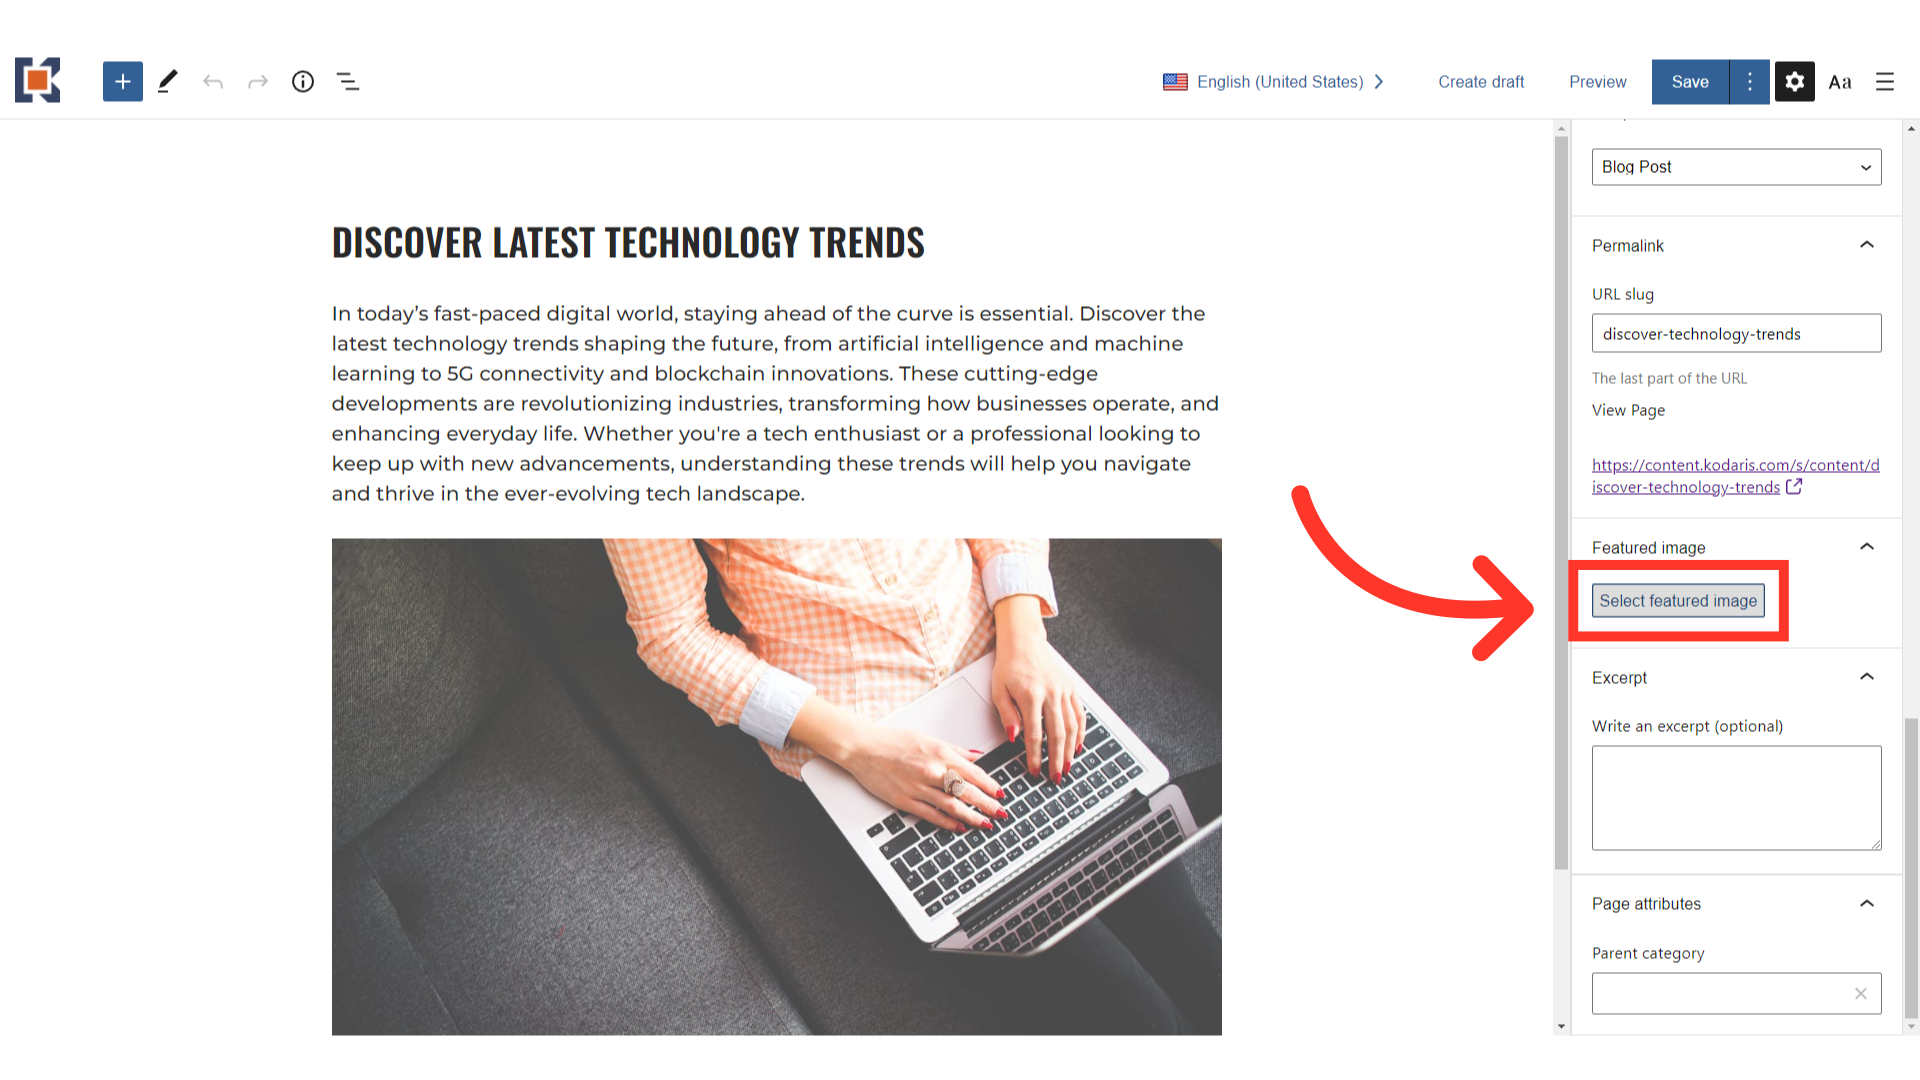
Select from the options. You can choose to upload an image from your computer or insert from URL.

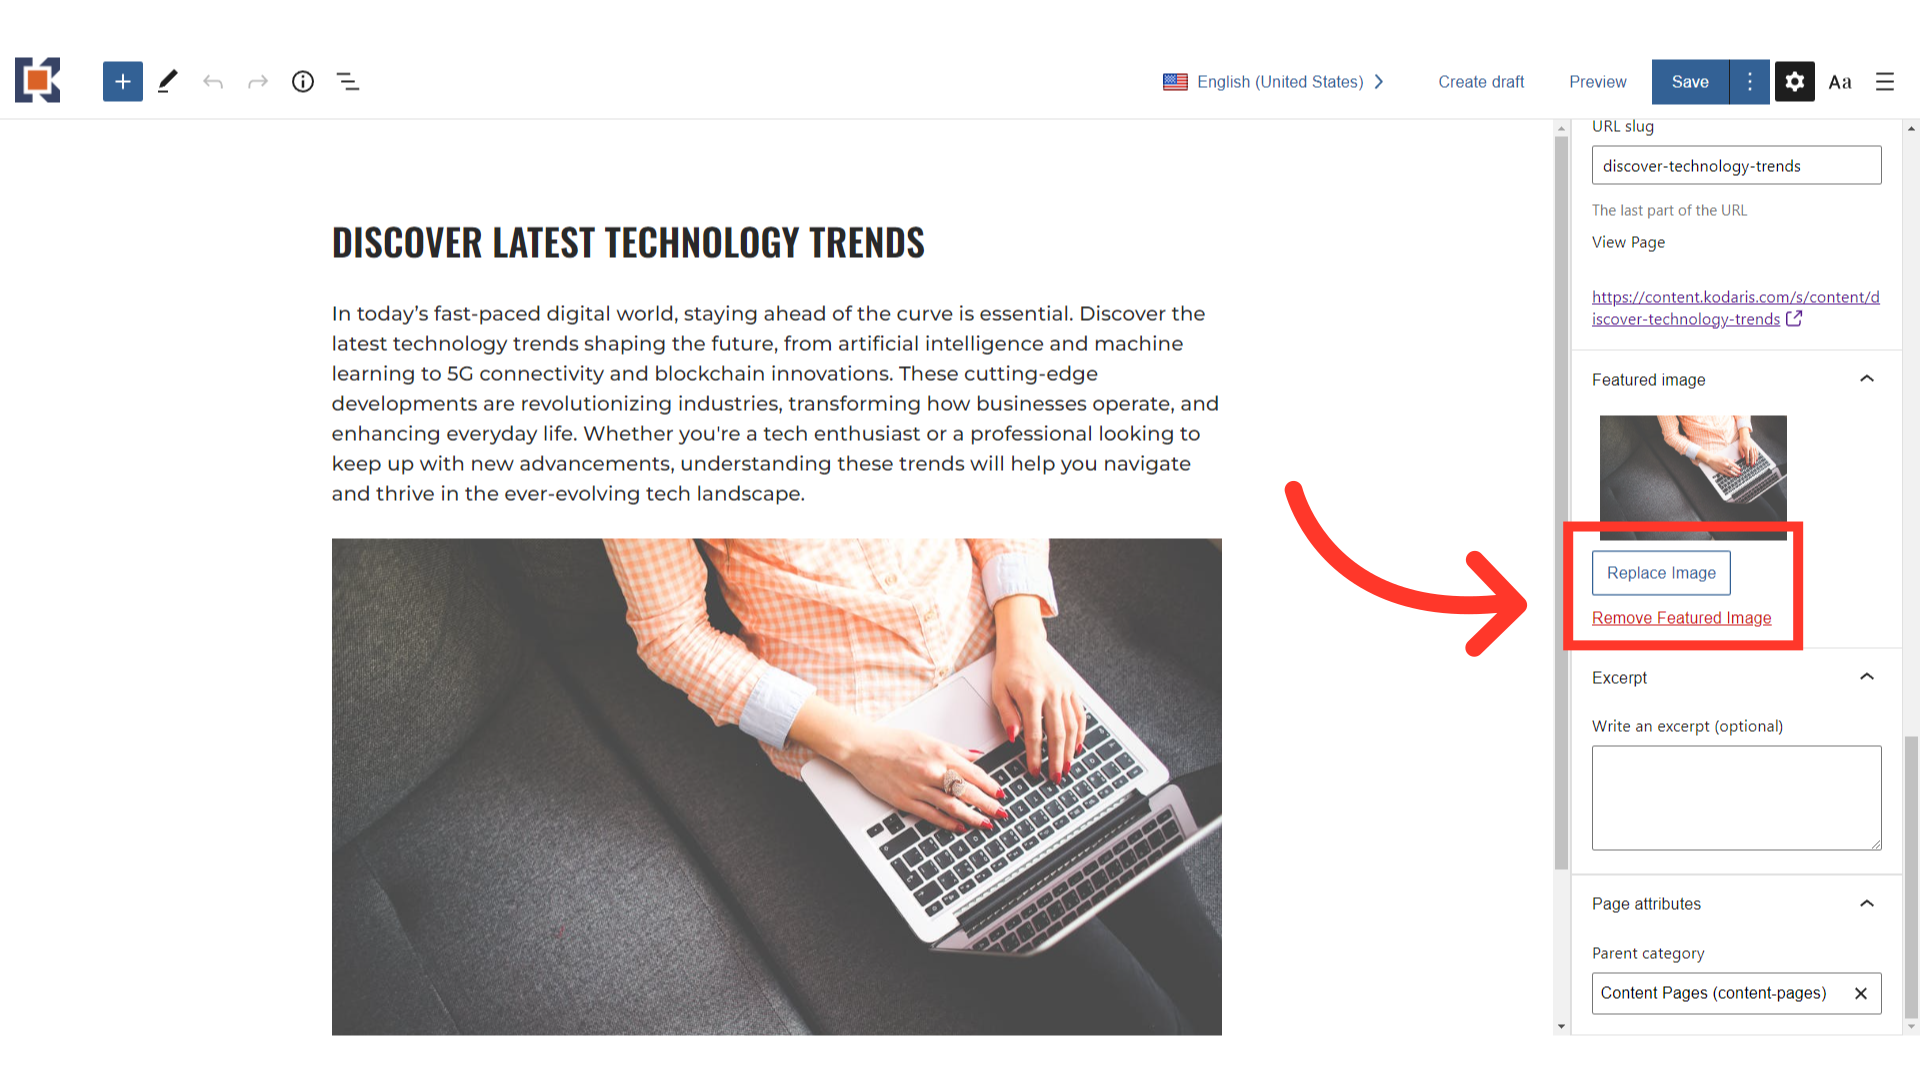
An option to replace and remove the image is also available if needed.
You can preview your page at any time by clicking the "Preview" button.

This will open a new tab with a preview of the page. Notice that the featured image you uploaded is now the tile image used for the blog post.

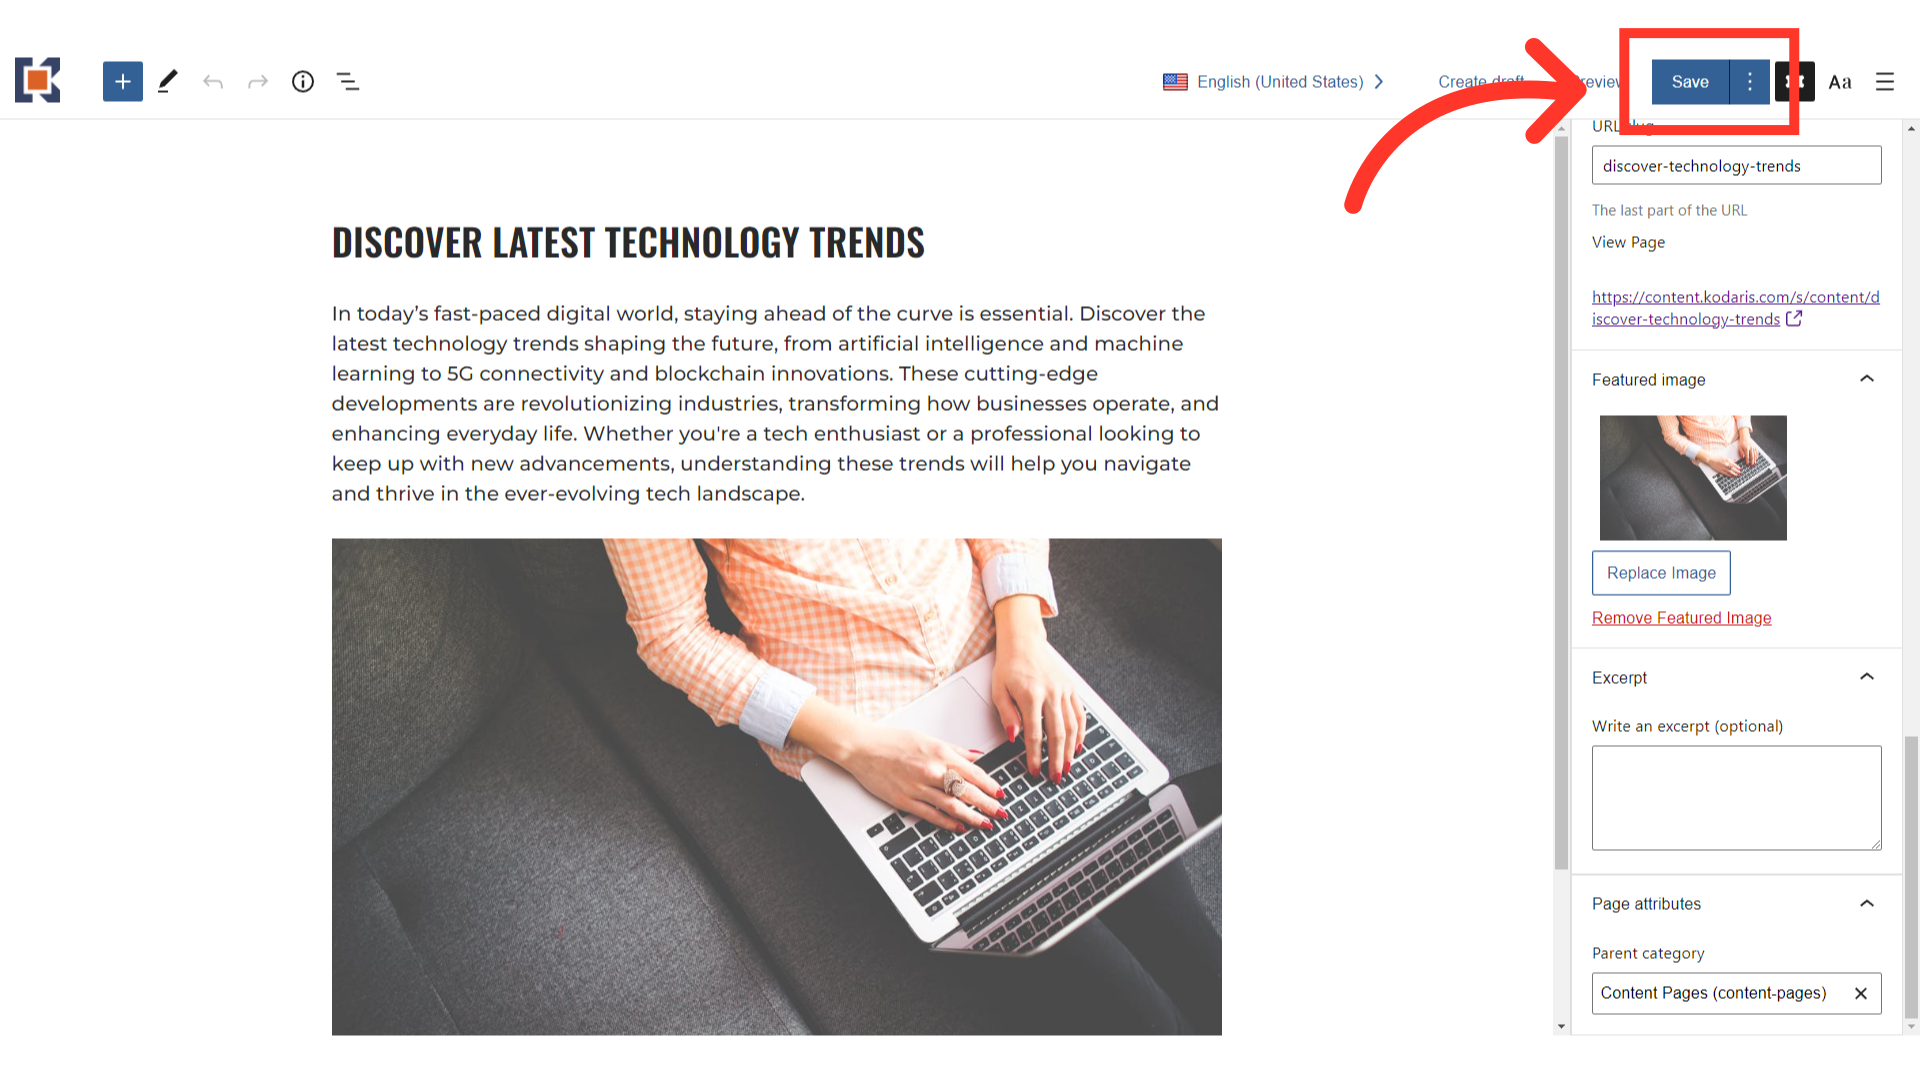
Click the "Save" button to save your updates.