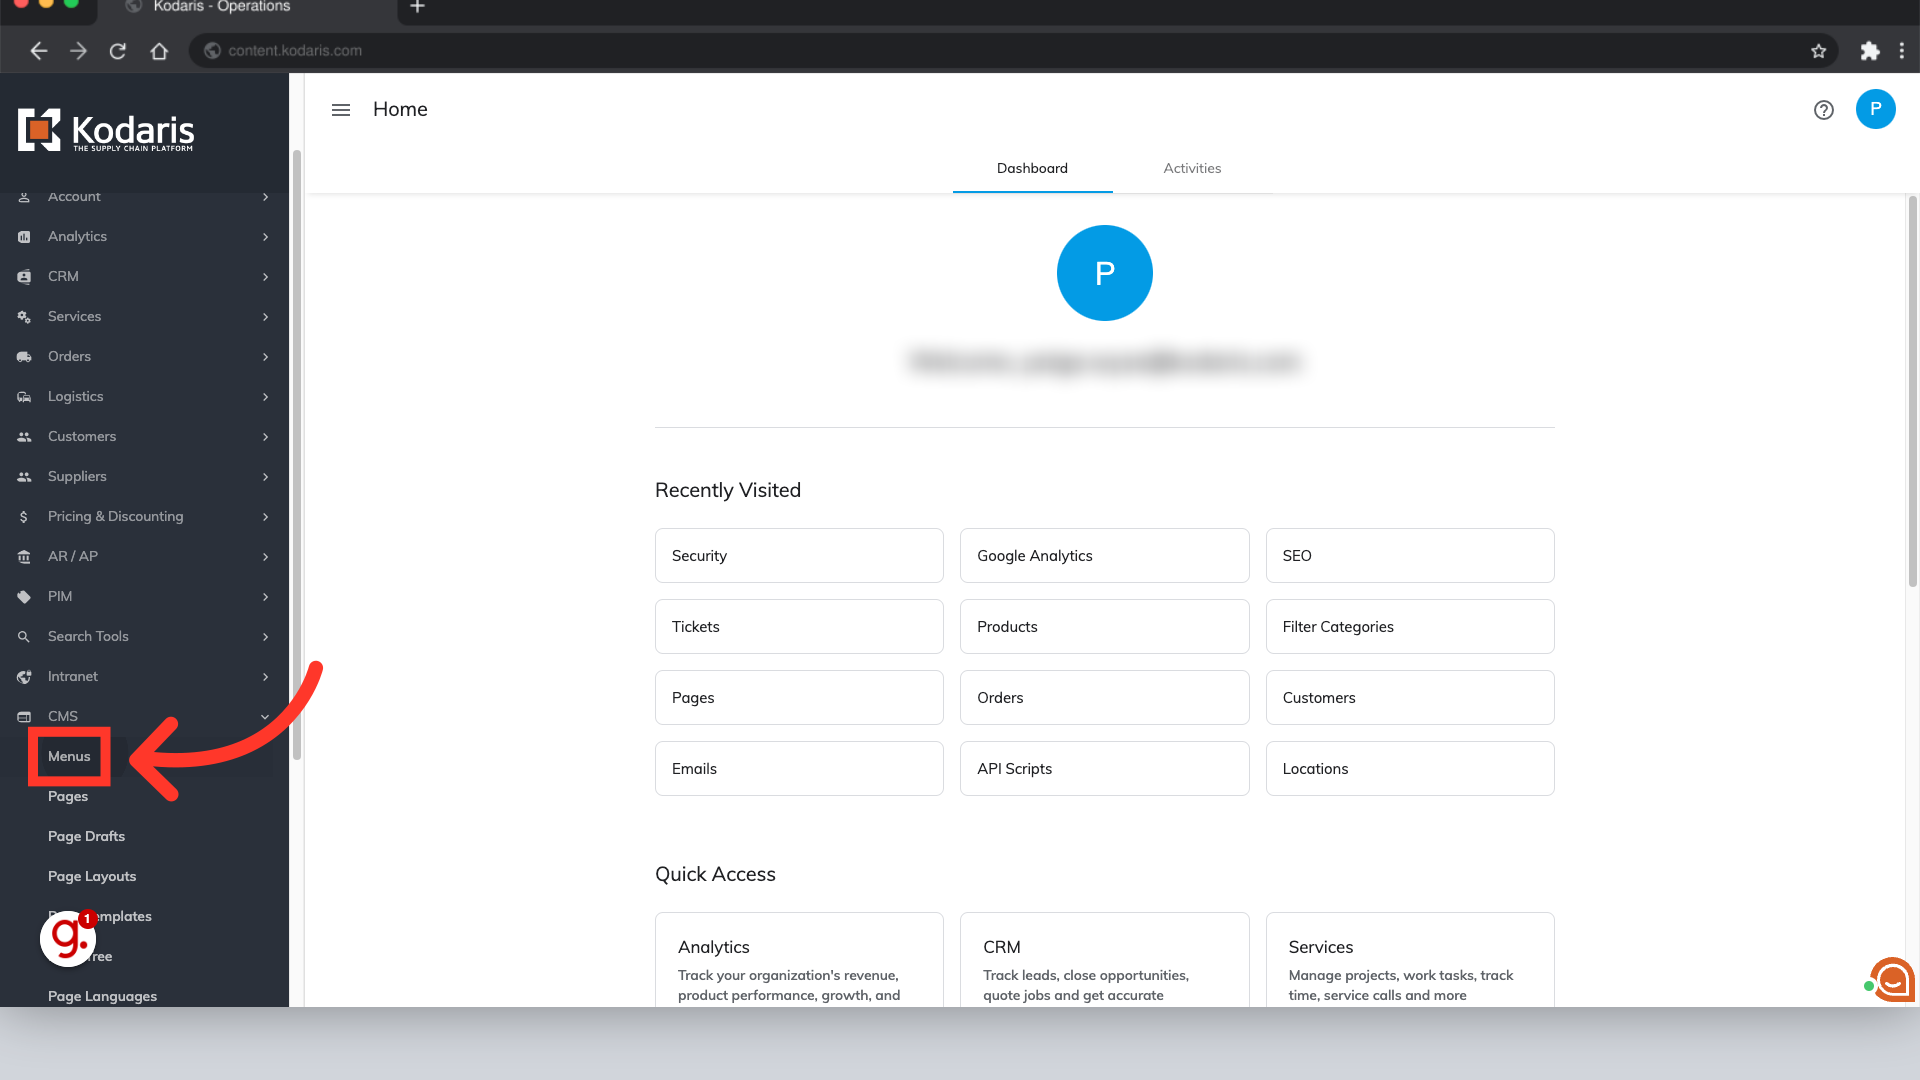
To edit or update your website's CMS header menu, begin by logging into the Operations Portal, and then navigating to "CMS".

Click "Menus" to open the Customizer where you will access your website's menus. In order to access and edit Menus, you will need to have the role of: "administrator" or "superuser", or have the roles of: "contentEdit" and "cmsEdit".
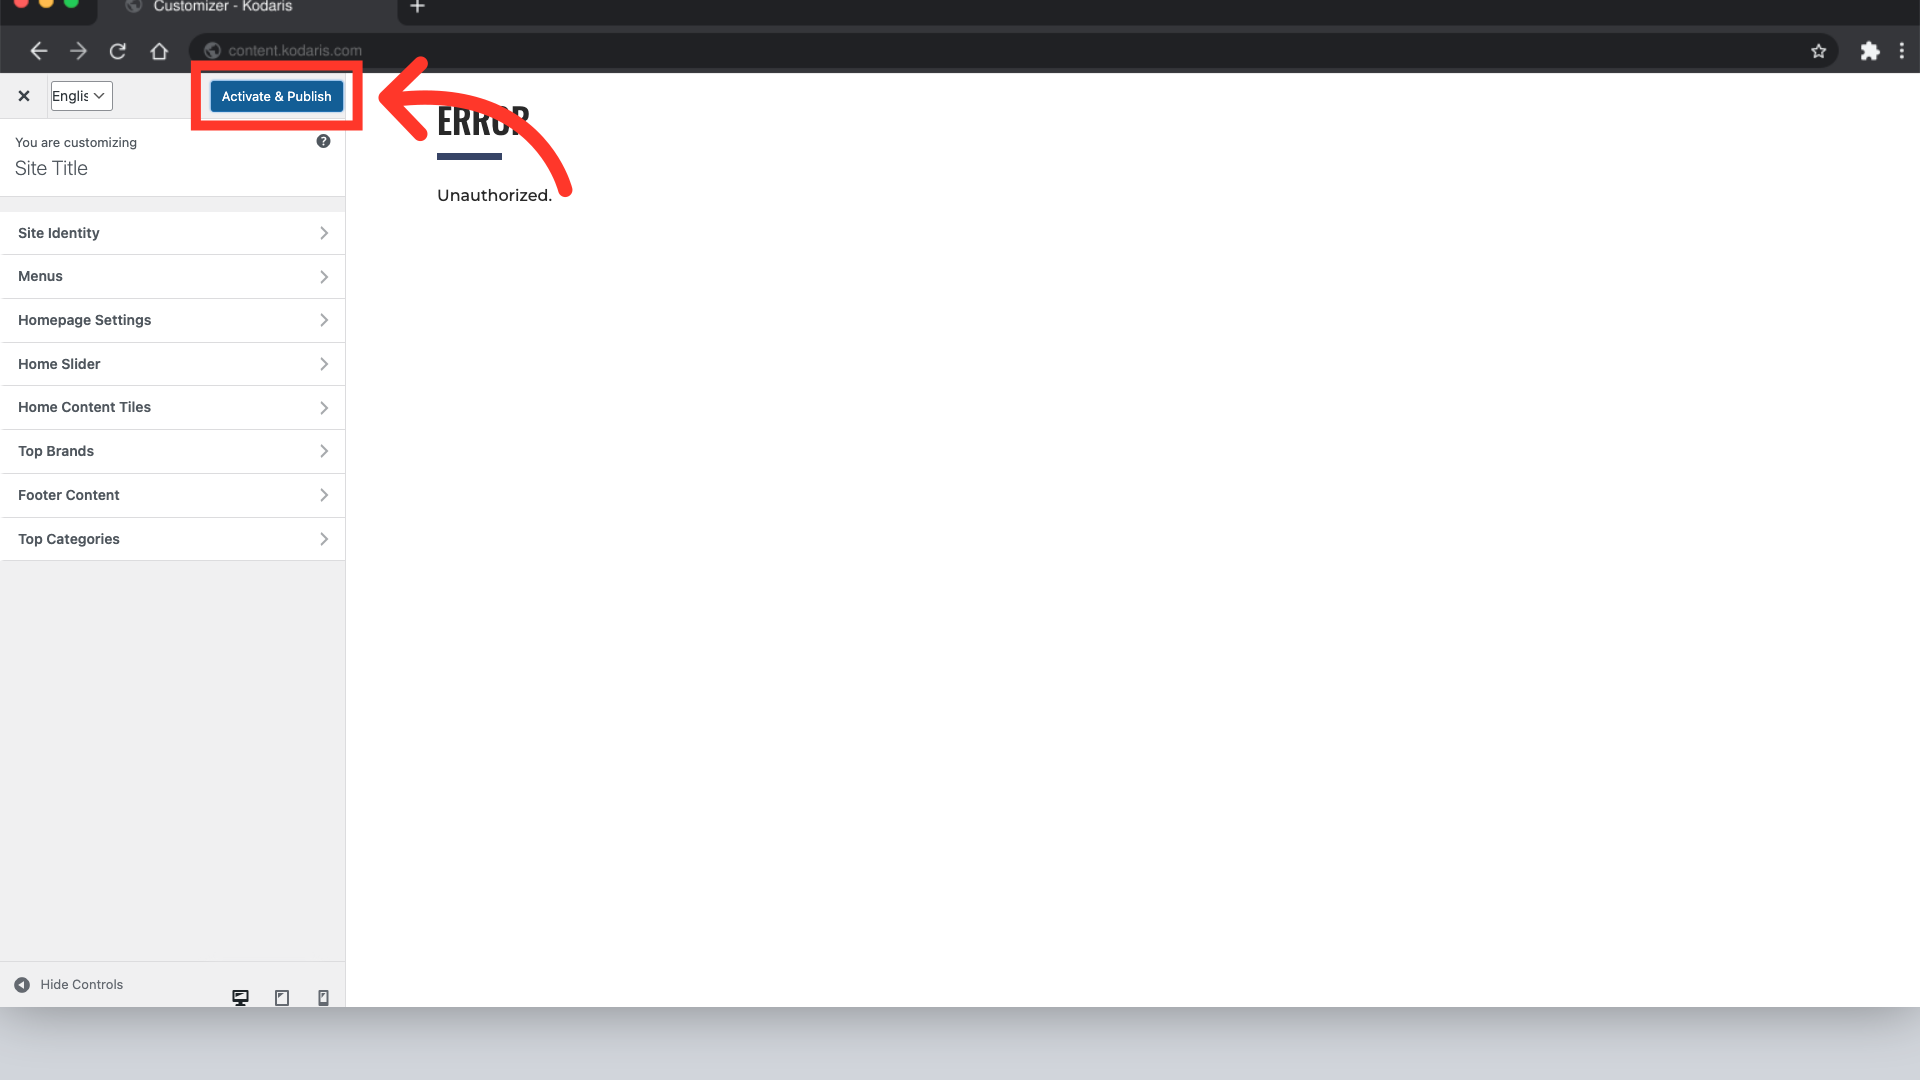
To be able to view and make edits to your live site, click the "Activate and Publish" button on the top right-hand corner of the Customizer.
Once your site has loaded, select "Menus". Doing this will open up a list of all your CMS menus on the site.
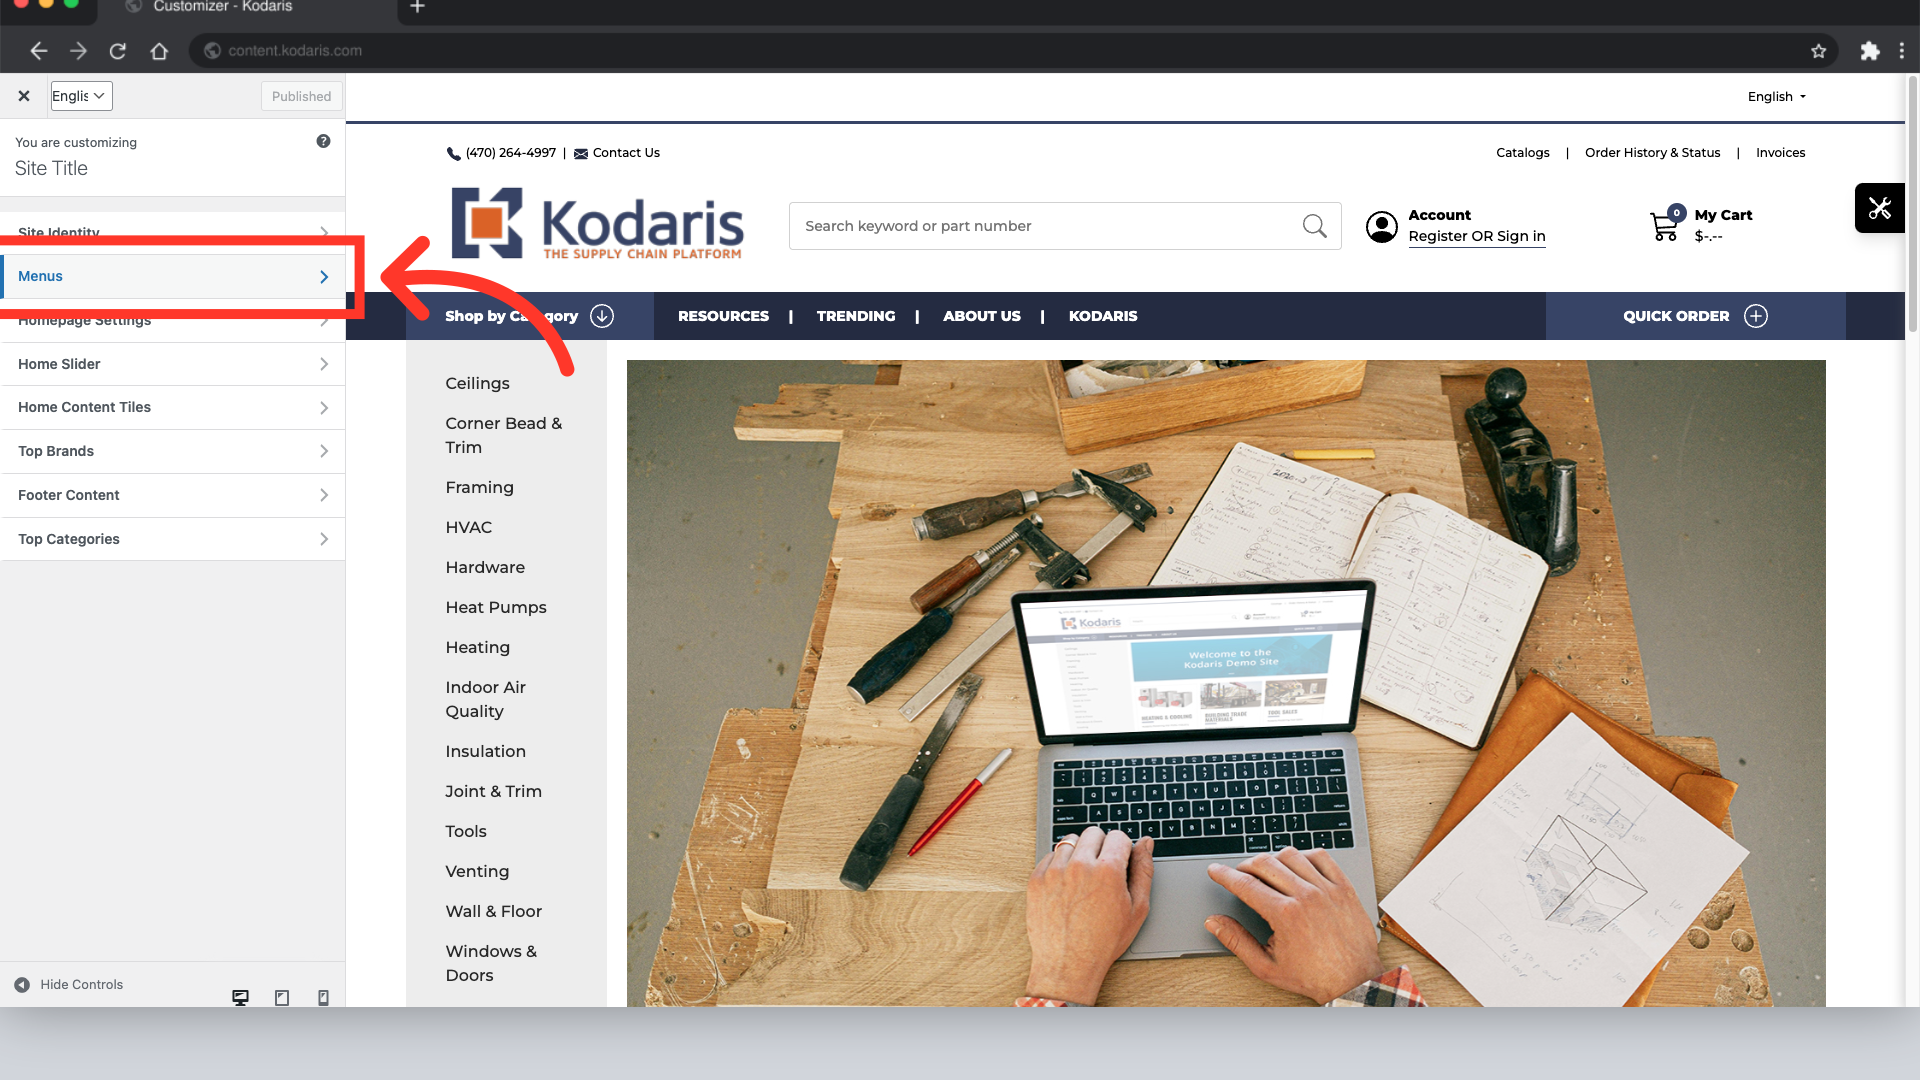
Because you want to edit your website's header menu, select "Header".

This will bring up all the menu items listed within your website's header. Here, you can update by adding new items, or rearrange, edit and delete existing items.

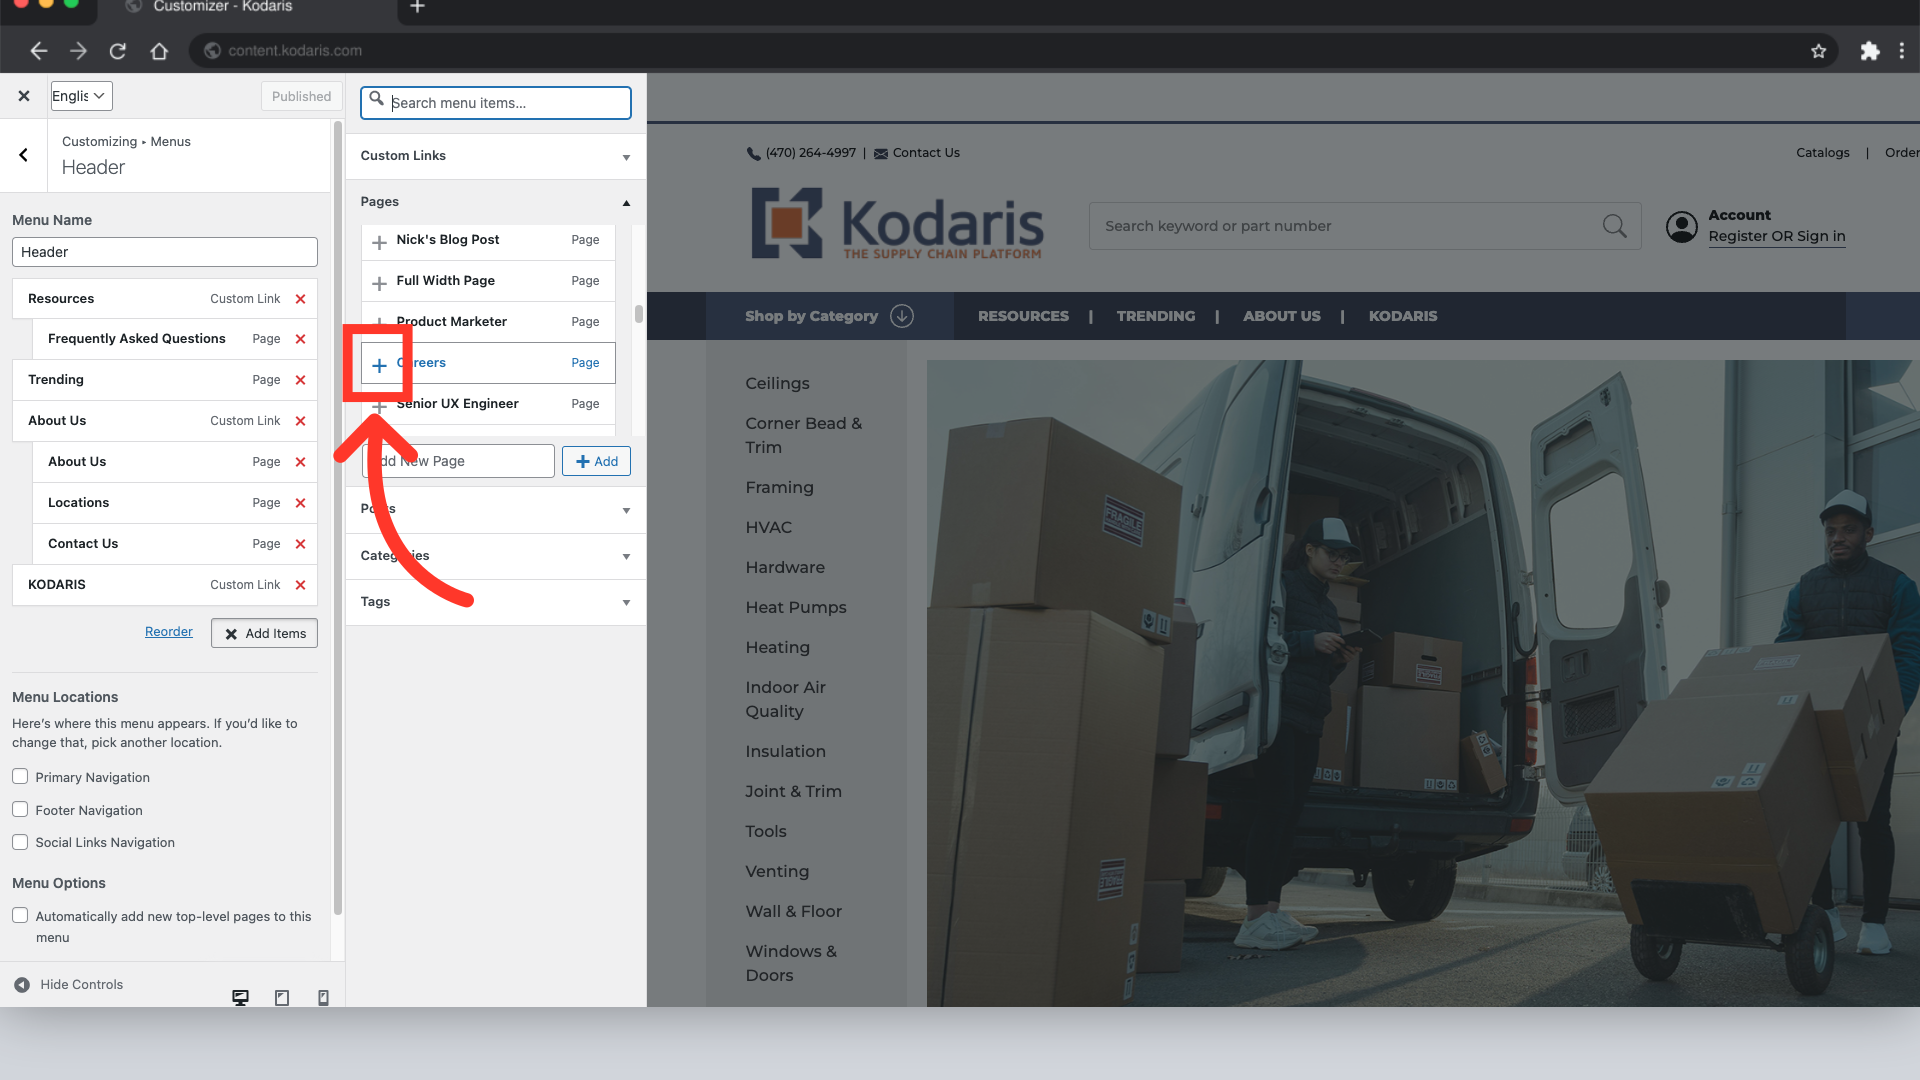
To add a new menu item to your header, click the "Add Items" button.

There are two ways to add a new menu item. The first is to select a webpage from the list of active pages on your website. Once you've located the page under the "Pages" section, click the "Plus" icon next to the page title.
Once you've added it to your header, it'll appear at the bottom of the menu list.

After the menu item is added, you can change its location or placement within your header. There are a few ways you can do this. One way is to click on the item and drag it to your desired location.

Another way to change the location of the new menu item within your header, is to select the "Reorder" button.

You can now edit the structure or hierarchy of your website's header menu by leveraging the arrows next to each menu item. The arrows work intuitively where the "Up" and "Down" arrows will move the item up and down. The "Left-Pointed" and "Right-Pointed" arrows will move the menu item in said direction.
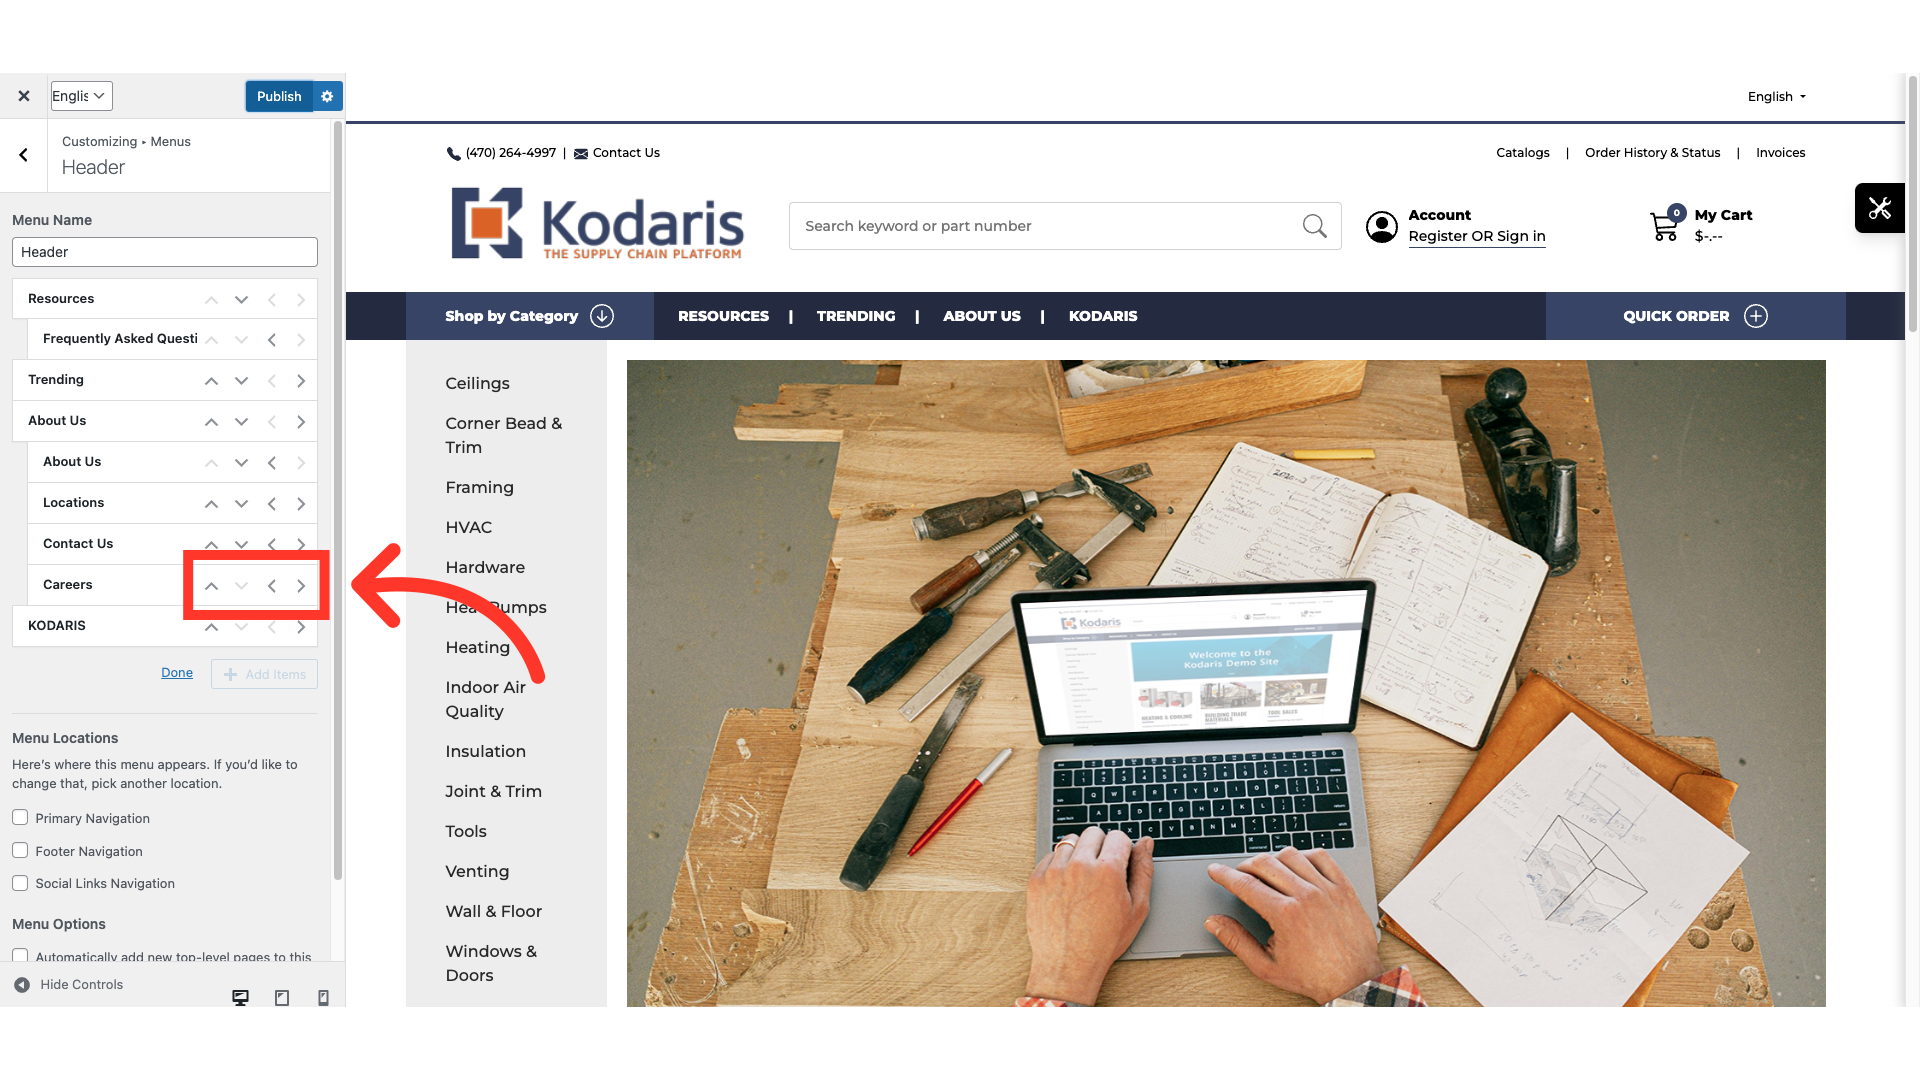
By moving the menu item farthest to the left, it will become a top level menu page and can house other pages under it. "About Us", for example, is a top level page. By moving a menu page farthest to the right, it will become a subpage within your menu. The "Locations" and "Contact Us" pages are examples of two subpages underneath "About Us".

For example purposes, we've moved our newly added "Careers" page so that it's a subpage under the "About Us" top level page.
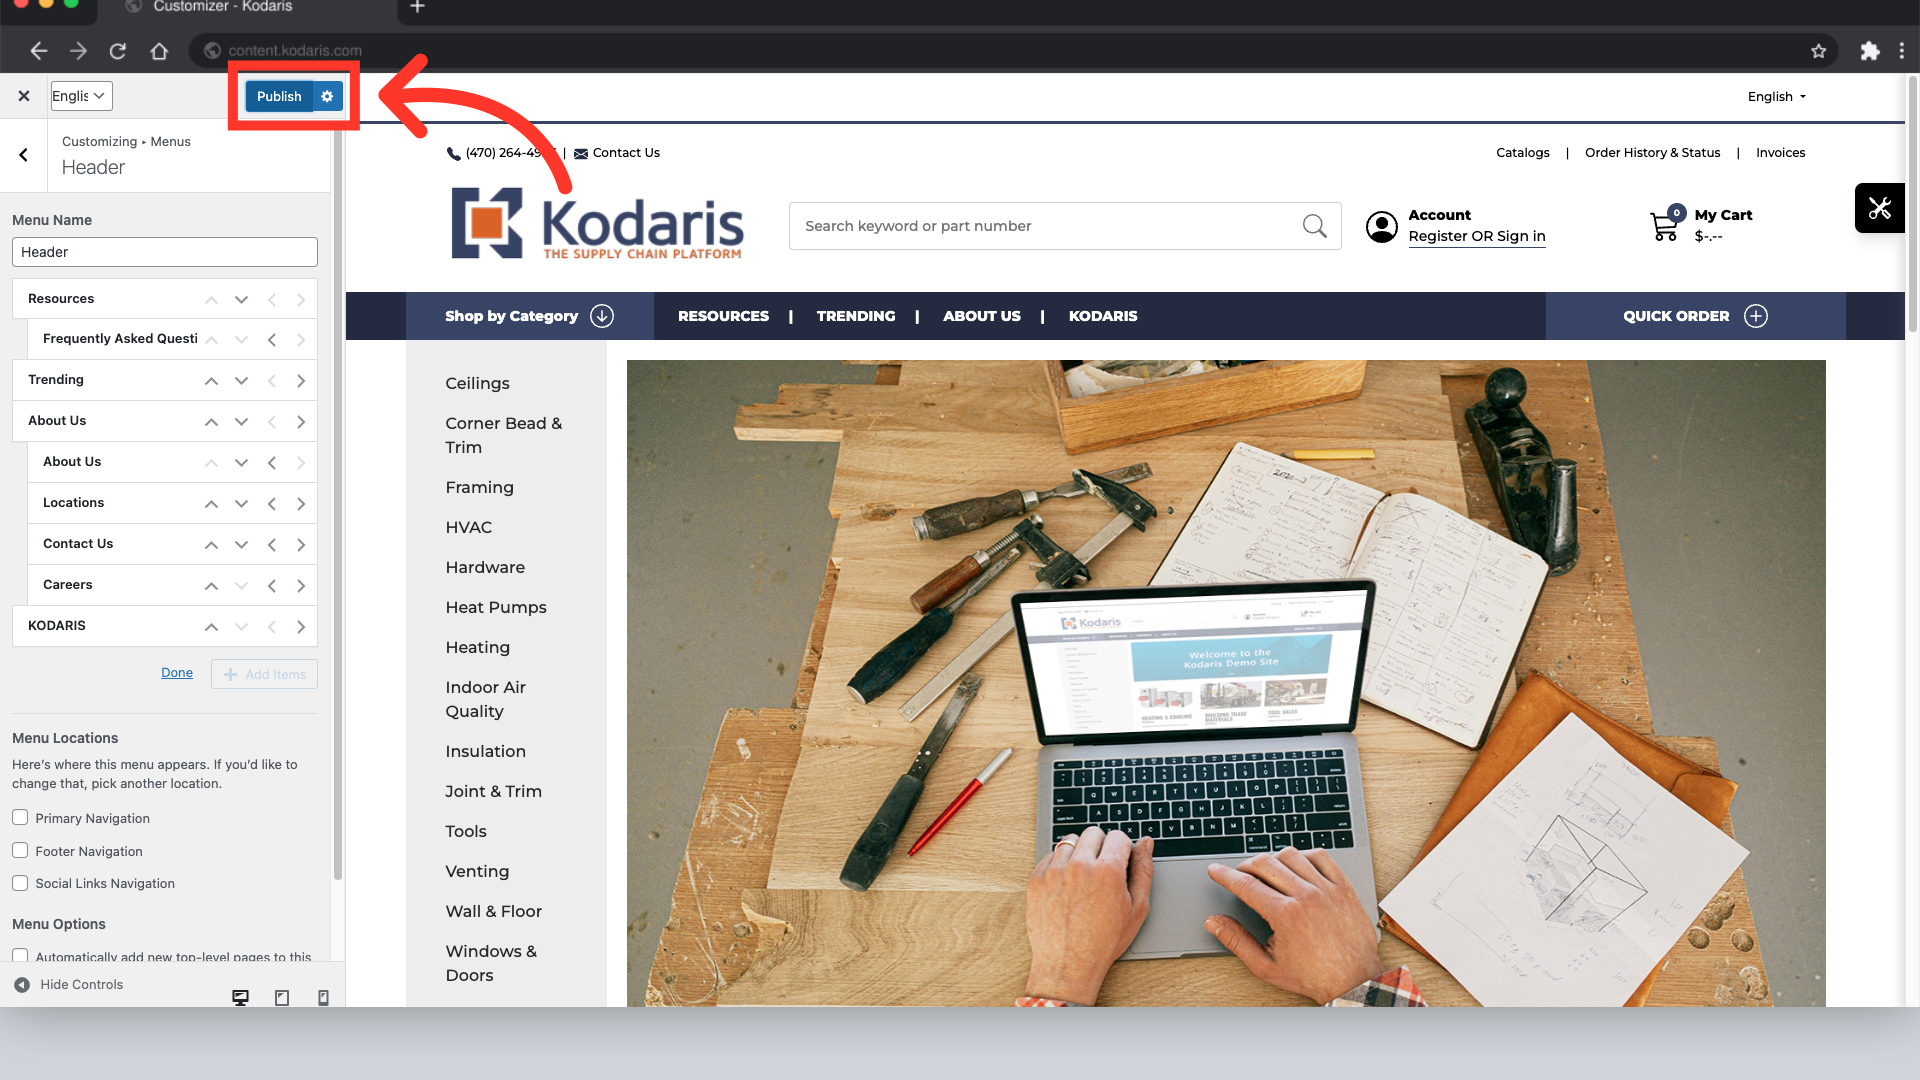
After making your changes and adjusting the hierarchy of your header menu, click the "Publish" button in the top right-hand corner of the Customizer.
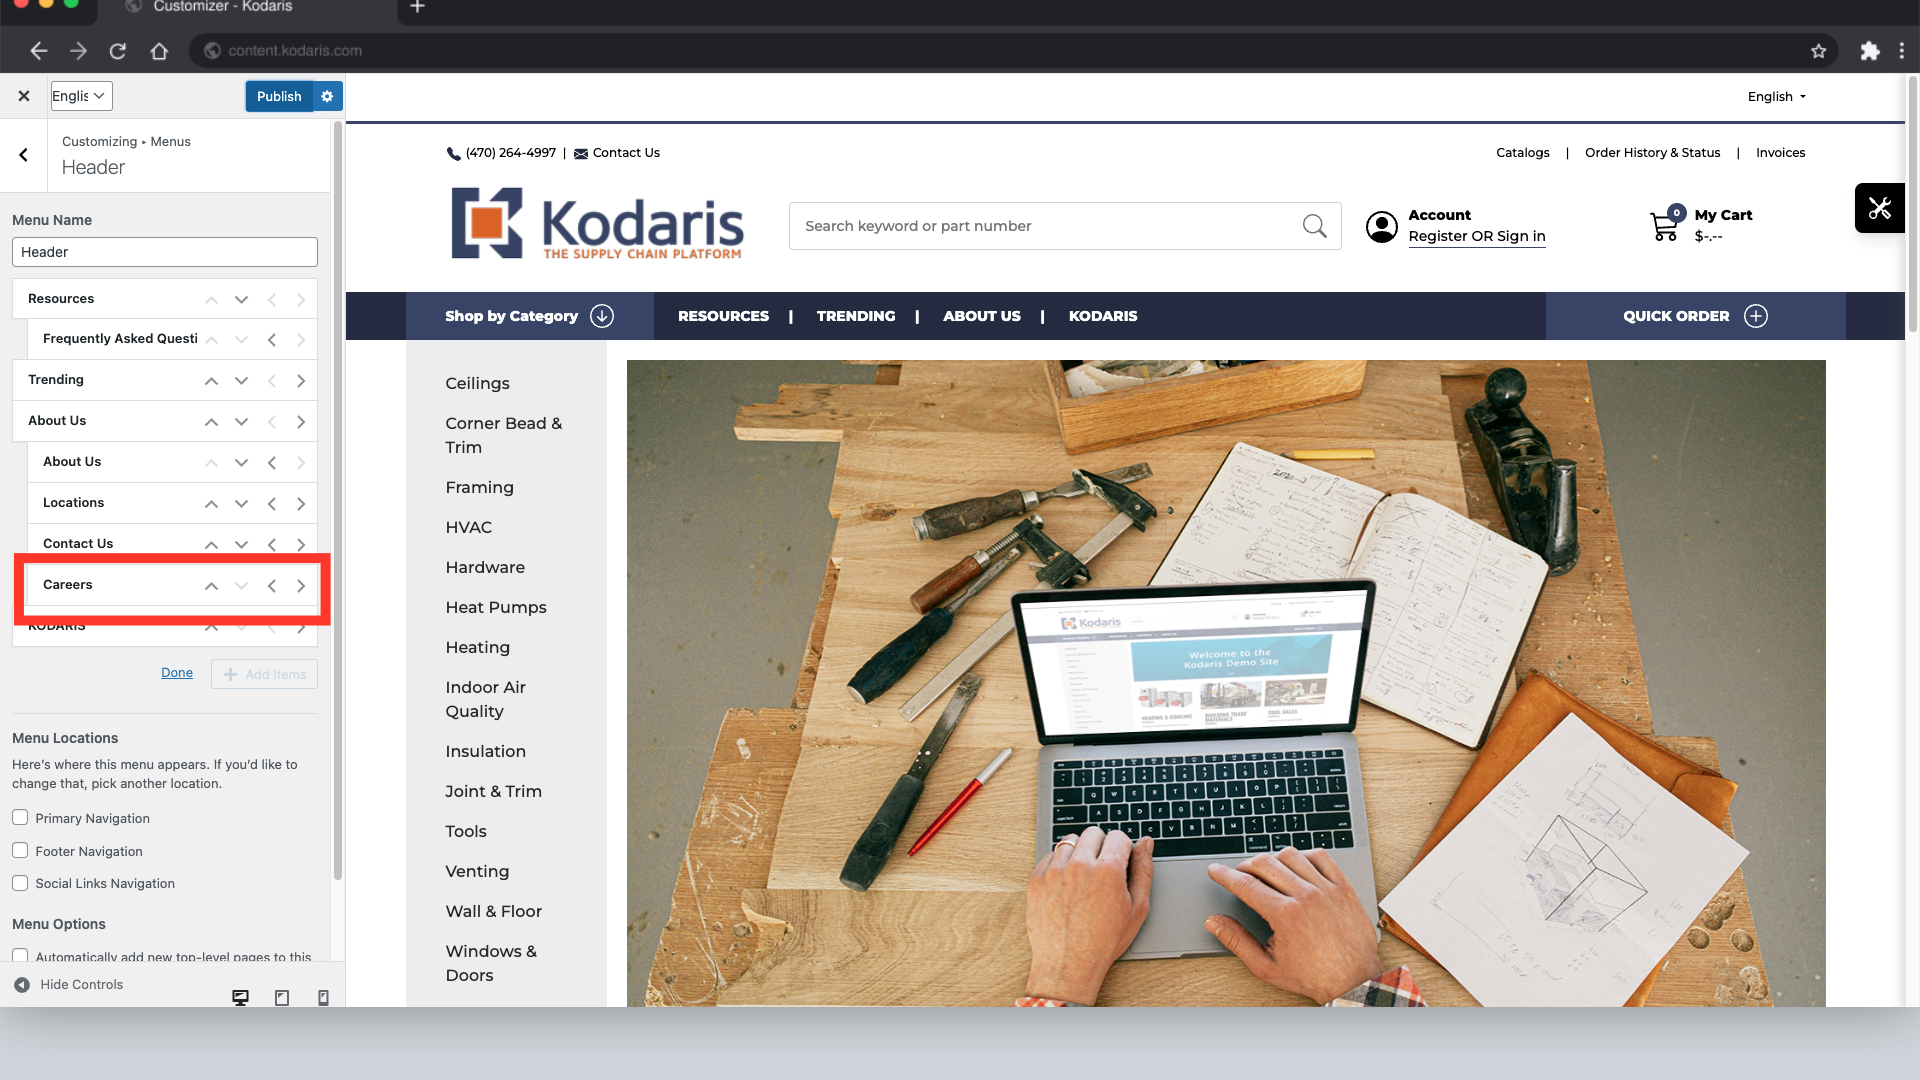
Once you save your changes, review the header menu to ensure the updates are correct. You'll notice that "Careers" is now a subpage under "About Us".

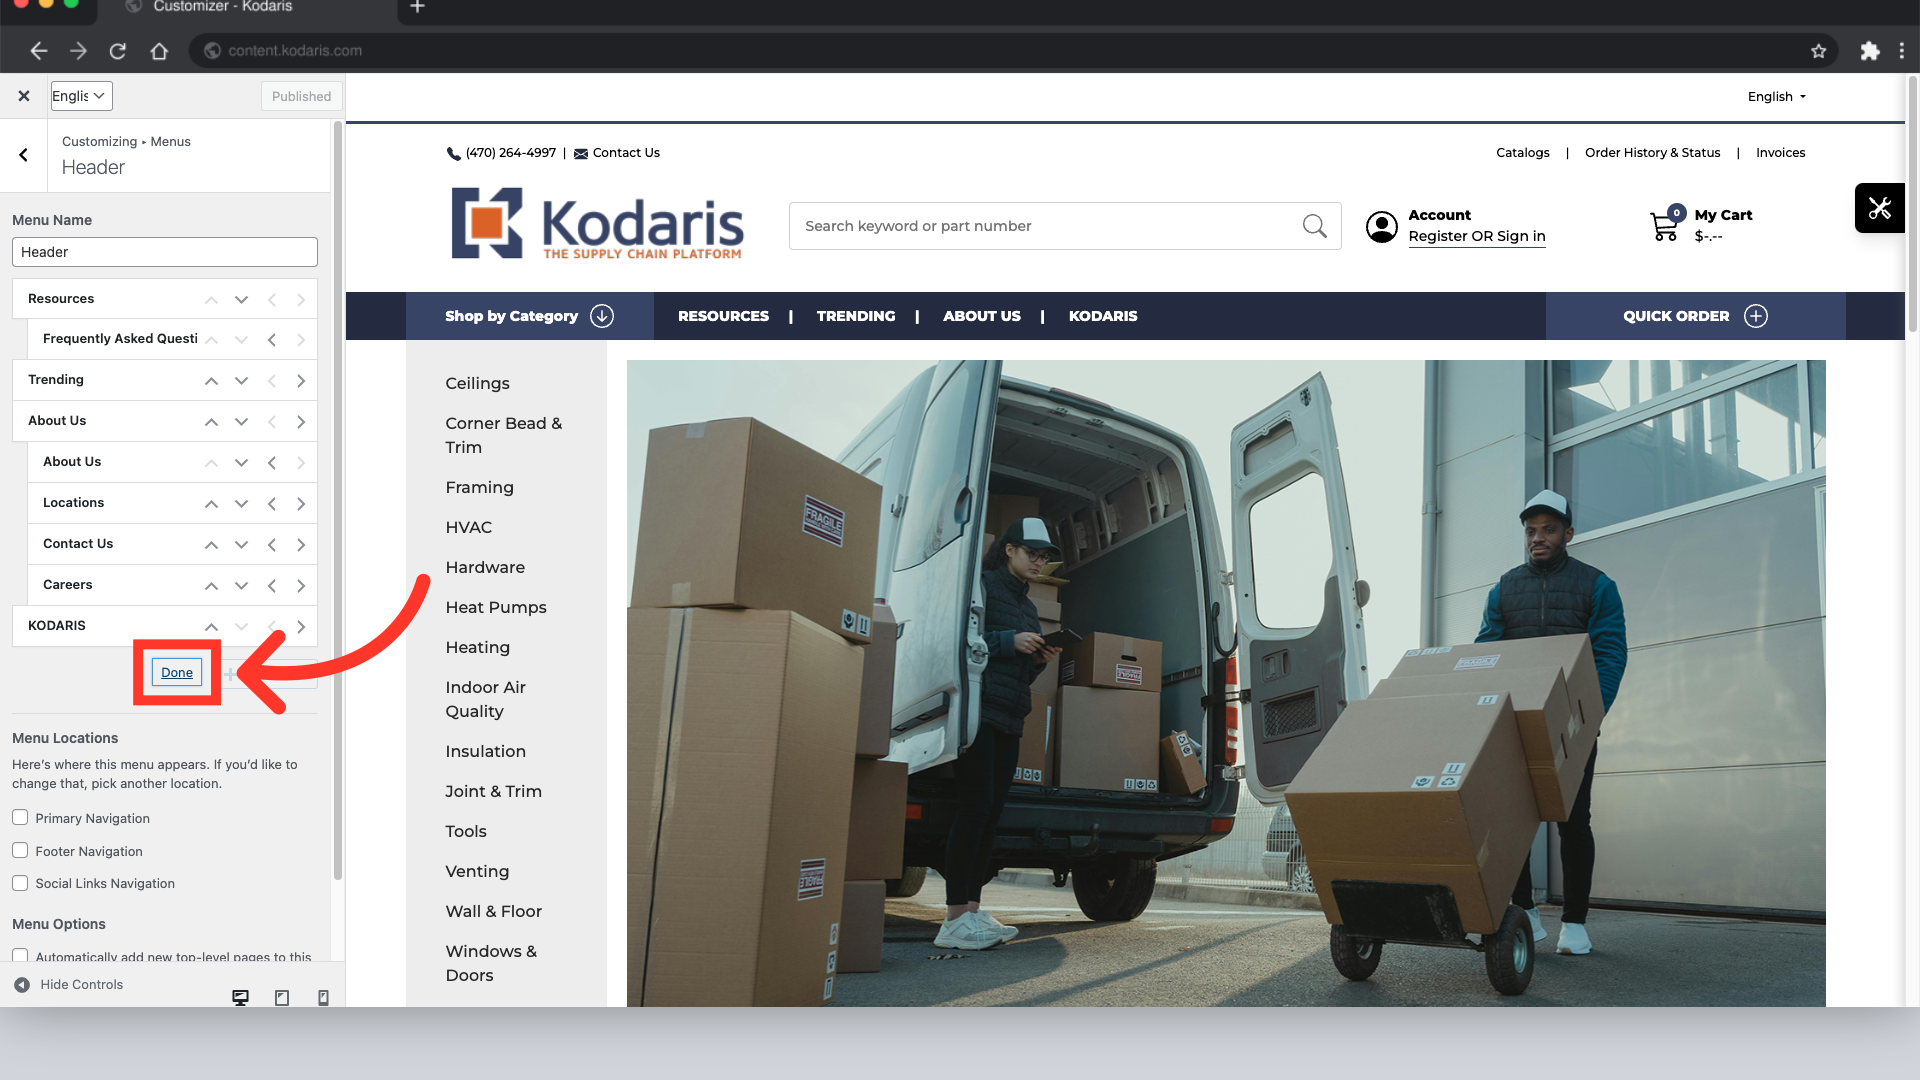
After verifying that your changes were made successfully and you no longer need to reorder your menu items, click "Done".
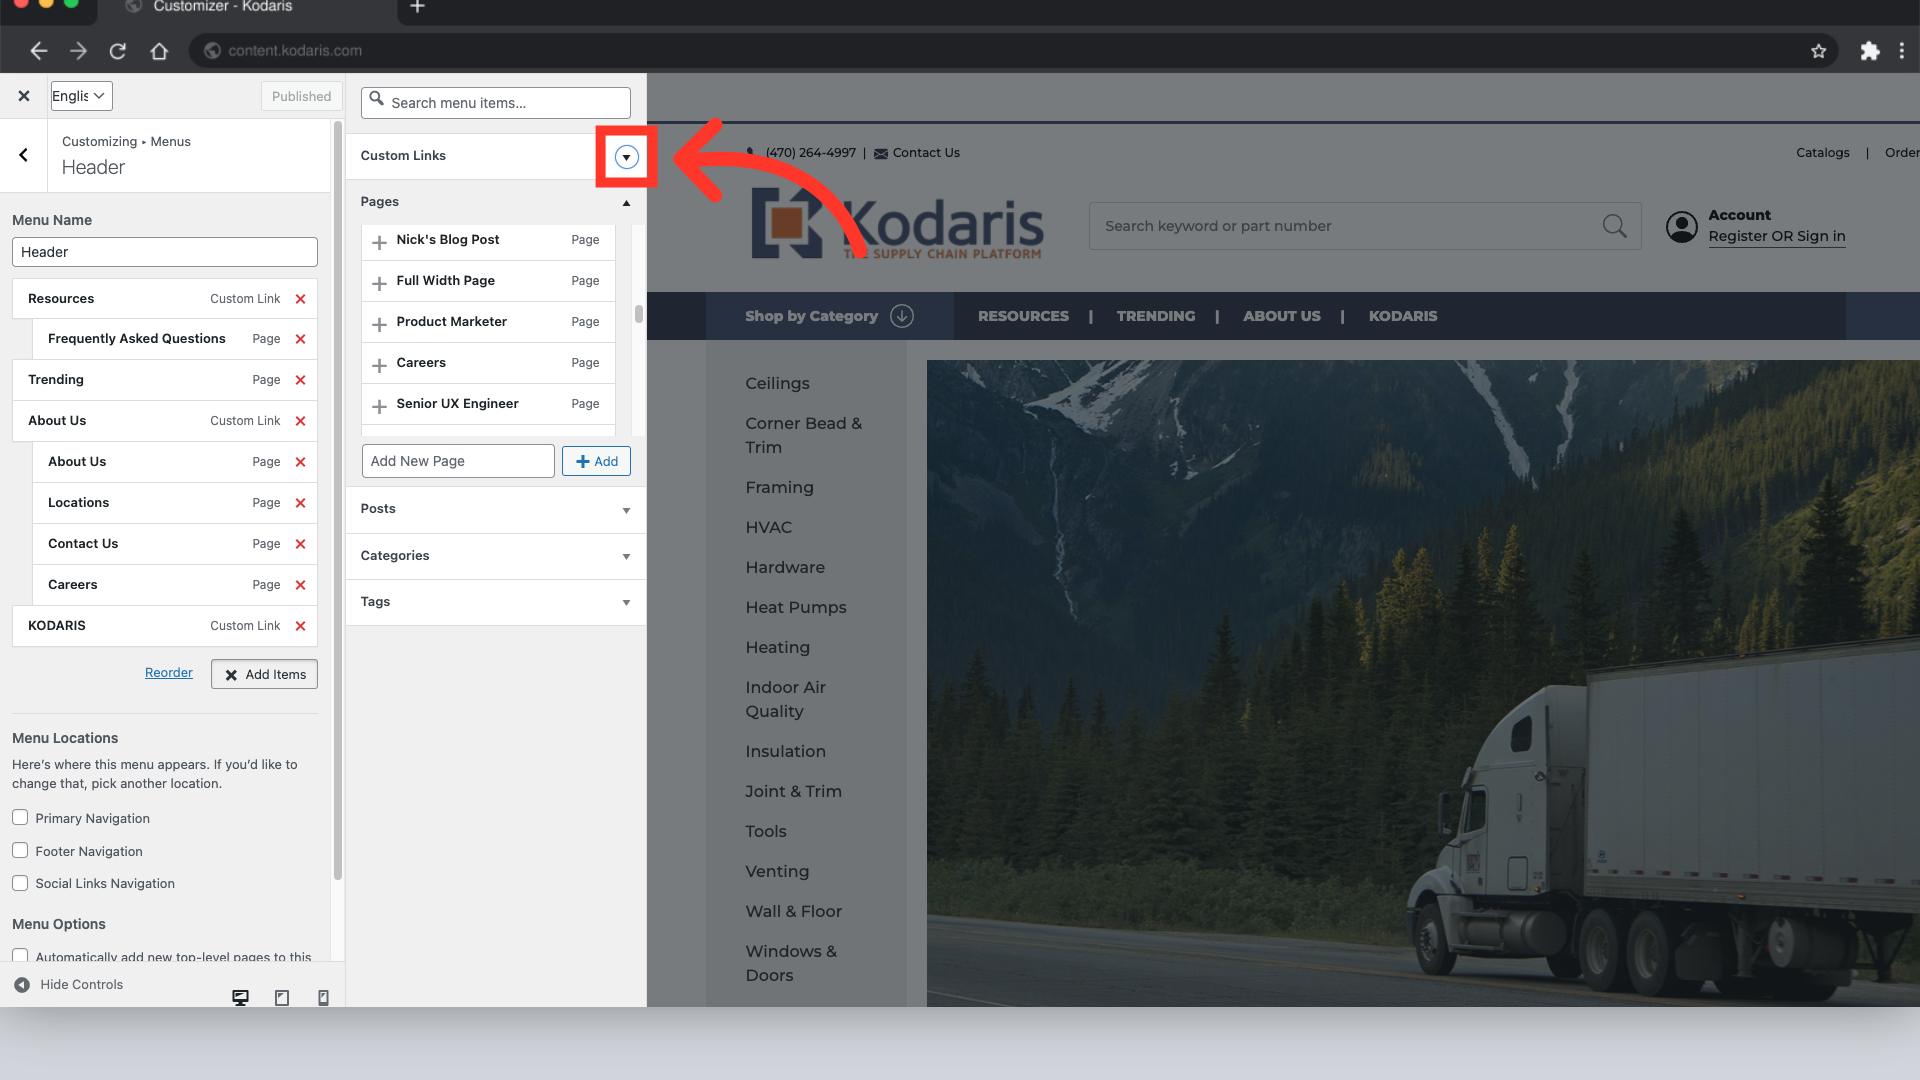
As mentioned earlier, there is a second way to add a new menu item to your header. To do this, click "Add Items".

If you wish to add an item to the menu that is not an existing content page, you can use the "Custom Link" feature to create many options. A few of these options would be: link to a product category, link to a PDF, link to any other page on your website, or add an external link.
You can manually add the URL you would like to use.
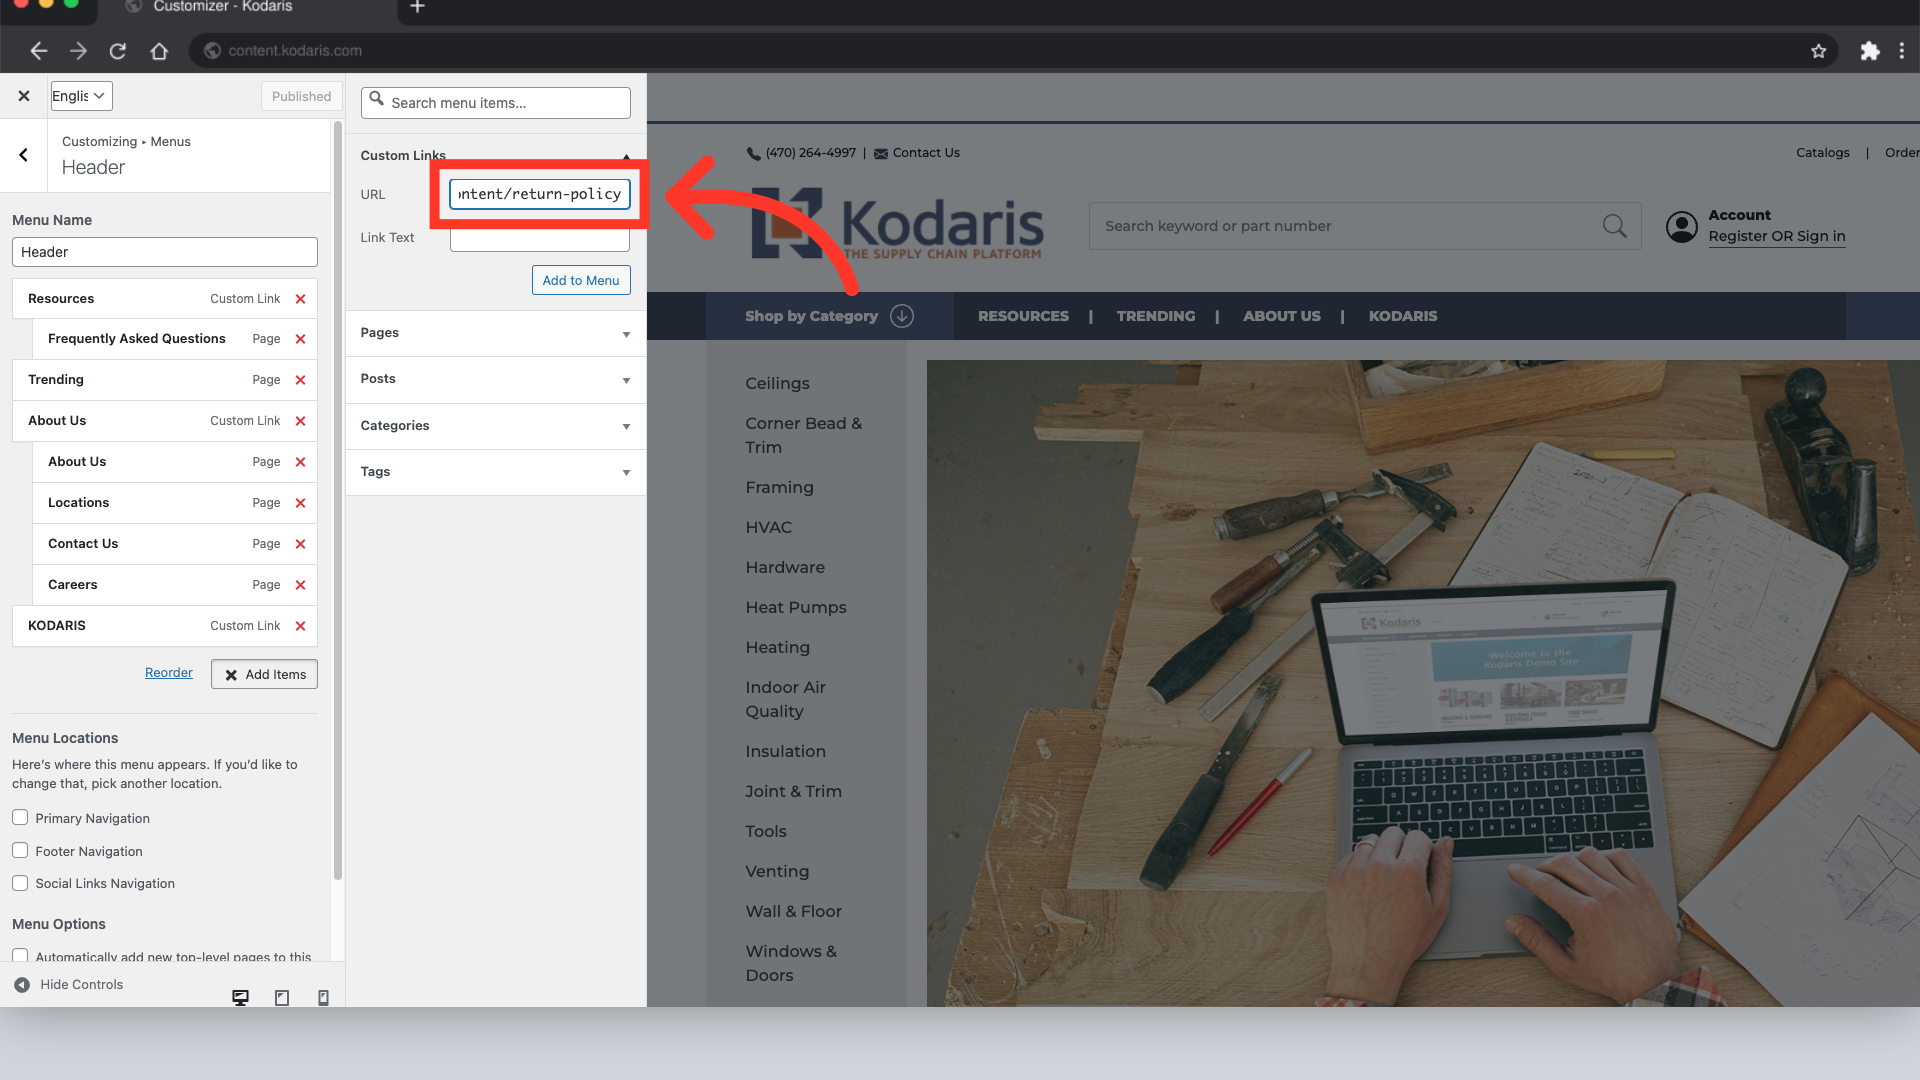
In the "Link Text" field, you will add the name of the menu item as you want it to appear in your header.

When finished, click the "Add to Menu" button.

Once you've added it to your header, it'll appear at the bottom of the list of menu items.

Again, if you'd like to adjust the placement of your new or existing menu items, click "Reorder" and follow the previously stated process.

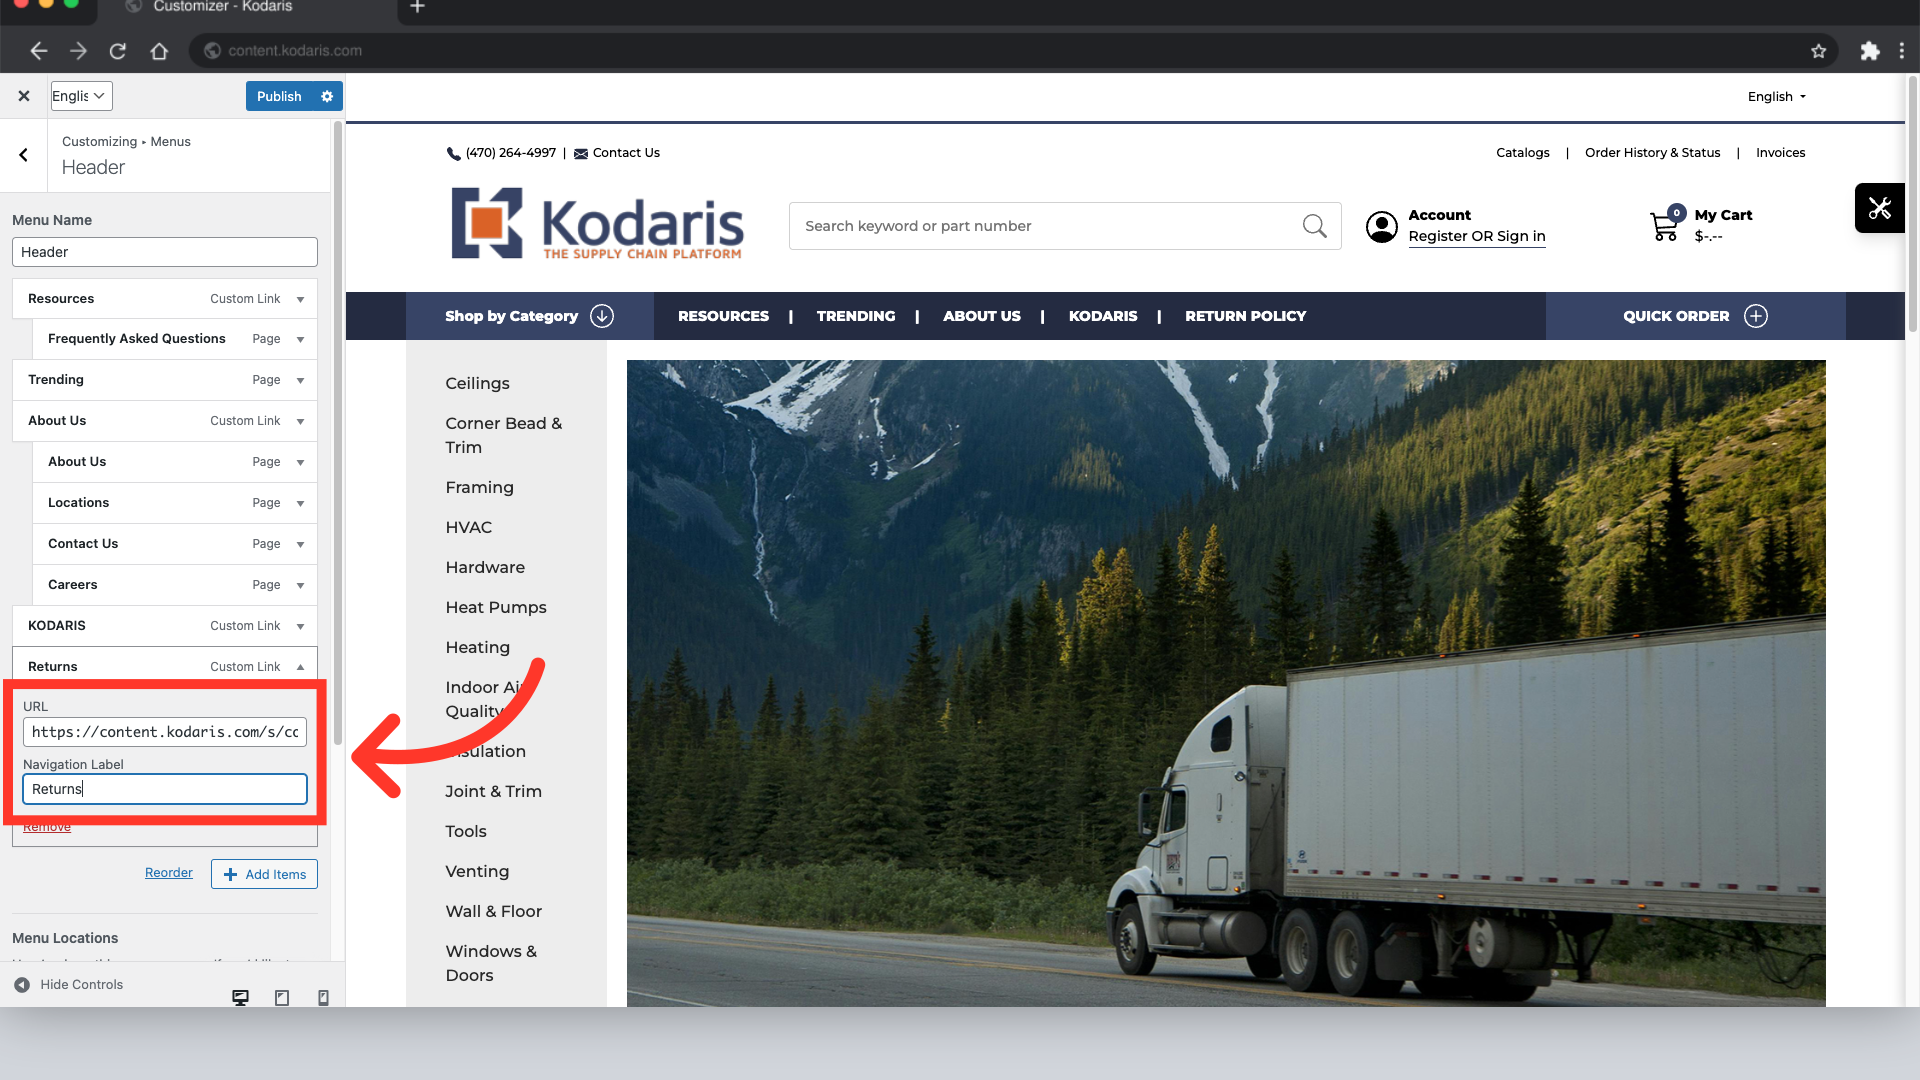
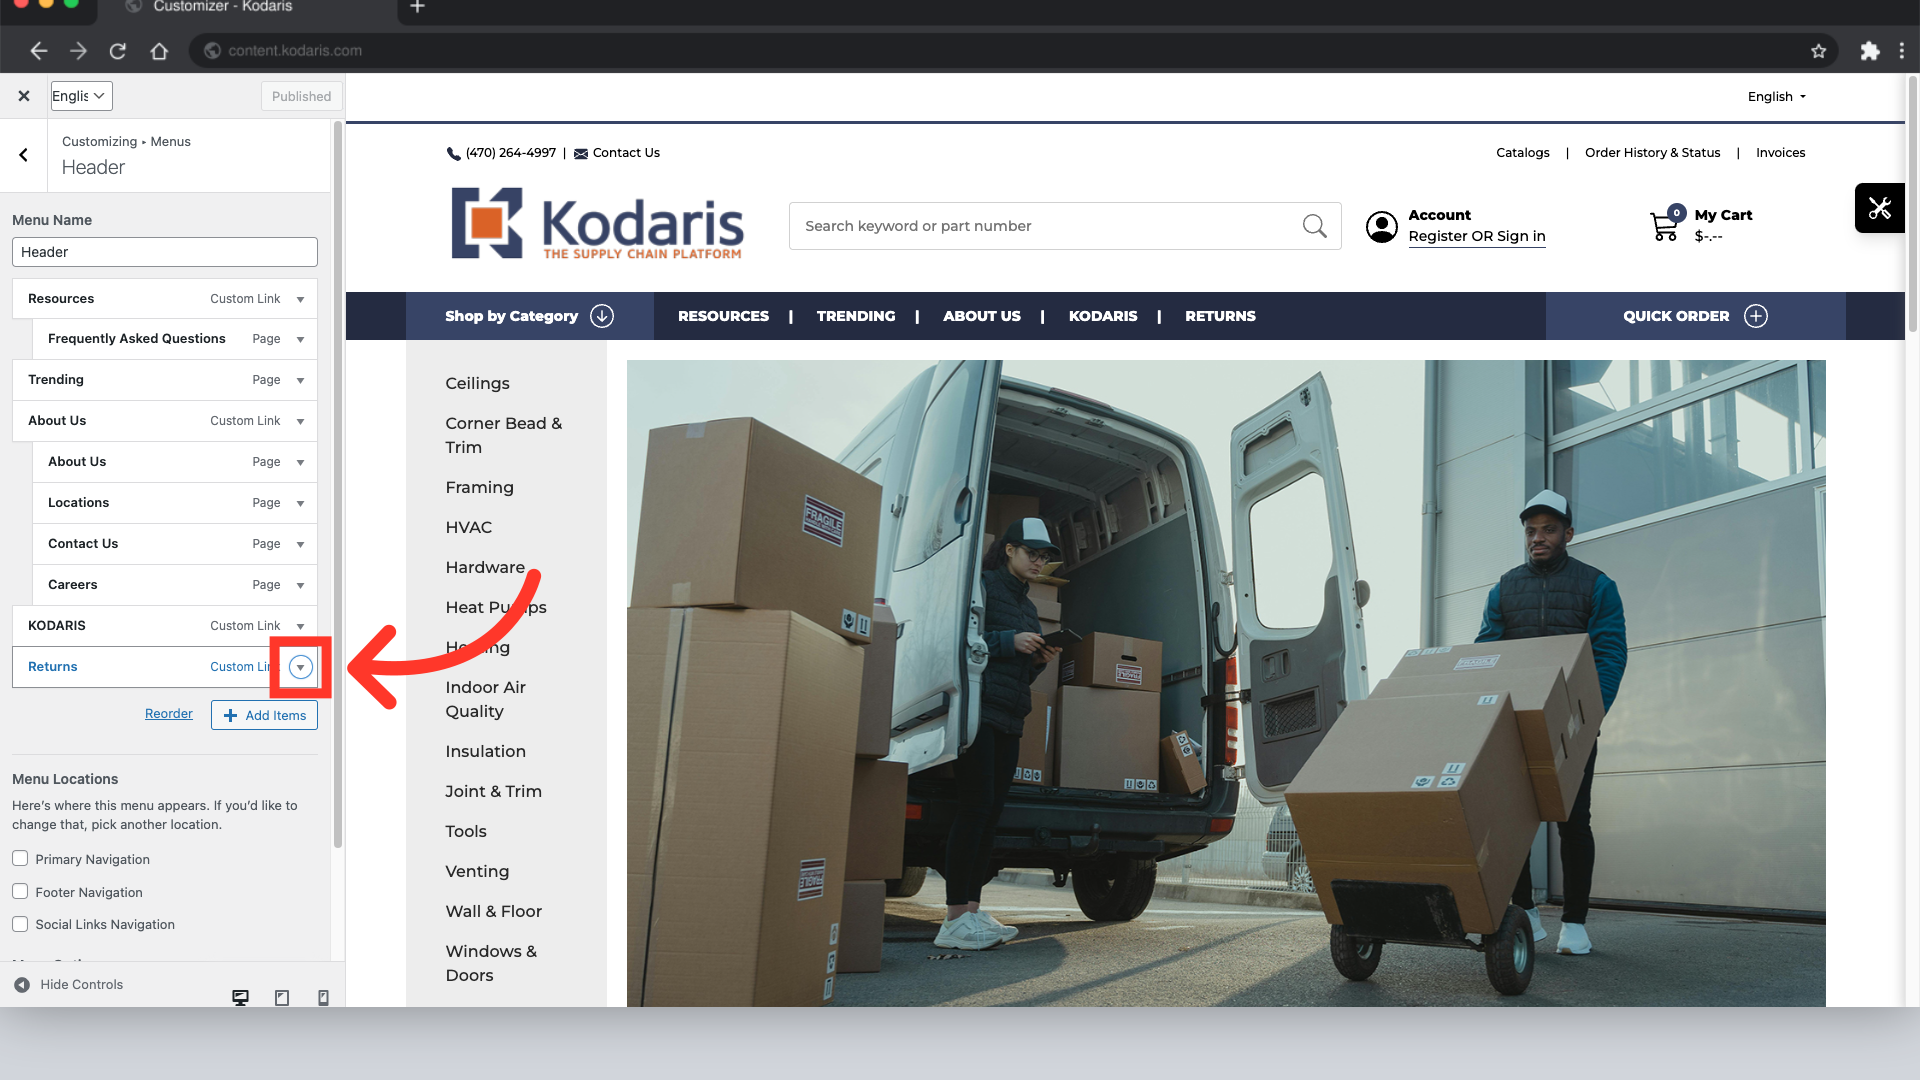
To edit a custom link label, click the dropdown arrow.

Use the fields to edit the URL and custom label.
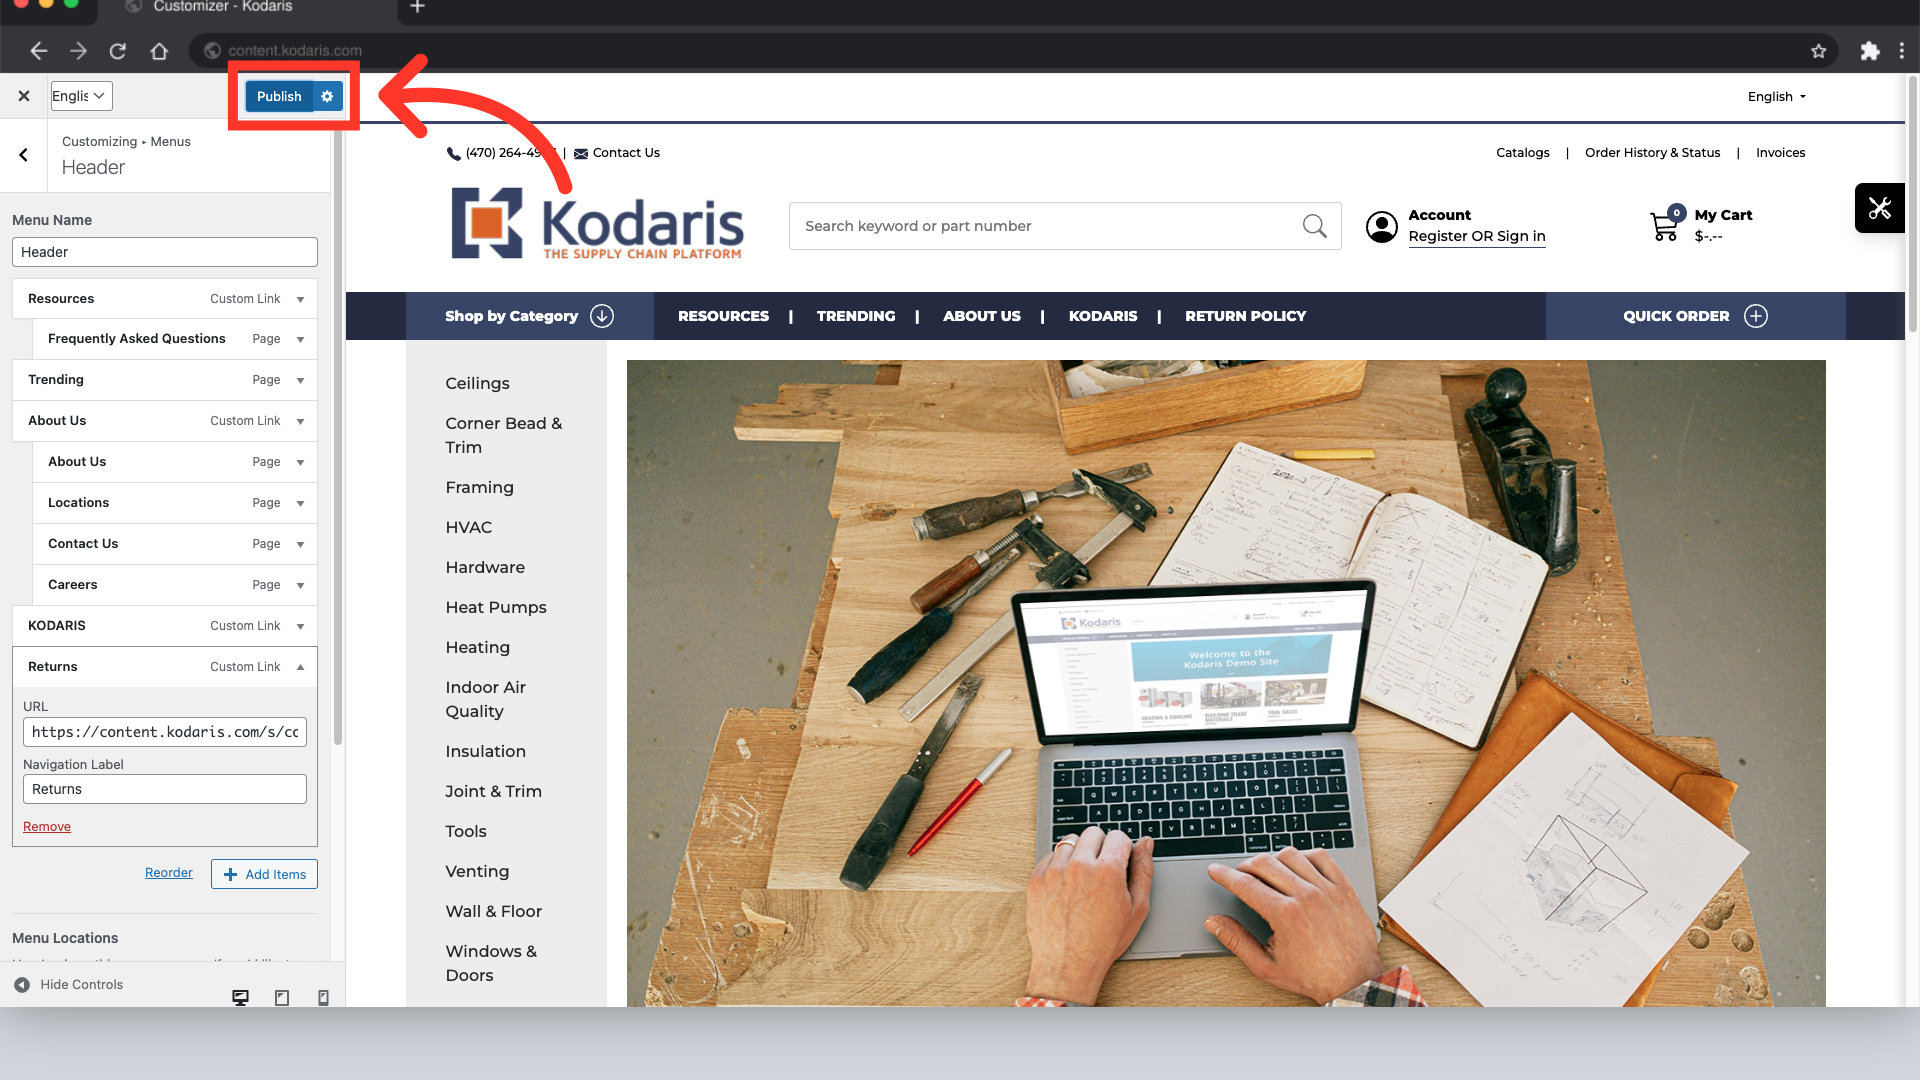
Save your changes by clicking the "Publish" button.
Once you save your changes, review the header menu to ensure the updates are correct. You'll notice that "Returns" is now a top level page.

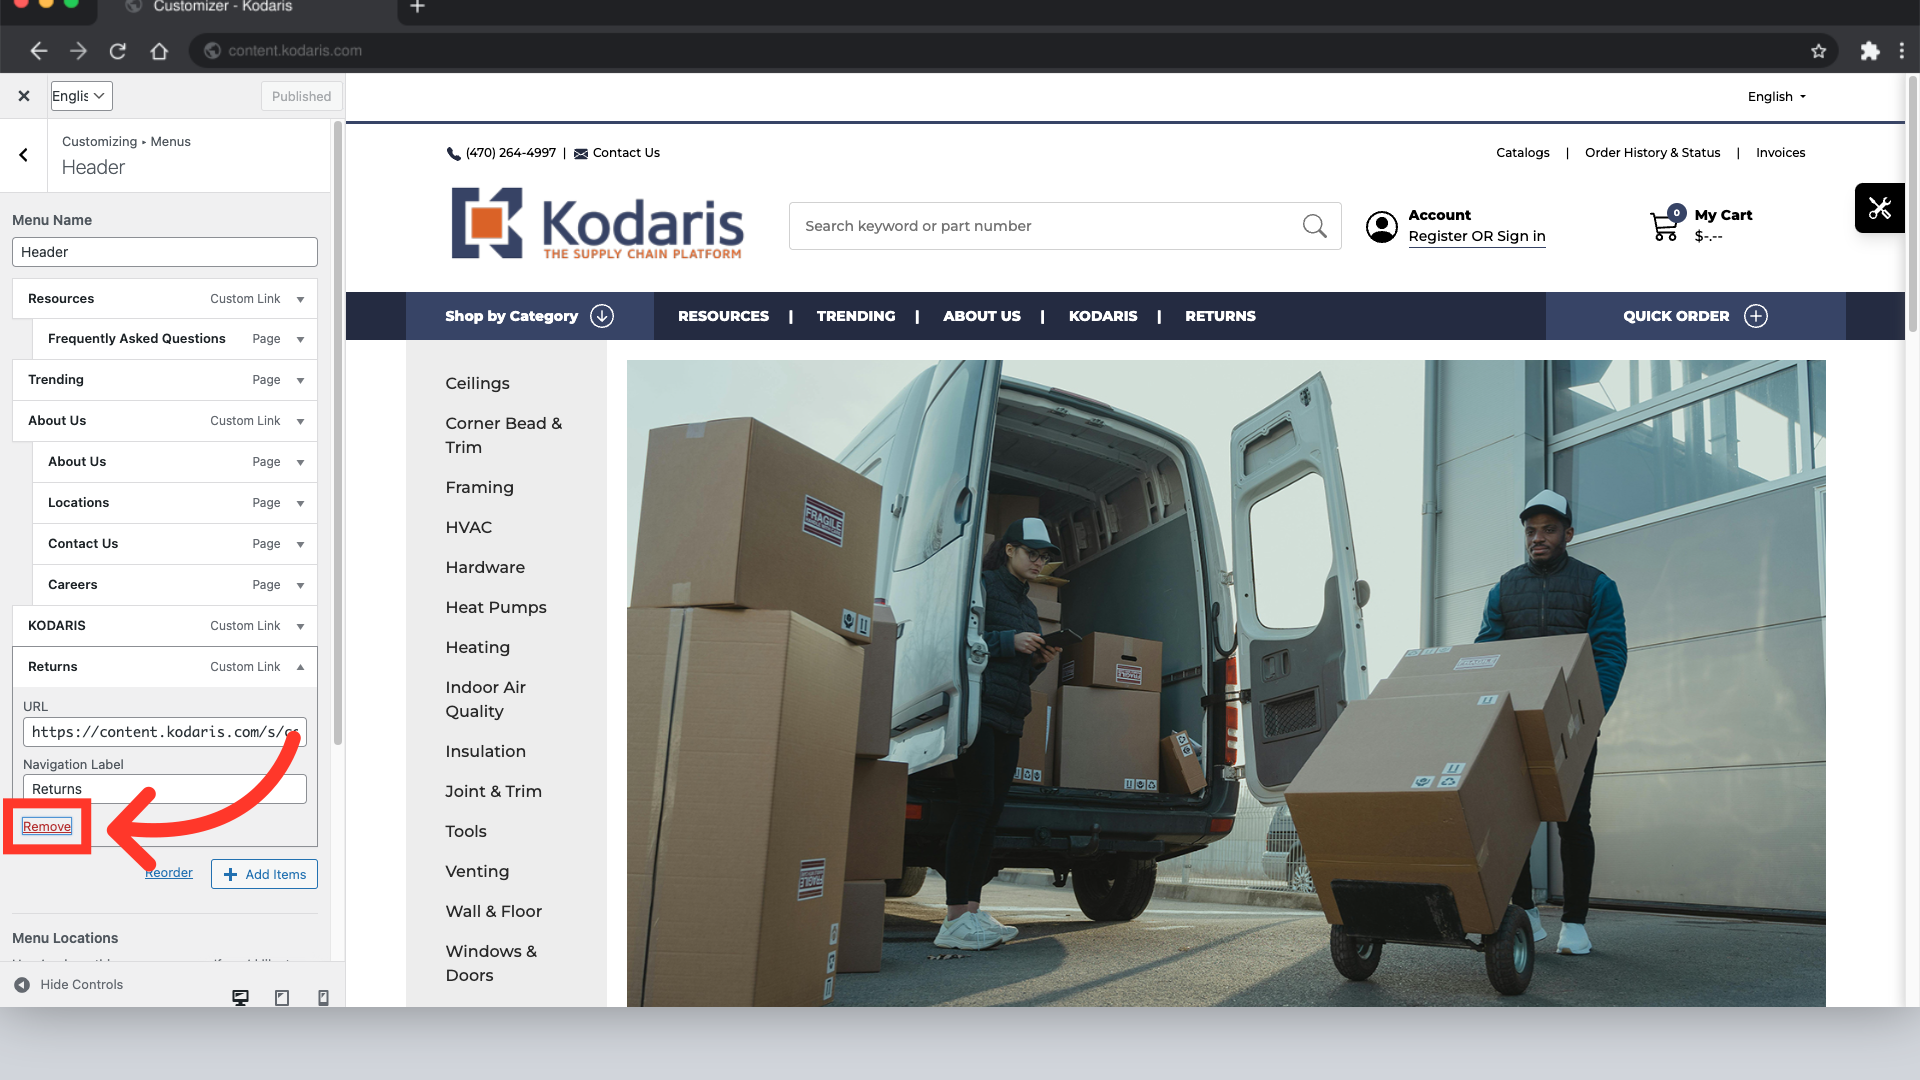
To delete a menu item, select the dropdown arrow next to the item you want to remove.
Select "Remove".
Select "Publish" to save your changes.

After deleting the menu item, you'll notice that "Returns" is no longer part of the header menu.
