If you are using the Ticket system, tickets can be assigned to employees while using the employee mobile app. While assignees are not required, you can add one or multiple assignees to a ticket. Once assigned, the assignee will receive notifications when there are changes to their Tickets. To start, tap the "Menu" icon.
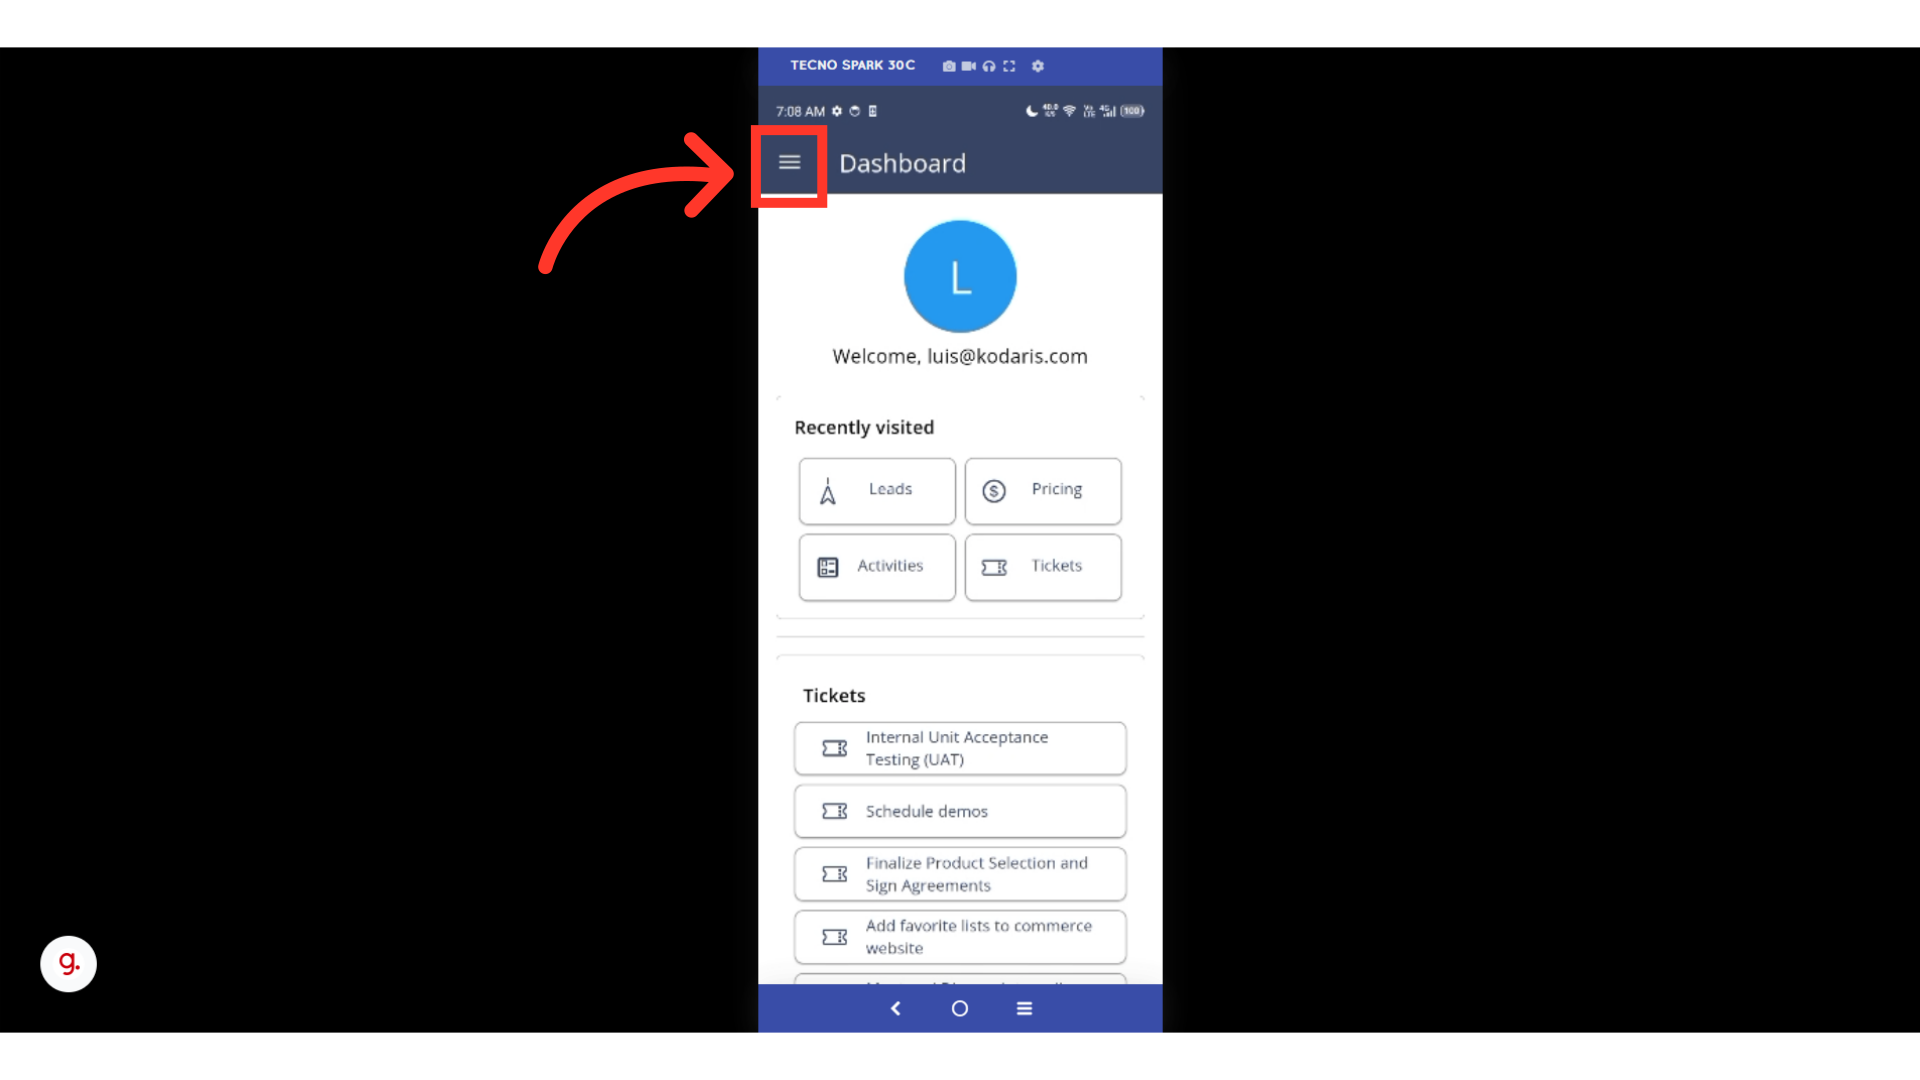
Then, select "Tickets". In order to access and update "Tickets" you will need to be set up either as an “administrator” or a "superuser", or have the roles of: "ticketView" and "ticketEdit".

Tap the "Show/Hide Columns" icon.

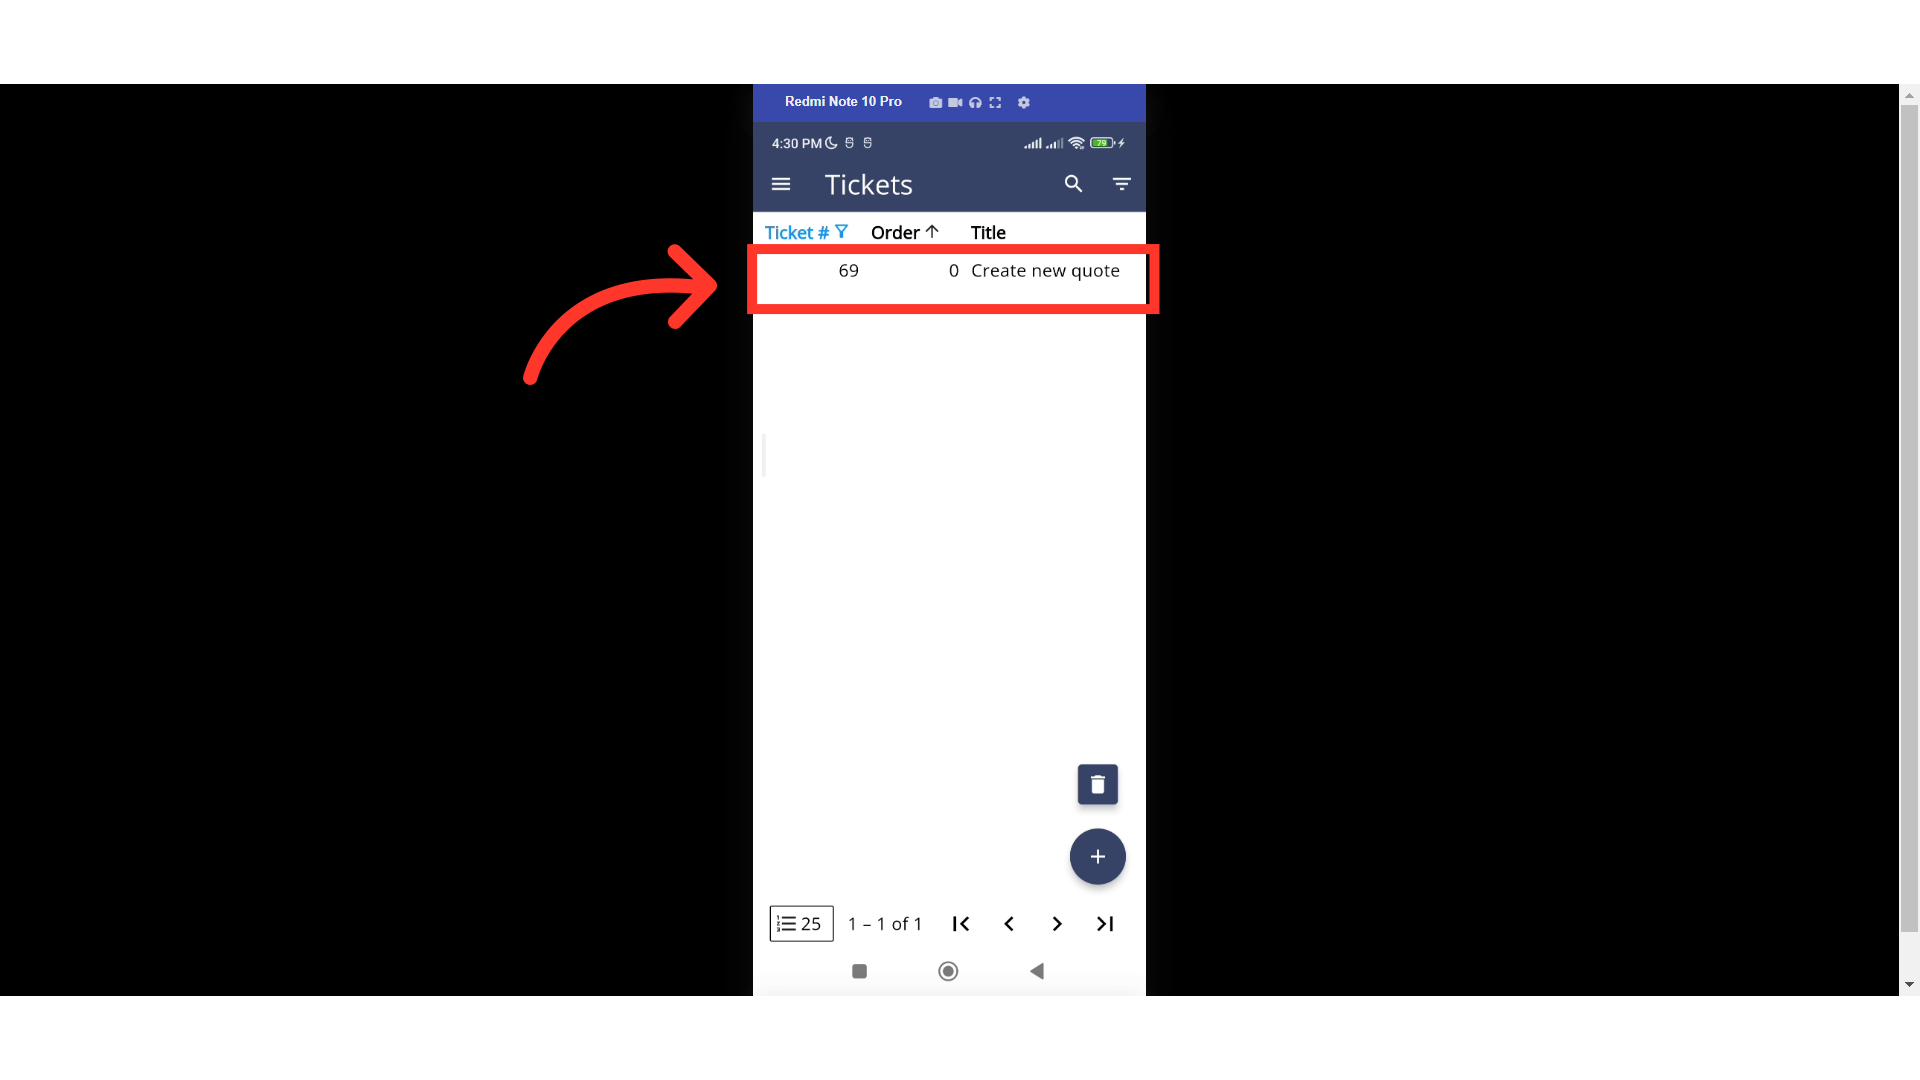
Search or Filter on the ticket you would like to assign.

Double-tap the ticket to view ticket details.
Swipe the tabs to the left.
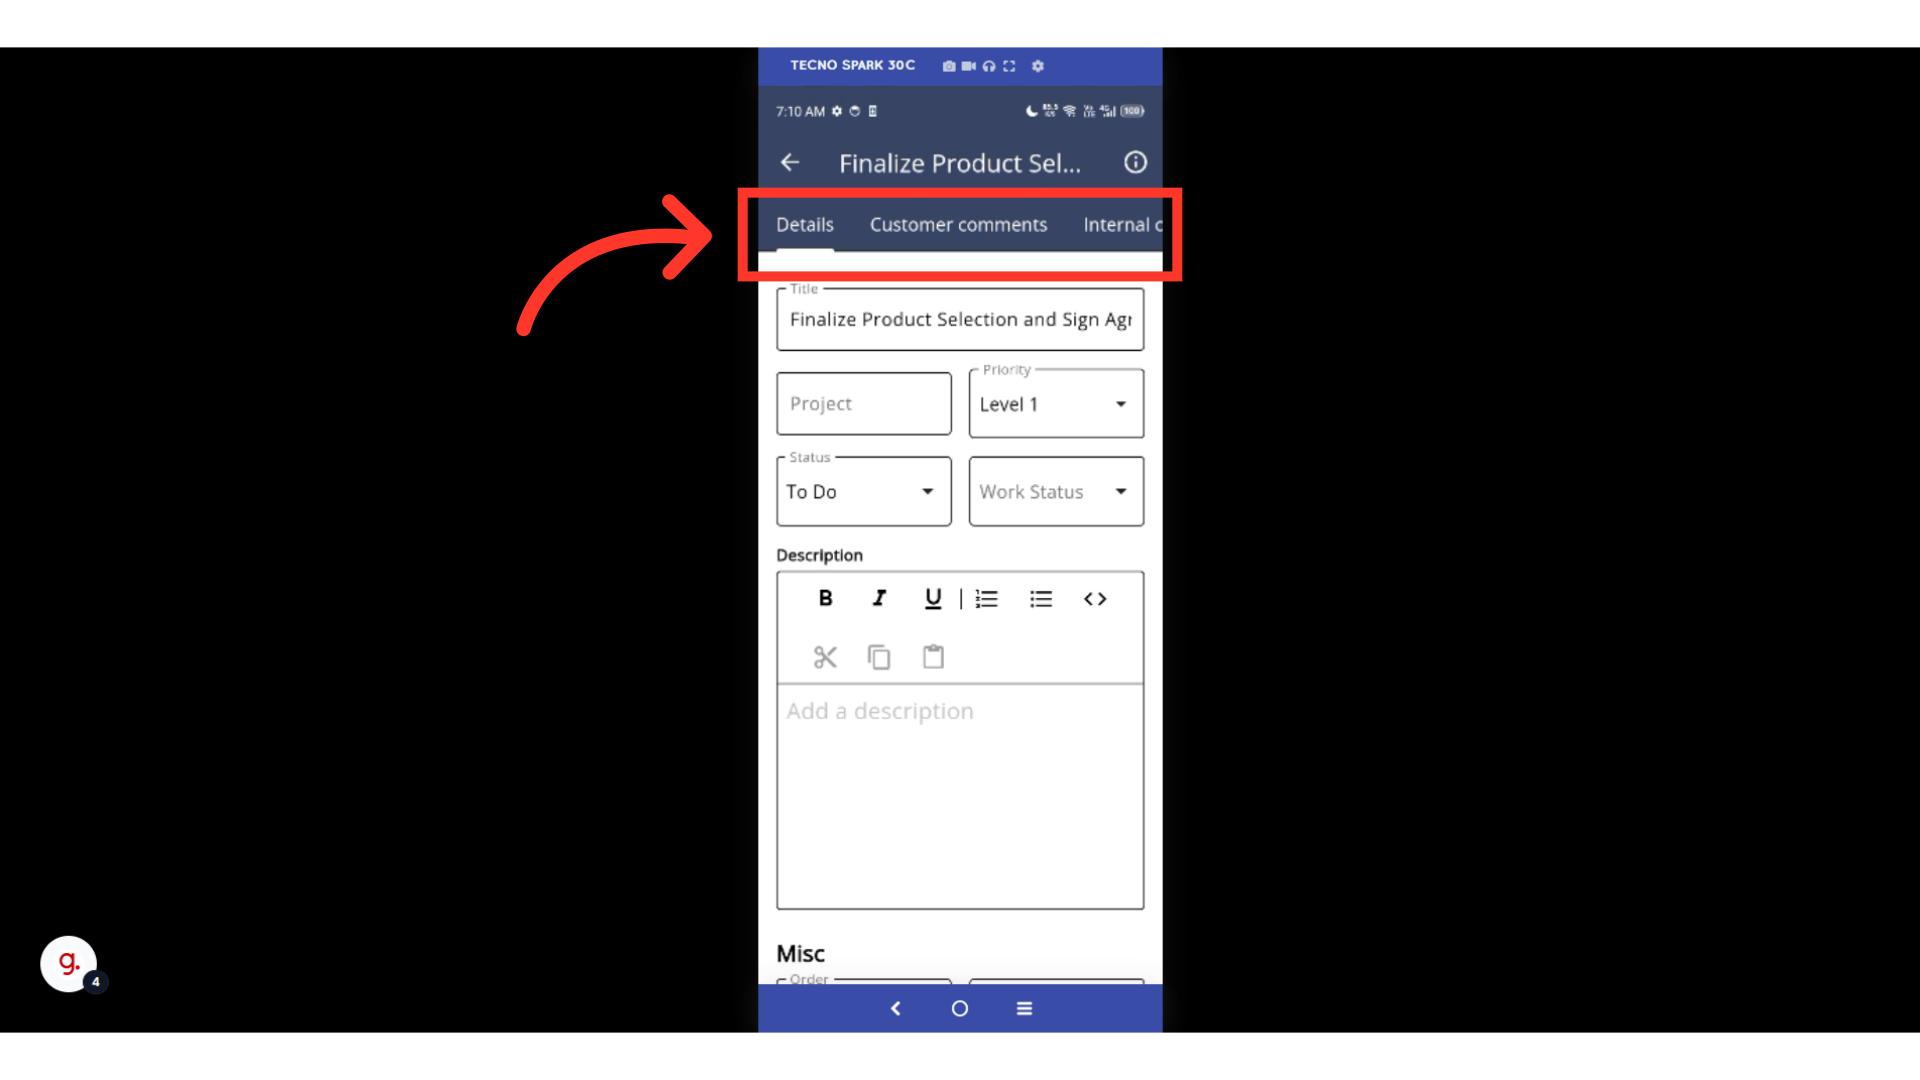
Then, tap on the "Assignees" tab

The first field is "Assignment Type". This field is optional. Select from the dropdown if desired.

To assign the ticket, enter the email of the employee. Then tap to confirm selection.

Assignees will receive a notification when updates have been made to the assigned ticket. For an employee to receive a notification when a ticket has been assigned, they would need to opt into "Ticket is assigned to employee notification".
