It is possible to add customers to accounts in two different ways: by using the "CRM" section or the "Customers" section in the Operations Portal. To start adding customers by using the "CRM" section, navigate to "CRM".

Then, click "Companies". In order to access "Companies" you will need to be set up either as an "administrator" or a "superuser", or have the appropriate roles: "companyView and companyEdit", or "crmCompanyView and crmCompanyEdit". Just a reminder, "crmCompanyView and crmCompanyEdit" access only allows employees to view companies that are assigned to them.

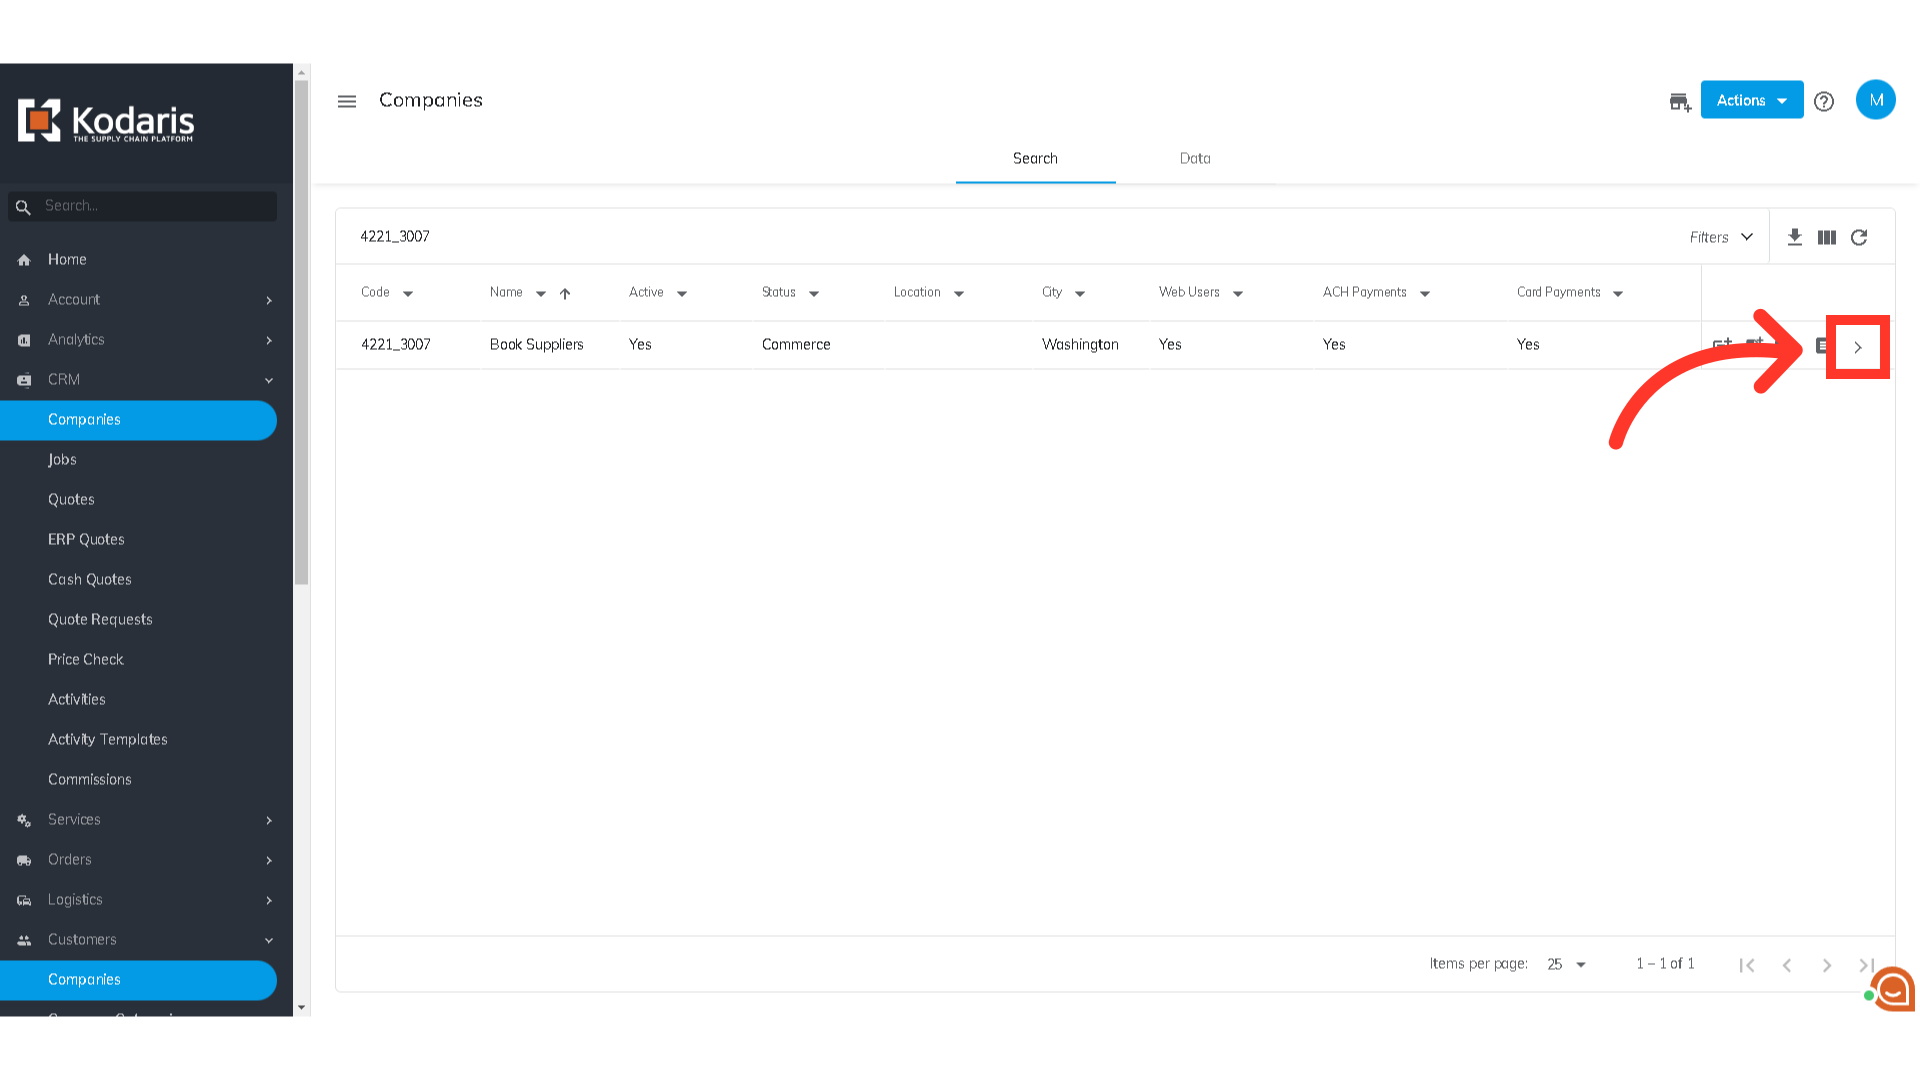
Enter the company code or name in the "Search..." field.

Locate the company and click on its more details icon.
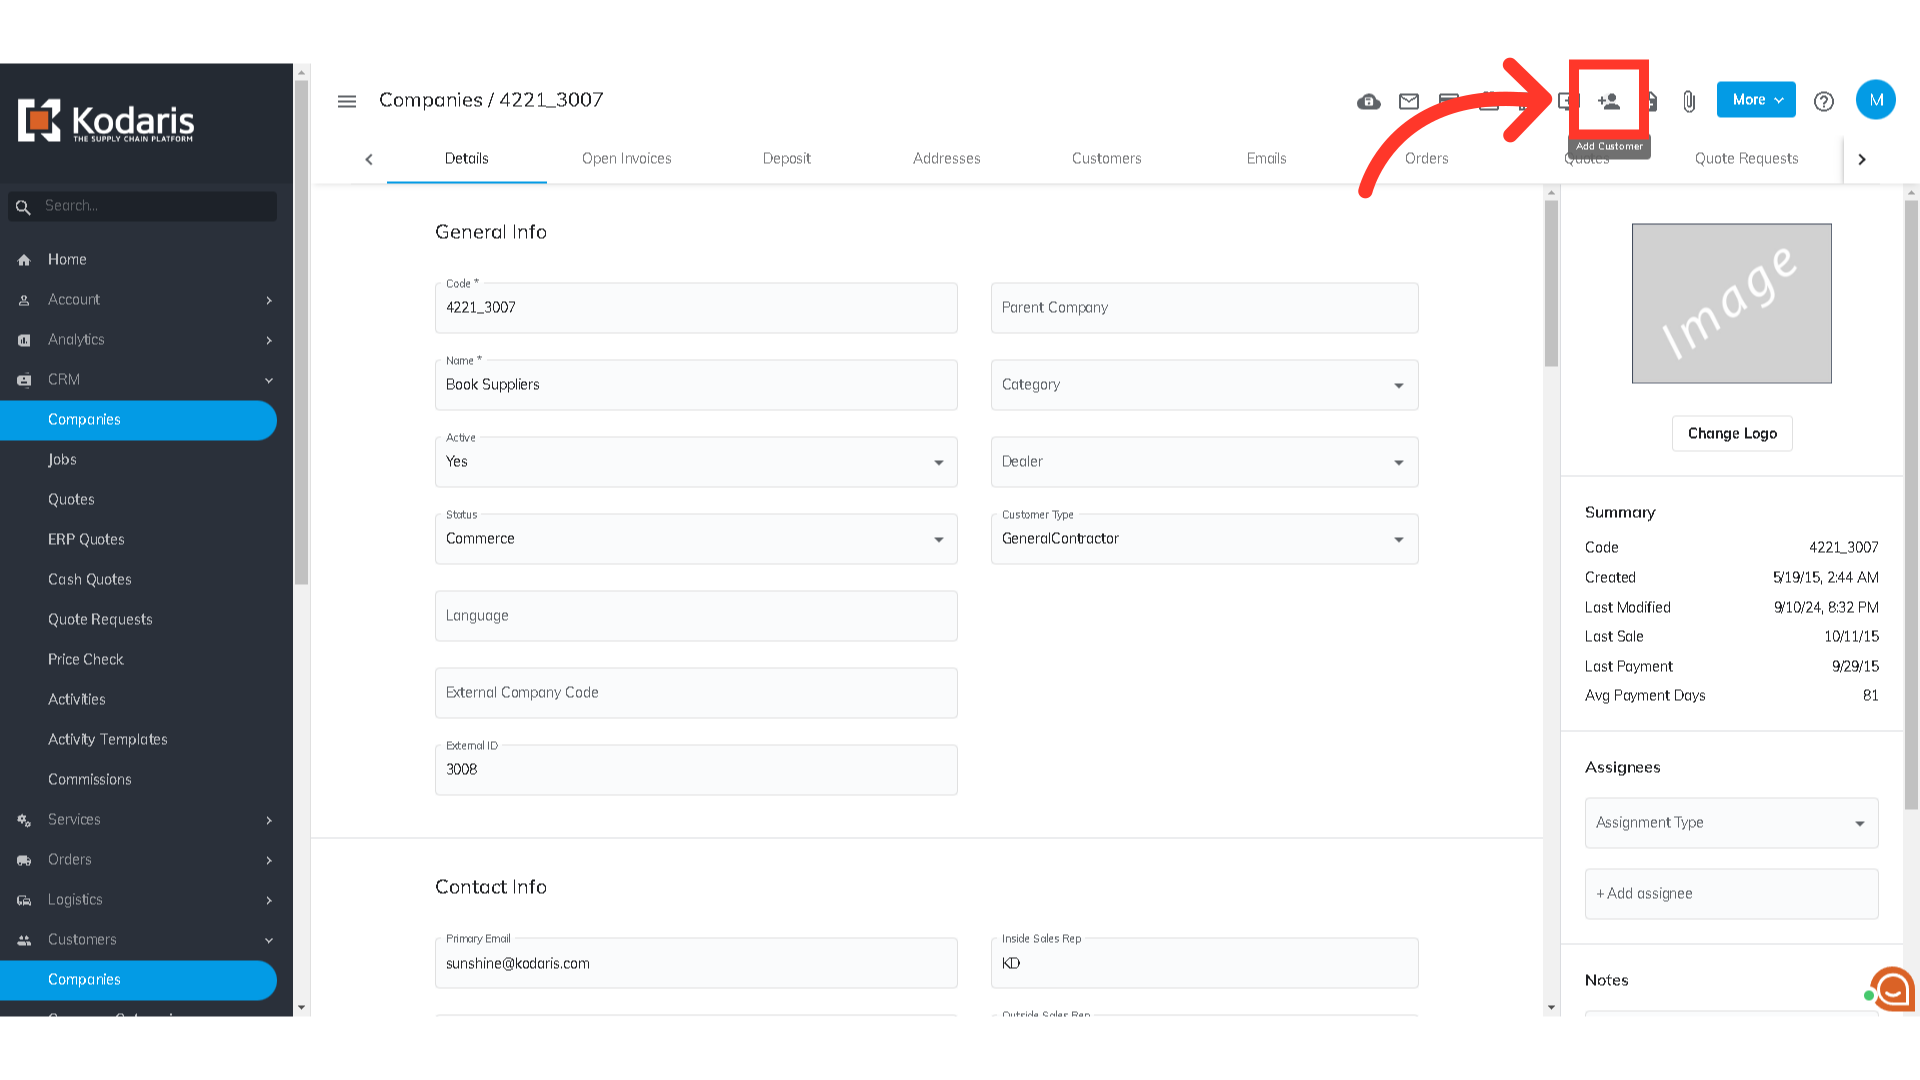
Click the "Add customer" icon.
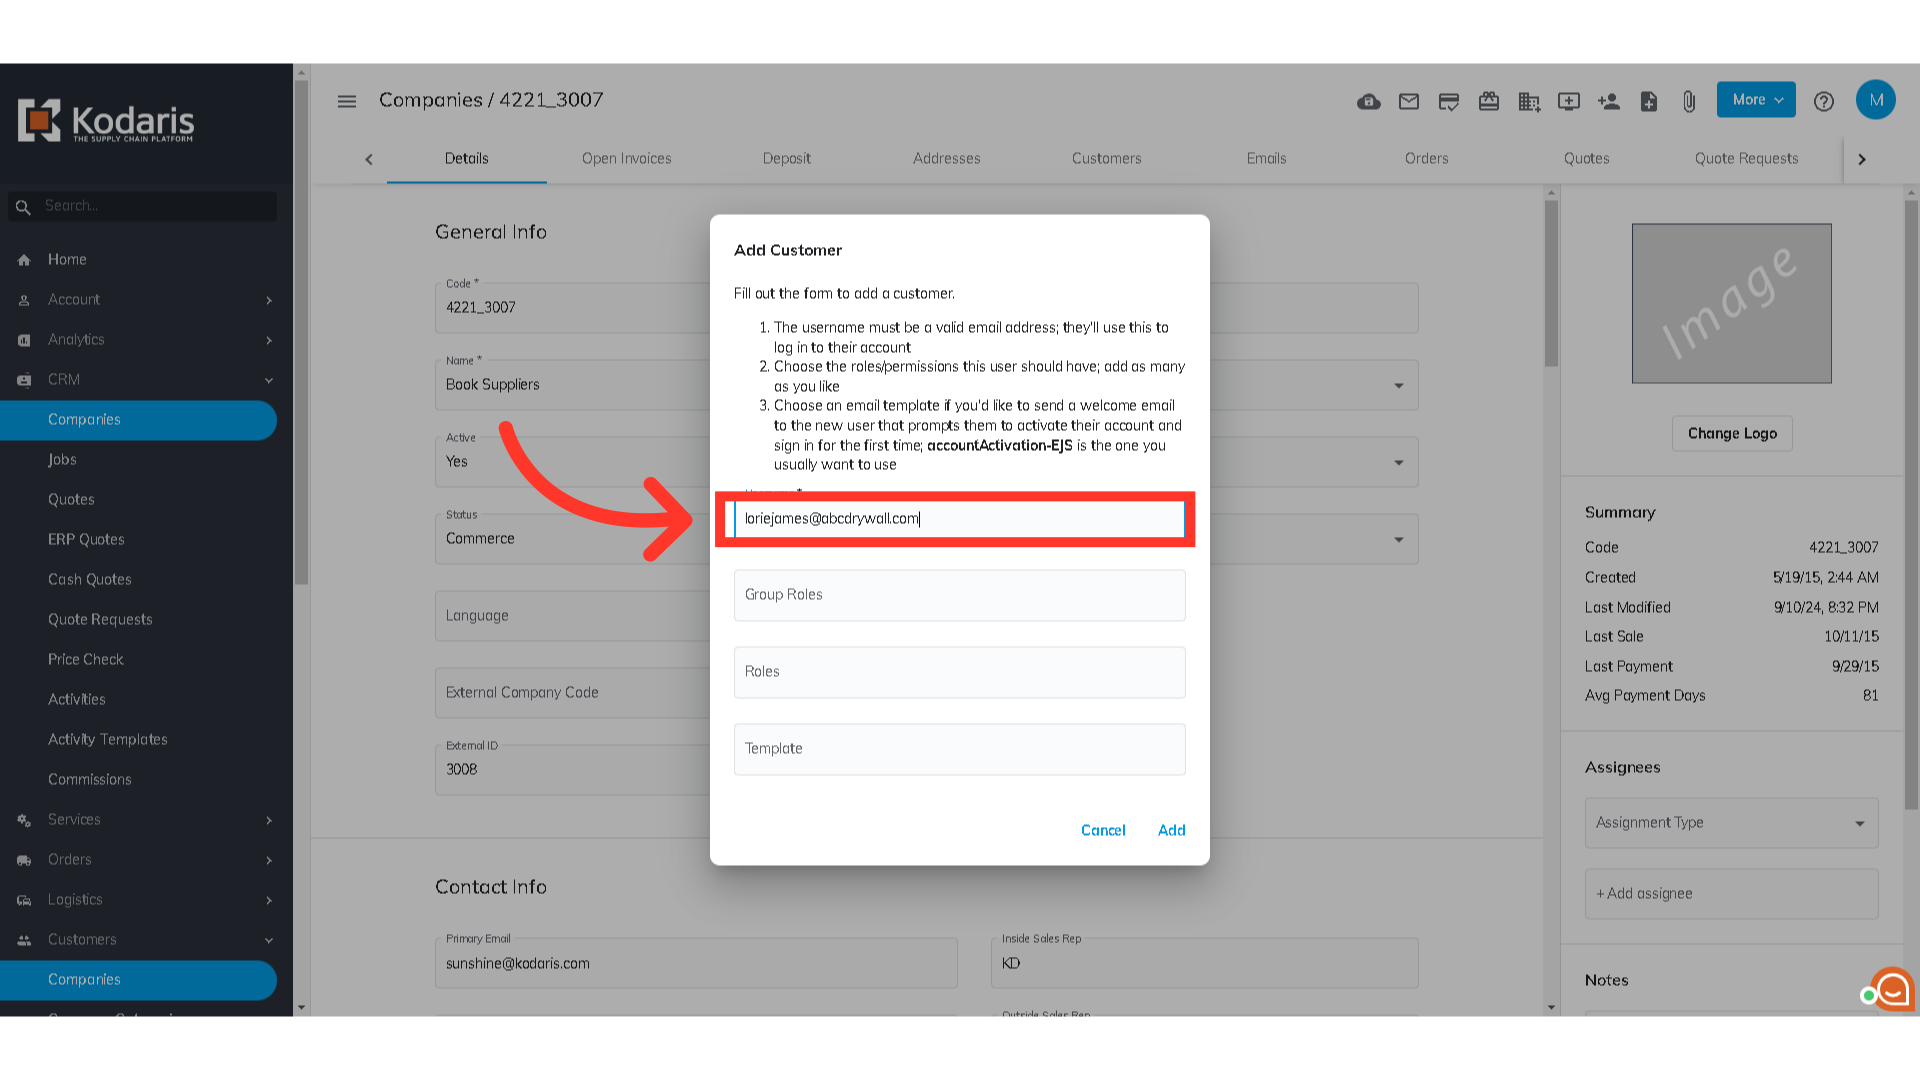
Upon clicking the "Add Customer" button, a dialog box will appear. The customer details will need to be entered. In the first field, enter the username of the customer - the username would be the email of the customer.
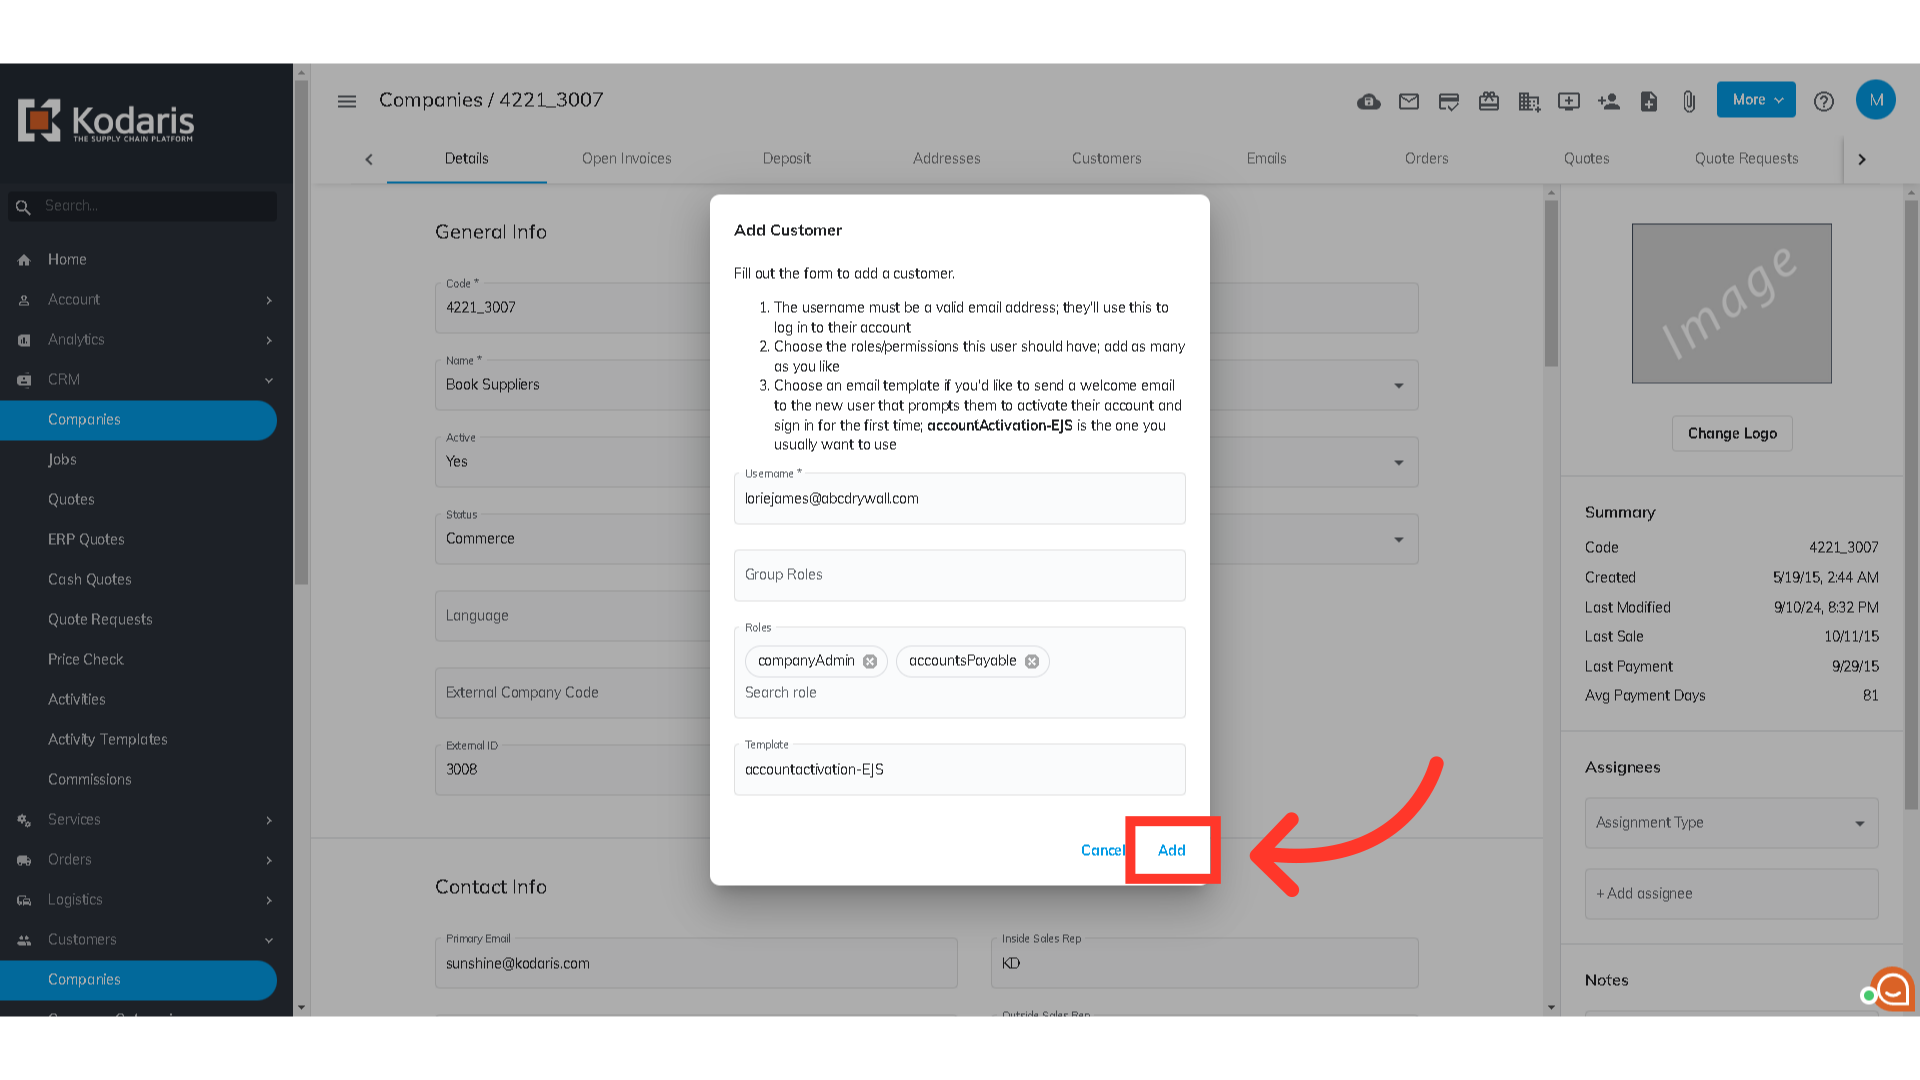
Now, you can assign customer roles to this user. If you want to assign group roles, just click on the "Group Role" field and select which group role you want to assign the customer from the options.

You can also assign individual roles from the "Roles" field dropdown.

In the "Templates" field, enter and select "accountactivation-EJS" to send the customer a welcome email.

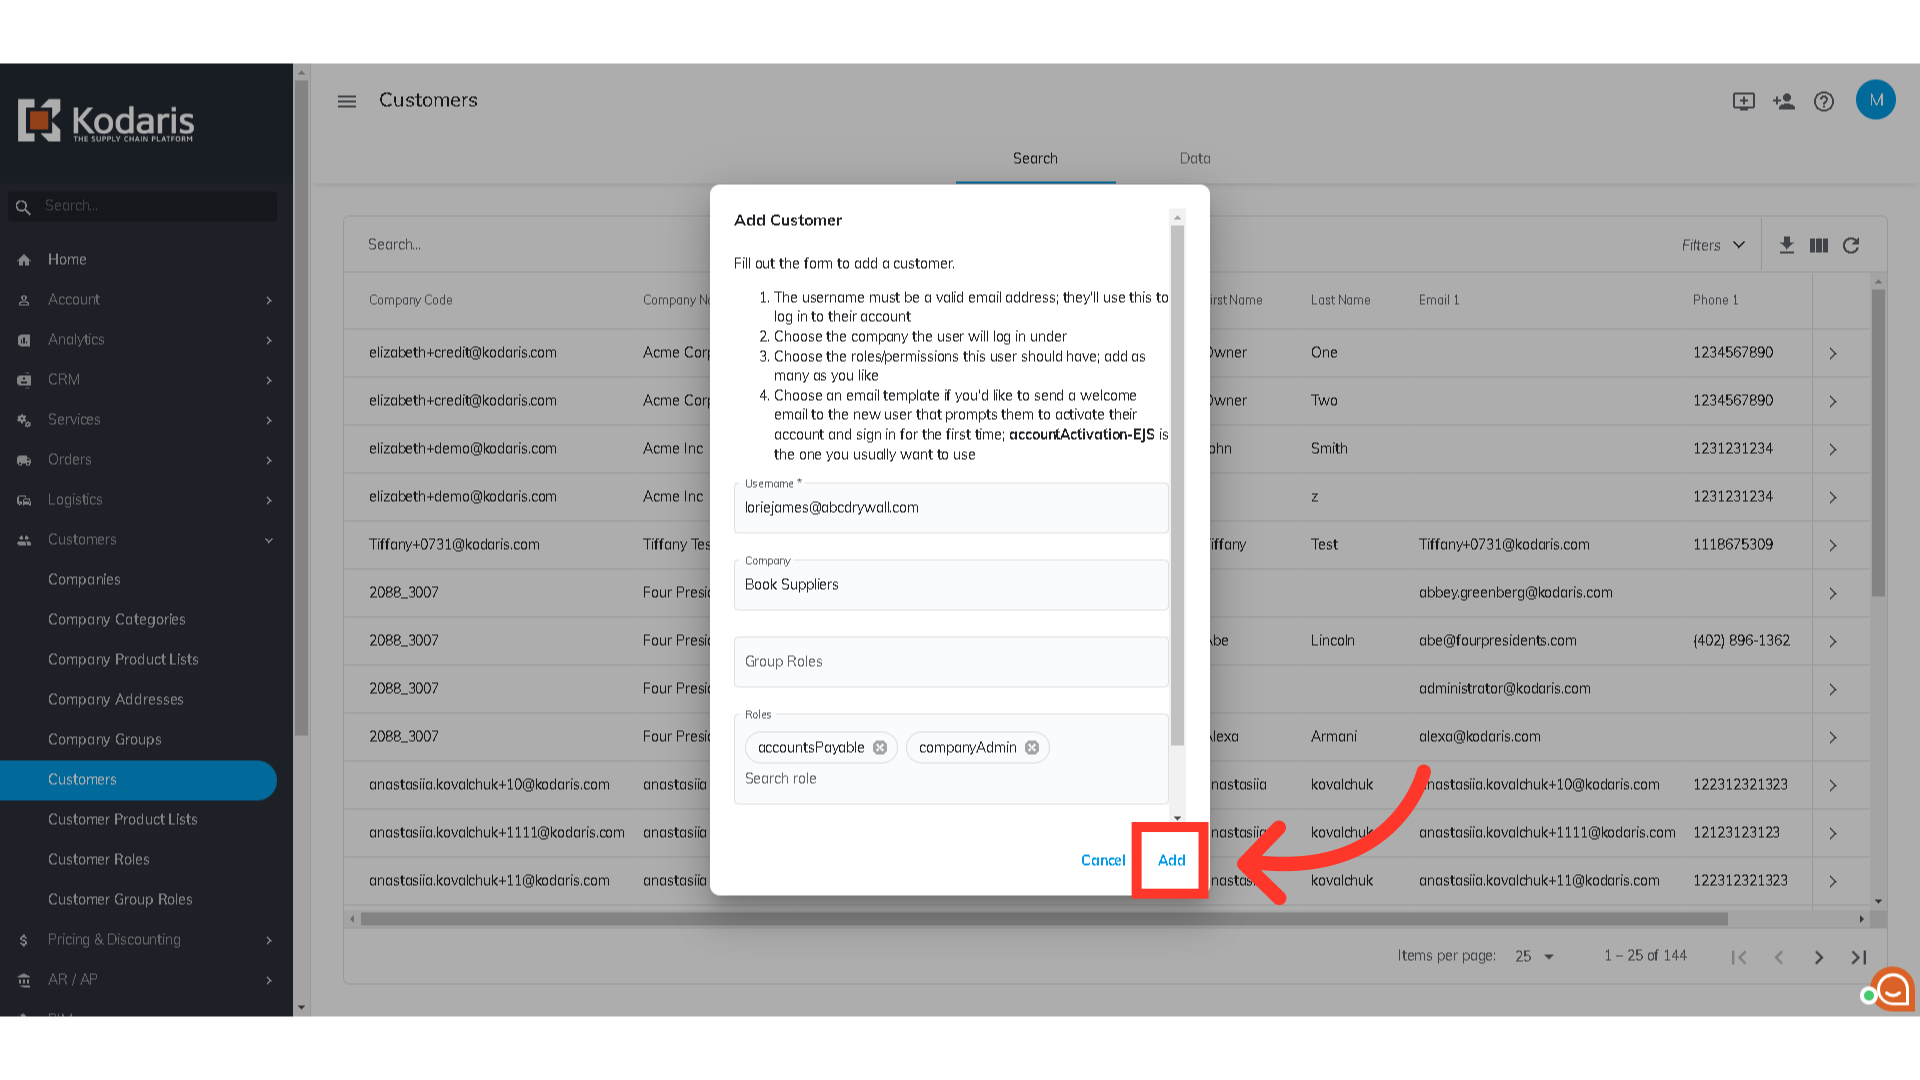
When everything looks good, click the "Add" button.
After you add the customer to the account from the CRM section, you will be redirected to the Customer's Details page where you can further update the customer information.
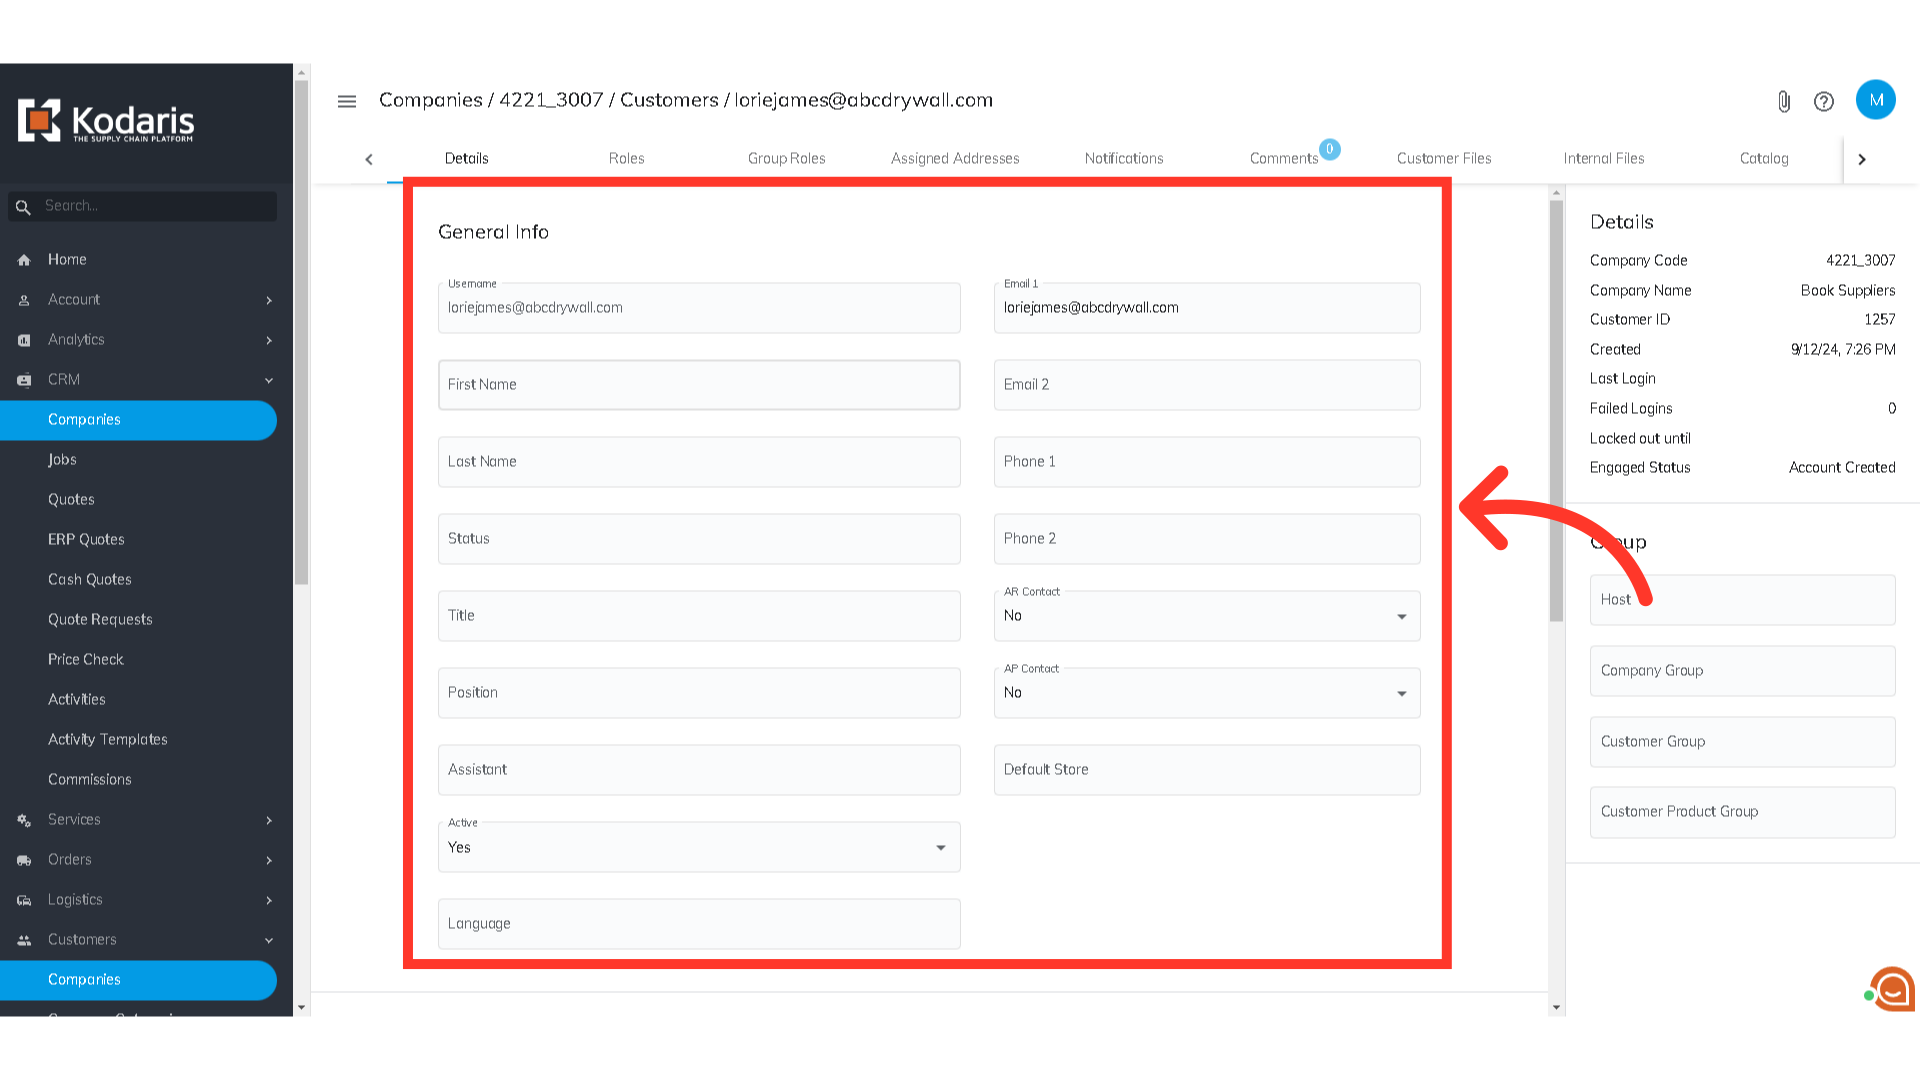
To add customers by using the "Customers" section, click "Customers". In order to access "Customers" you will need to be set up either as an "administrator" or a "superuser", or have the appropriate roles: "customerView and customerEdit".

Then, select the "Customers" option.

Click the "Add customer" icon.

A dialog box will appear. Complete all the fields with the needed information. The first field is the Username - this would be the customer's email address.
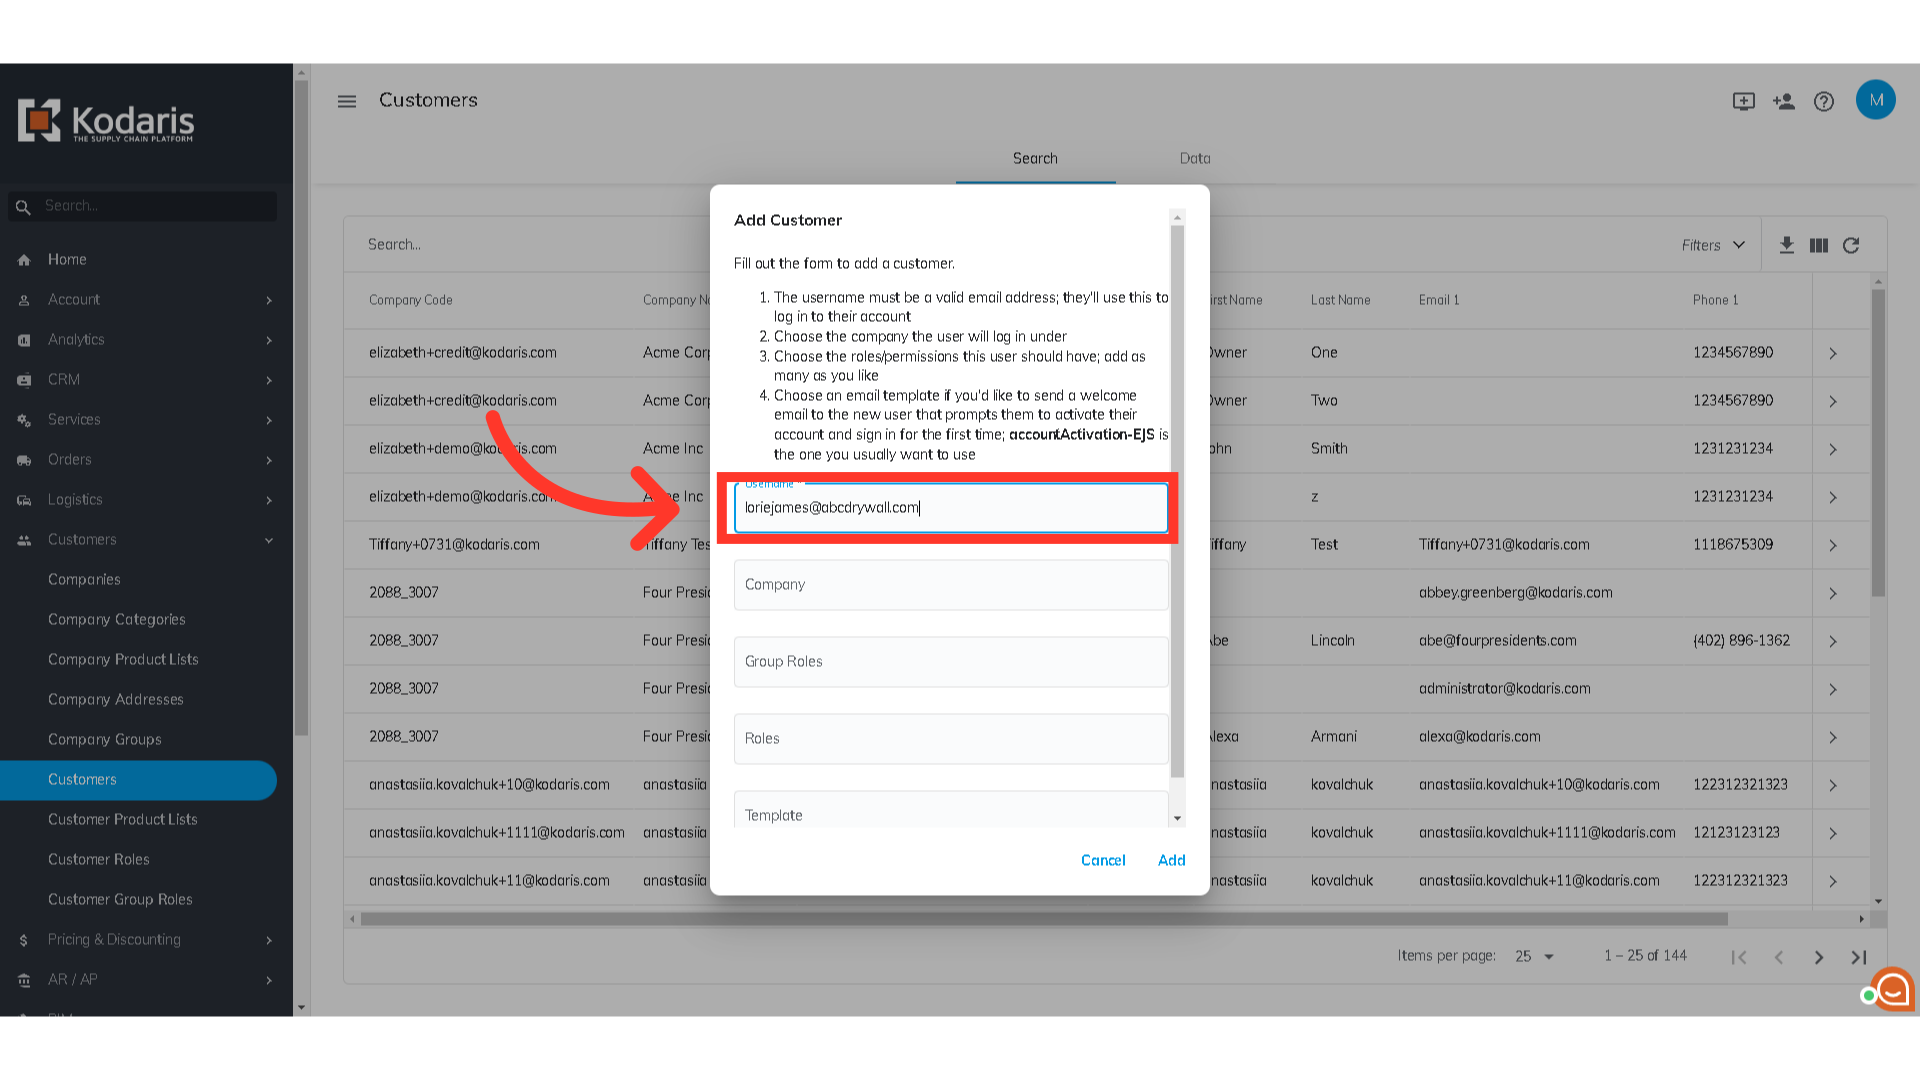
In the "Company" field, enter the company code or name in the field. Then, select it from the options.

If you want to assign group roles, just click on the "Group Role" field and select which group role you want to assign the customer from the options.
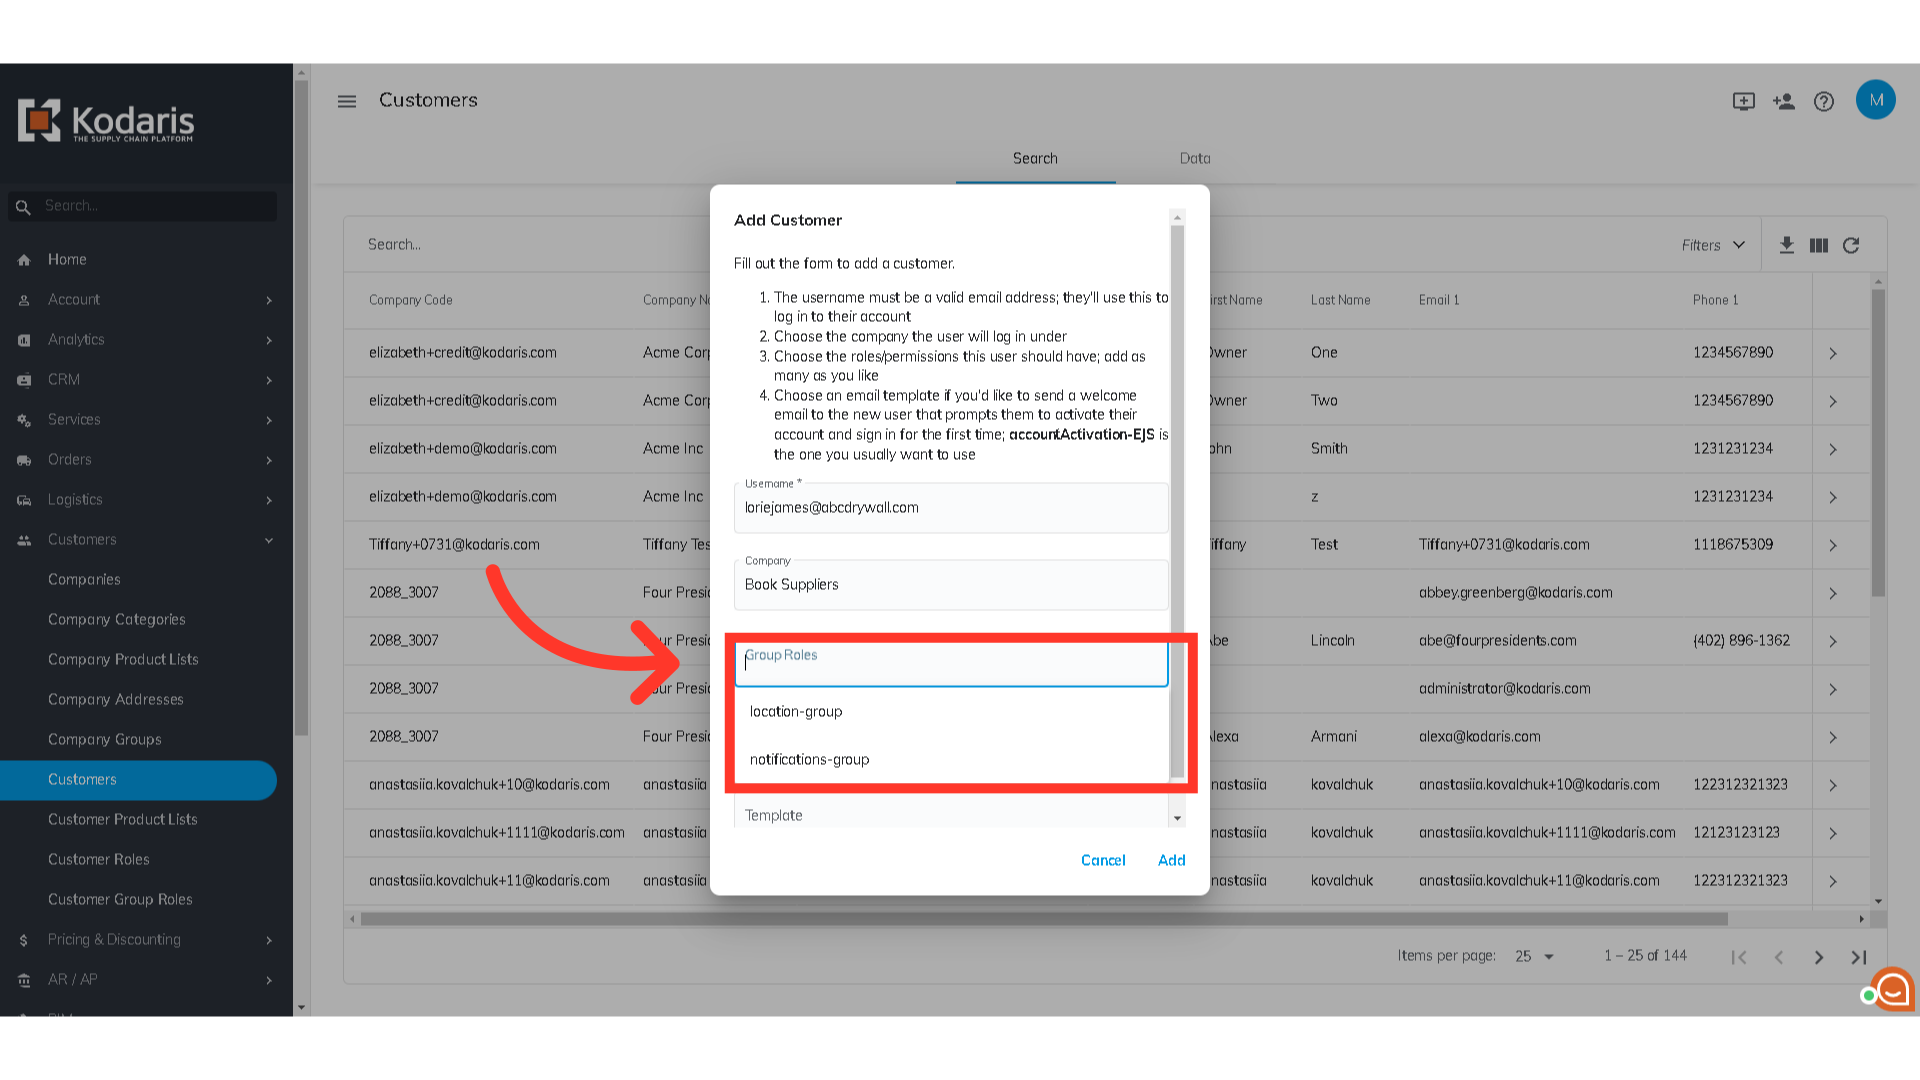
You can also assign individual roles from the "Roles" field dropdown.

Search "accountactivation-EJS" template by typing it in the "Templates" field and then selecting it from the options. This template is the welcome email that customer will receive once they are activated in the portal.
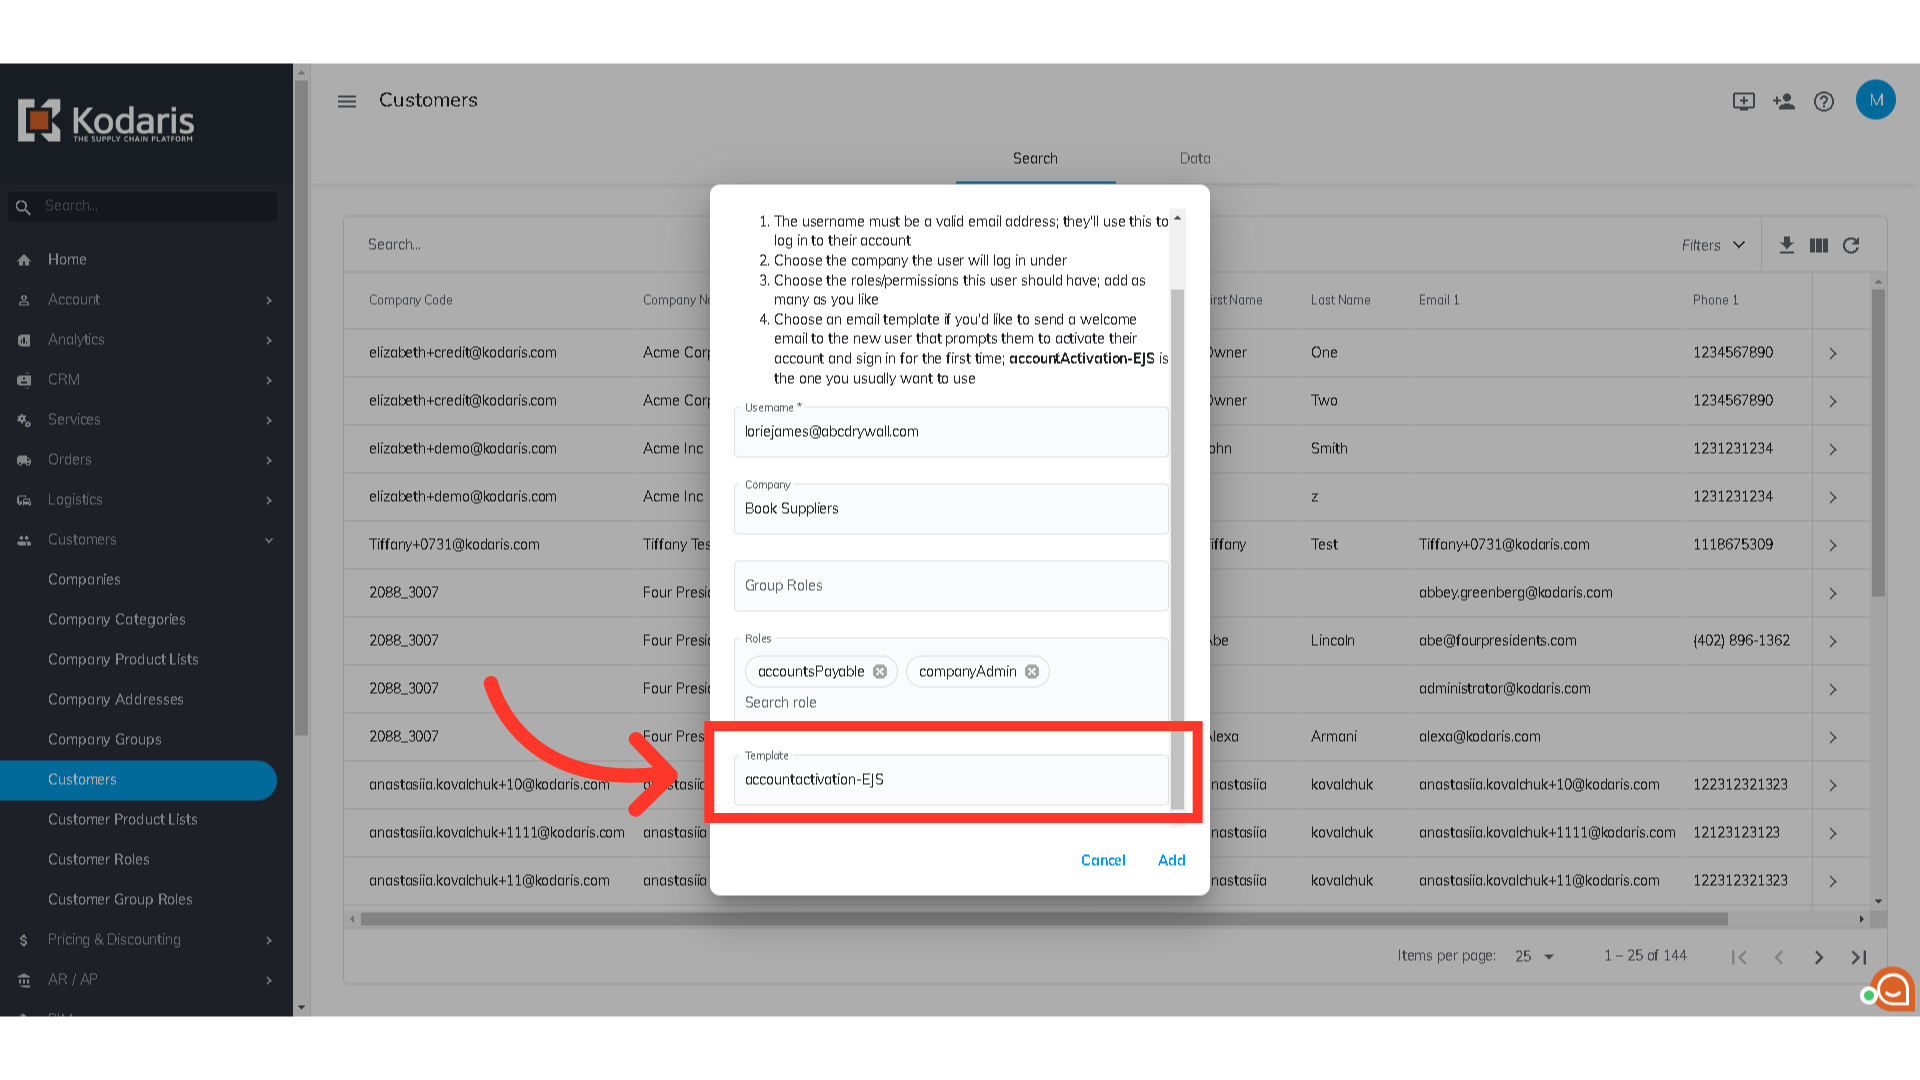
Click on "Add" to add the customer in the system with the selected roles once everything looks good.
You will be redirected to the Customer's details page where you can further update customer information.
