Attributes can be viewed and assigned to products many different ways in the operations portal. Currently, if you have twenty or less attributes to a product, you can easily view and assign them by working in the attribute assignment tab. To view, start by navigating to "PIM" in the operations portal.

Select "Products".

Choose the "Attribute Assignment" tab.

Click on the "show/hide" icon to view the grid options.

You can see that there is the option to add twenty attribute columns to the grid. Using these columns, you can assign attributes to products or remove them.

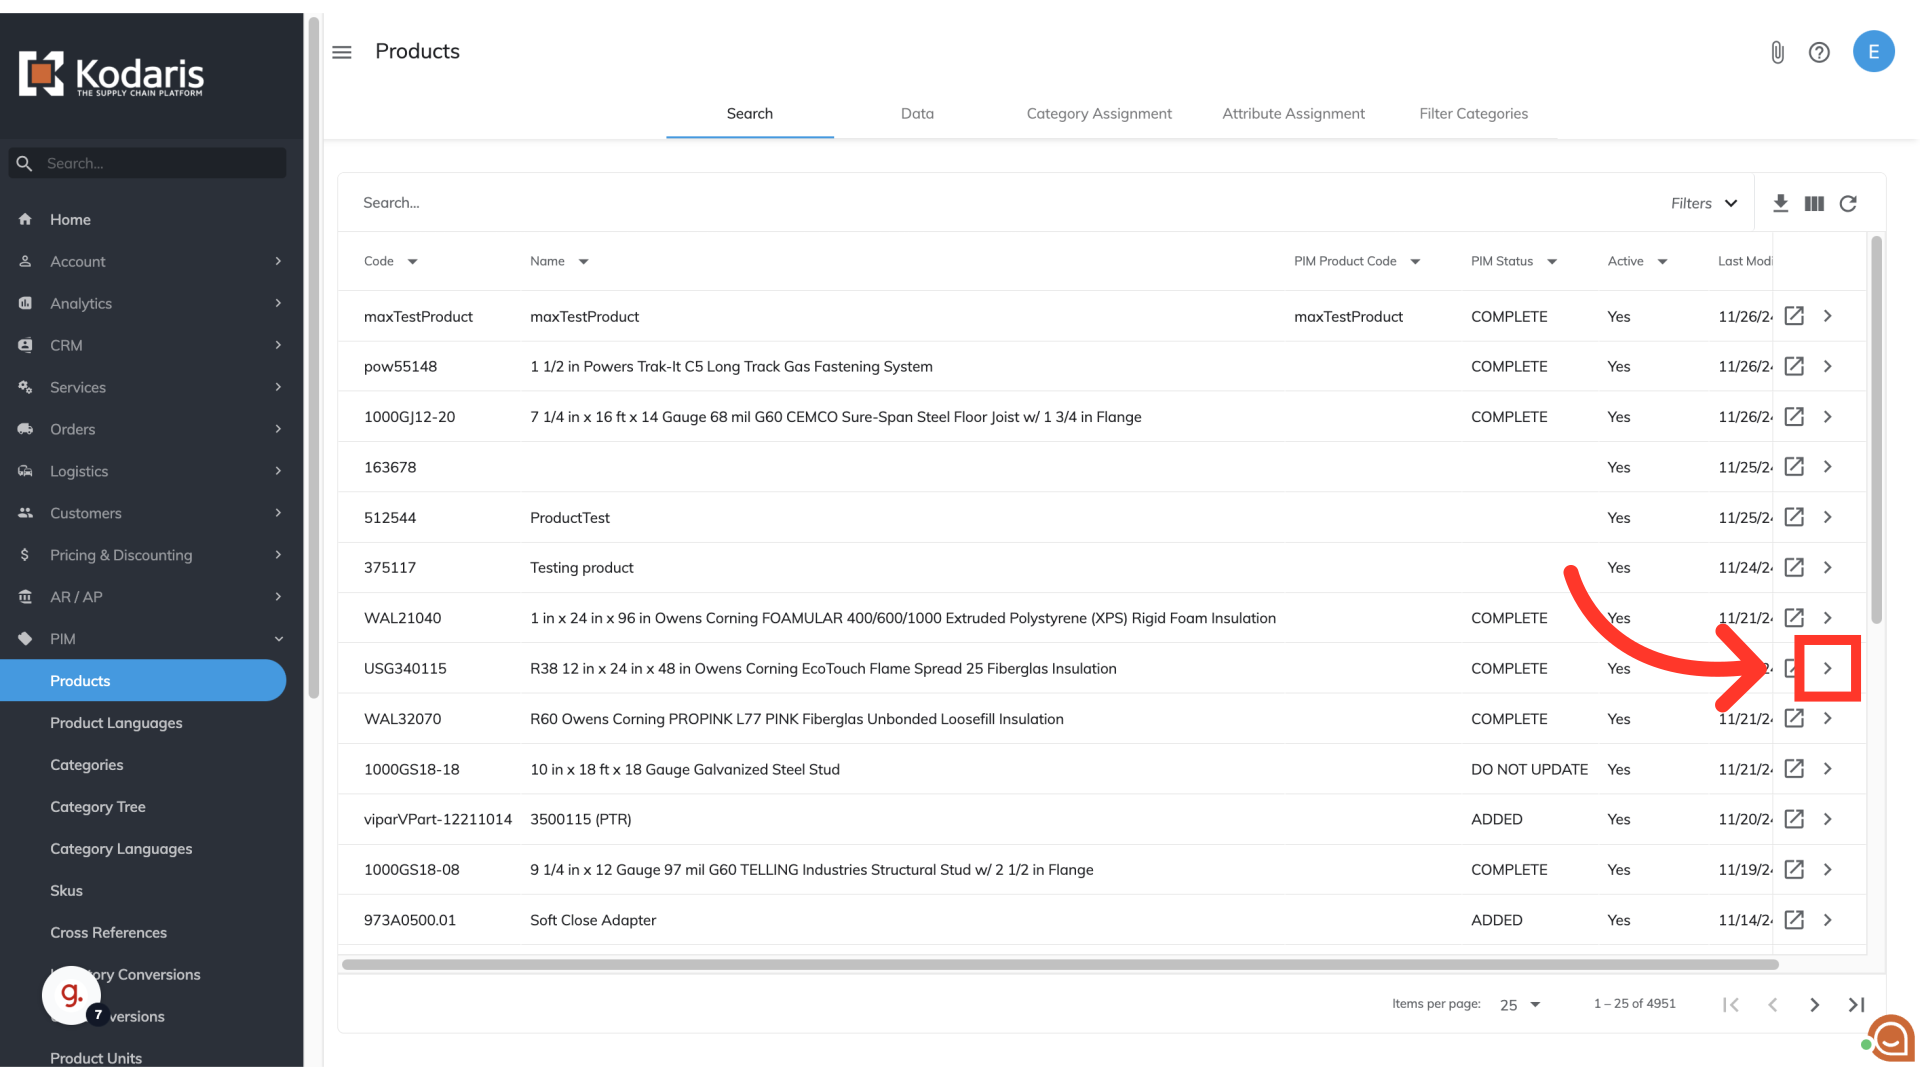
If you have products that have more than twenty attributes assigned to them, you can view and update the attributes directly on the product details. To do this, navigate back to "Products".

Find a product that you would like to view, and click the more details icon.
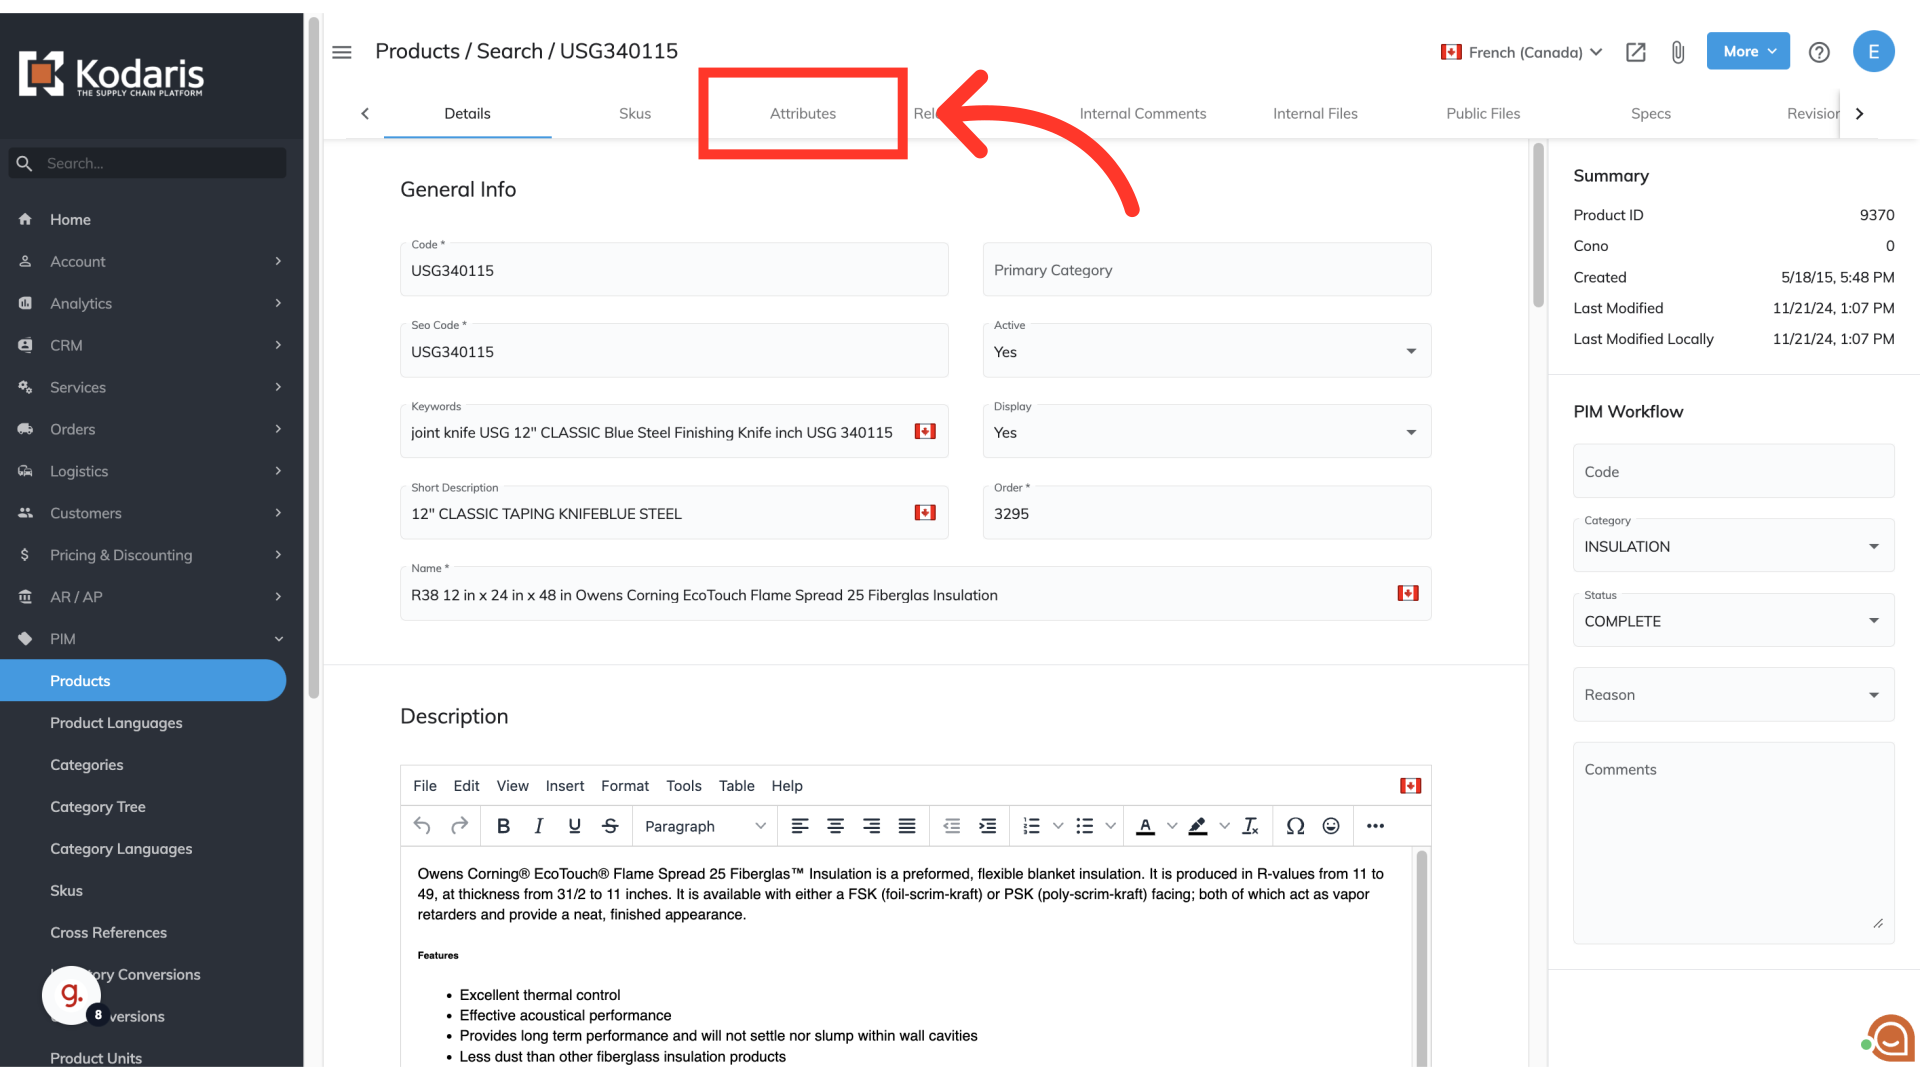
Select the "Attributes" tab.
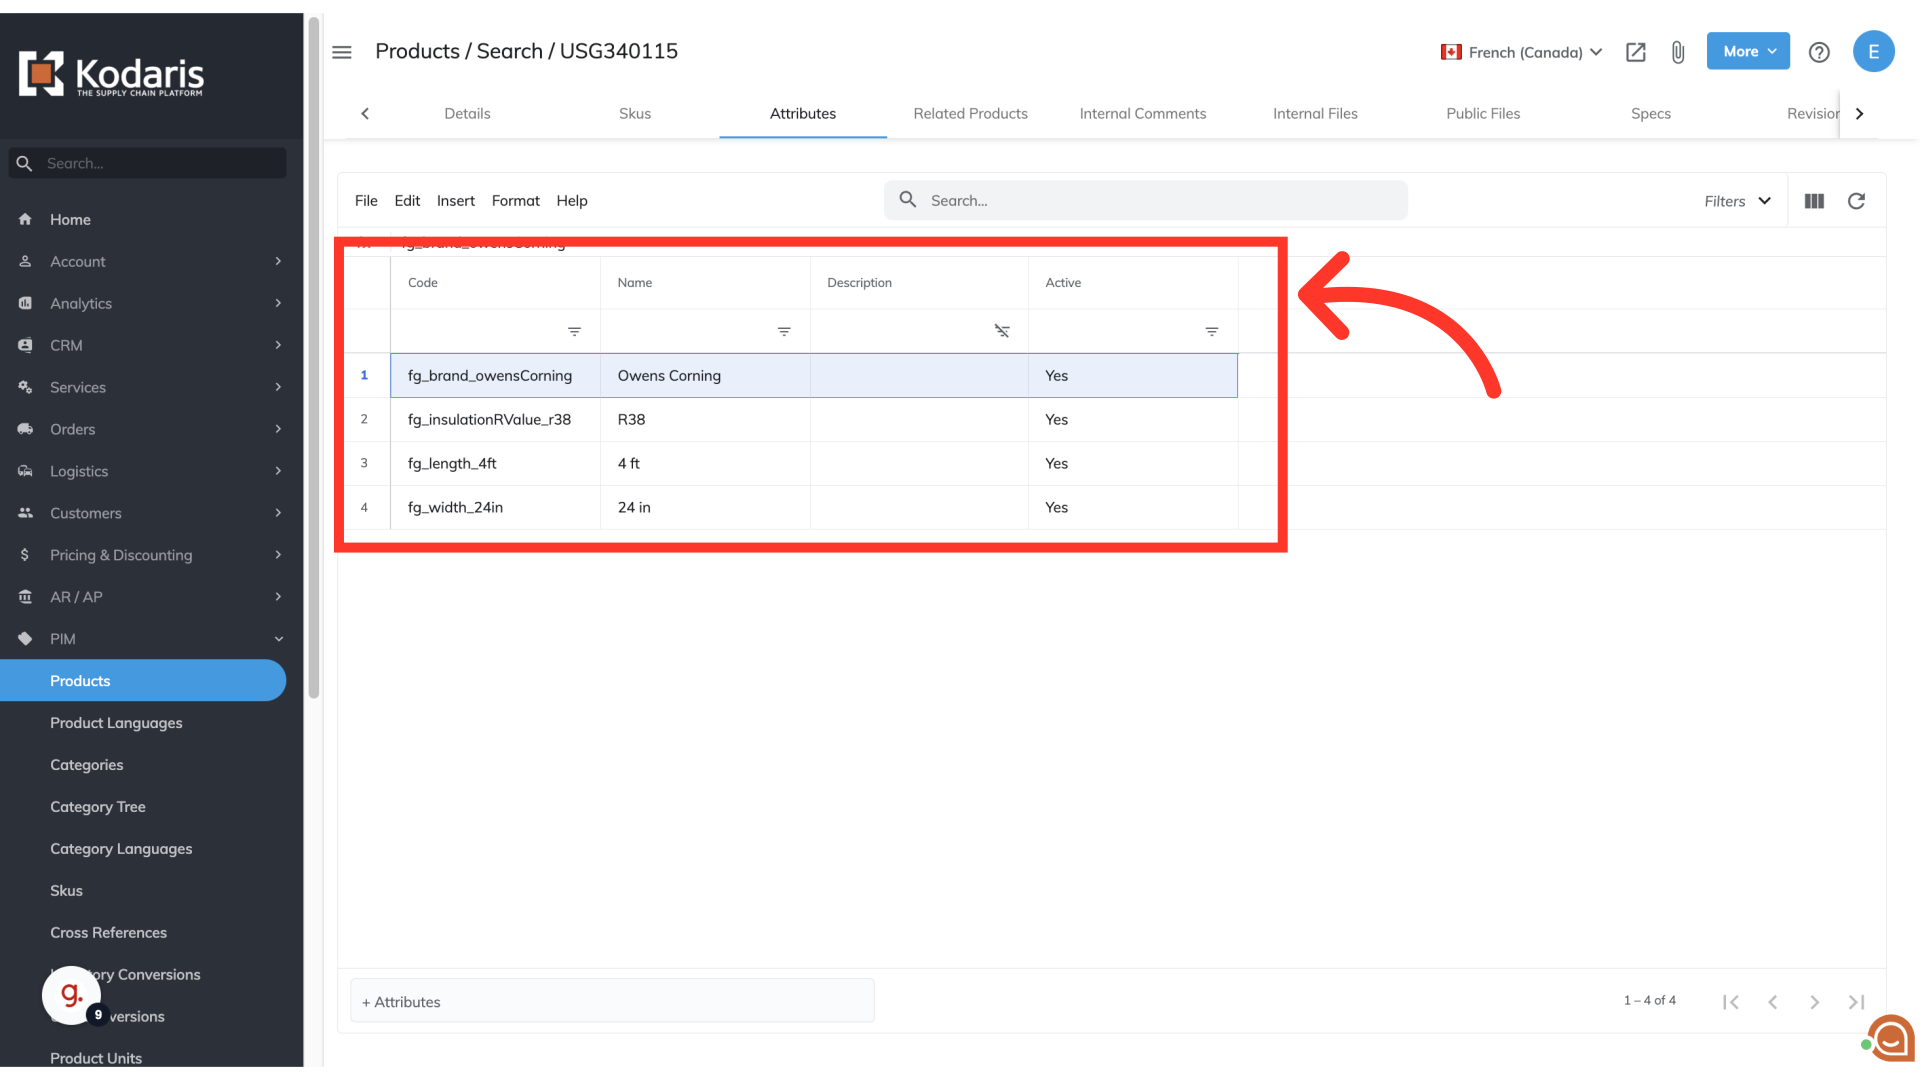
Here you will be able to view, add, or remove any attributes assigned to the product.
Click into the "+ Attribute " field and use the type as you search function to find the attribute you would like to add. Once the attribute appears, select it from the list and the attribute will be added to the product.

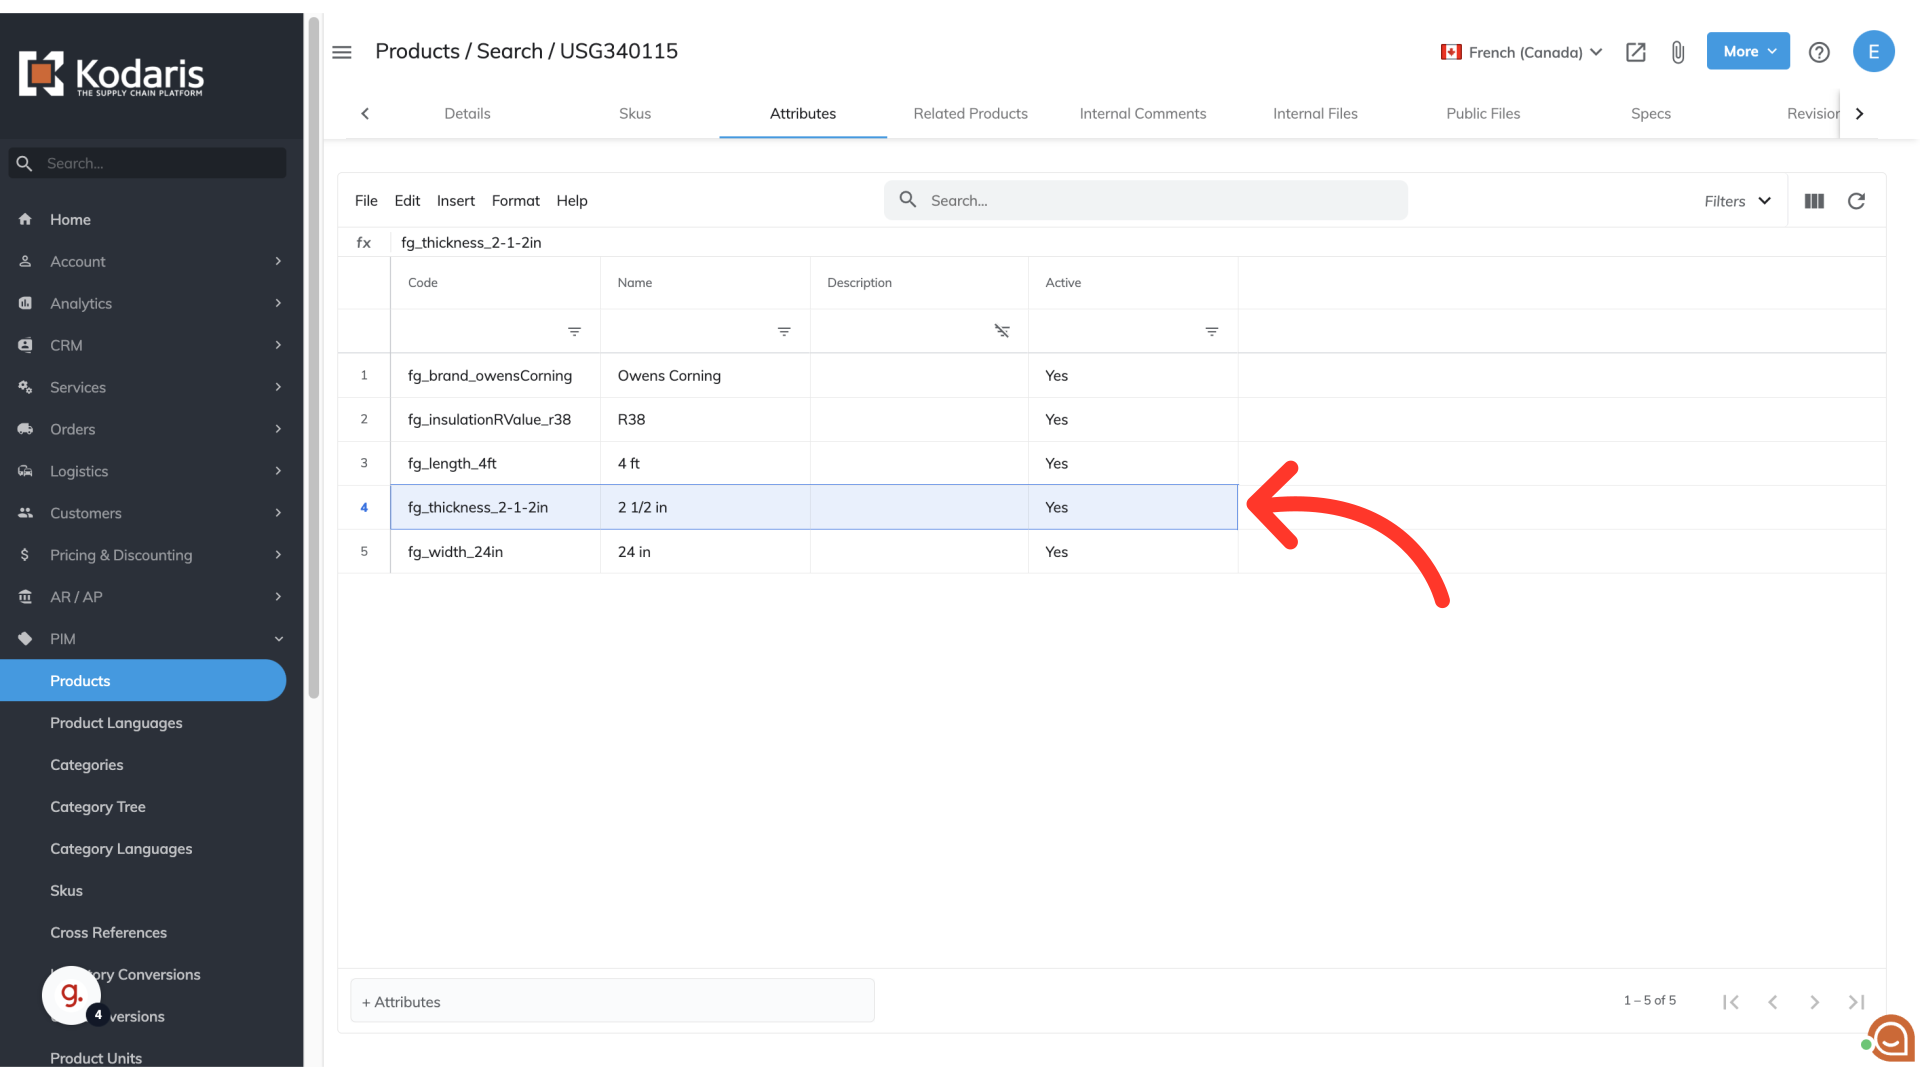
You can see that the attribute has been added to the product.
To delete an attribute that has been assigned, select the attribute row by clicking on the row number.

Select "Edit" and then "Delete selected rows" to remove the selected attribute. Once selected, the attribute will be removed from the product.
