Tickets can be used by your team for internal use to help track and organize your to-do items, projects, initiatives, conversations, and more. If also utilizing as a customer ticket system, they can be shared with your customers as well. To start, tap the menu icon.

Then, tap "Tickets". In order to access and update "Tickets" you will need to be set up either as an "administrator" or a "superuser", or have the roles of: "ticketView" and "ticketEdit".

Here on the Tickets screen, you can scroll the screen to view other ticket details. To create a new ticket, tap on the "+" button.

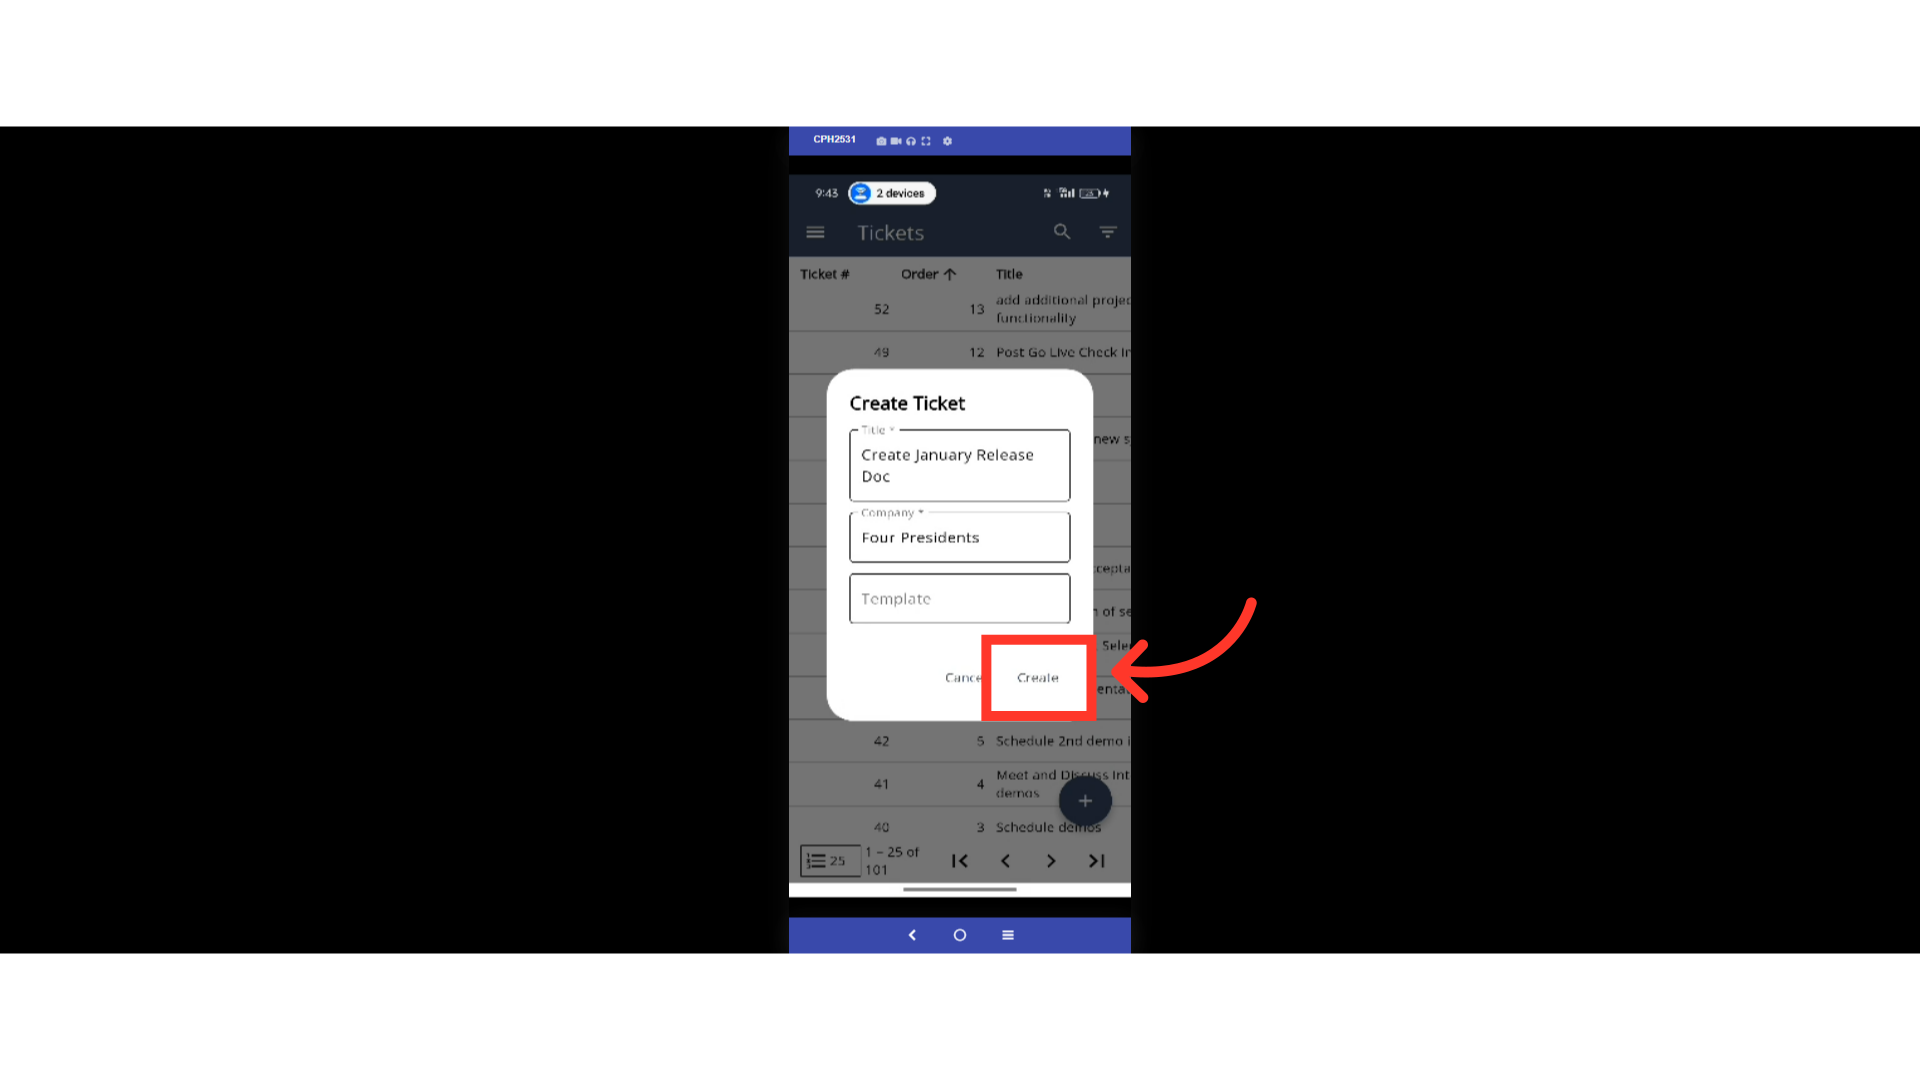
Enter the ticket name in the "Title" field.

Type to search for the company in the "Company" field. It can be the company name.

Select the company from the dropdown.

You can select a template for the ticket, if needed.

Then, tap "Create" to add the new ticket.
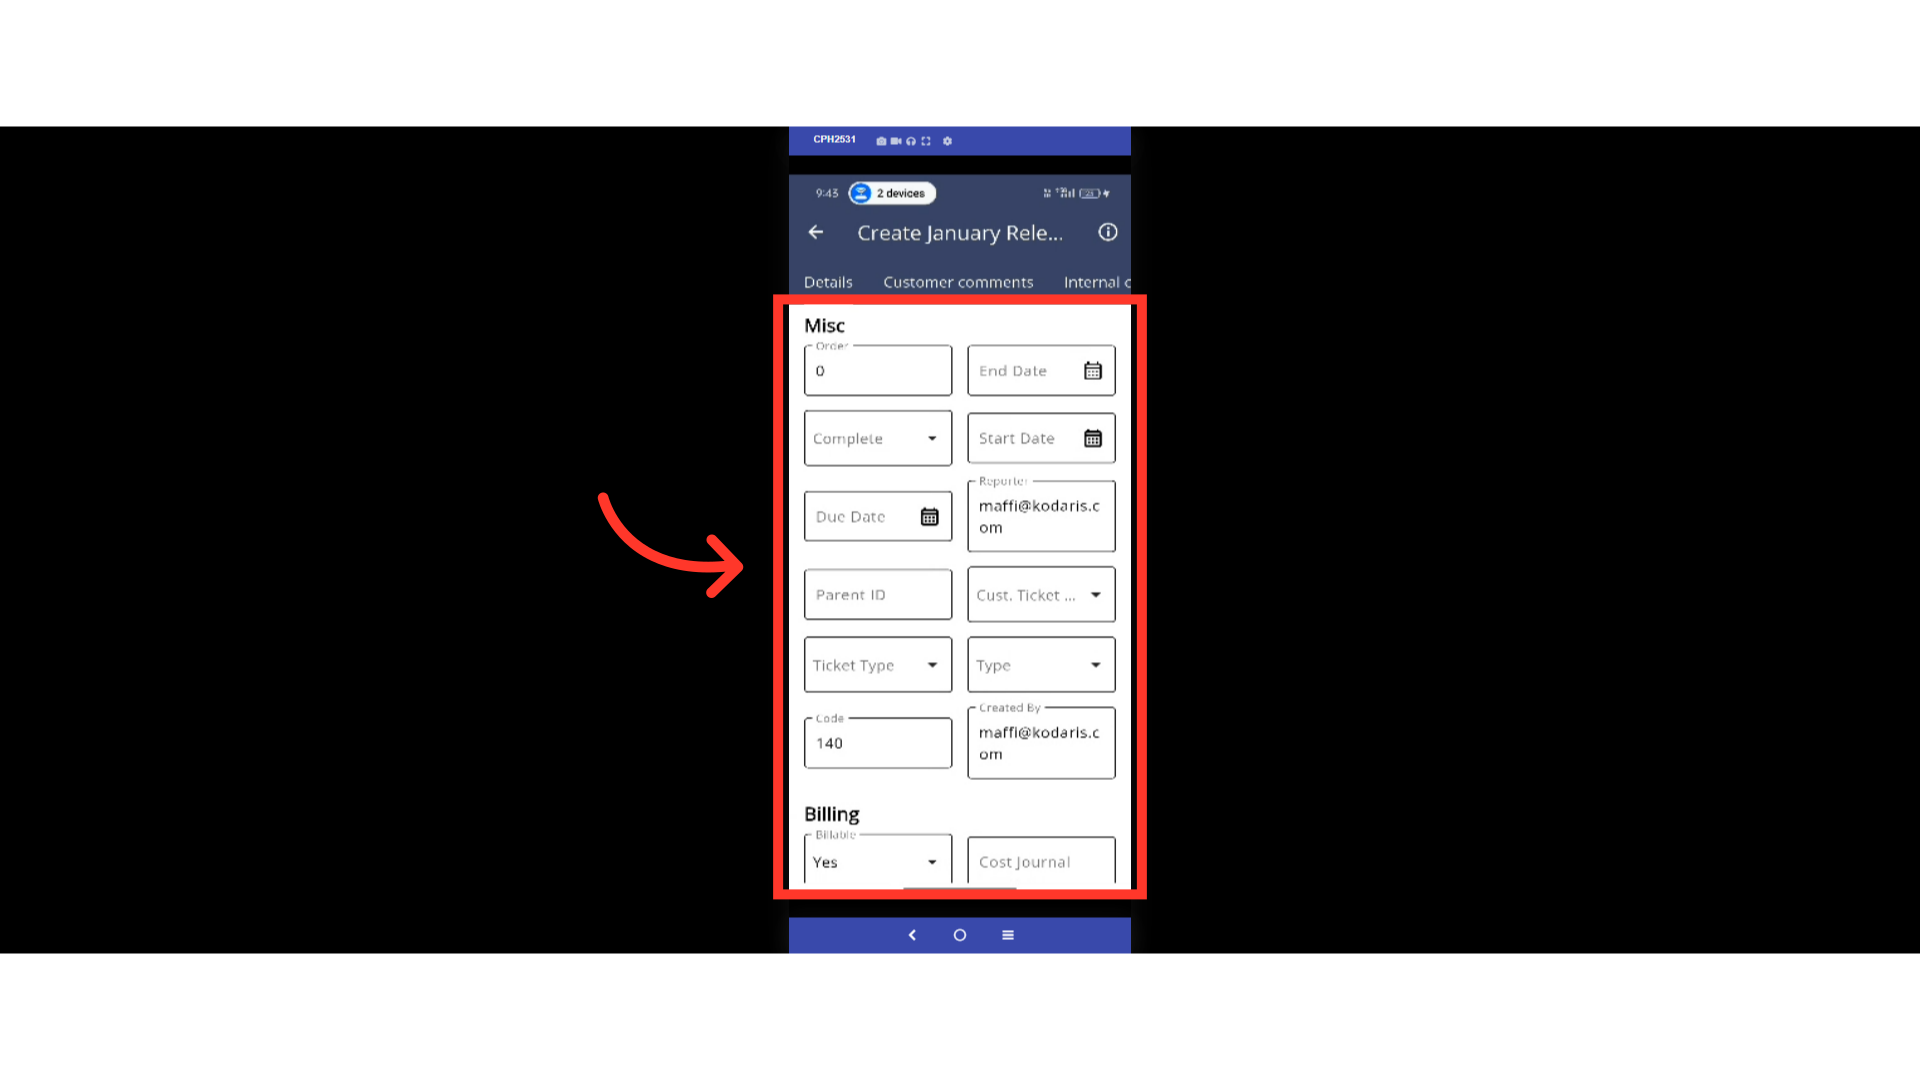
Here on the ticket Details screen, you can fill the needed details for the ticket.
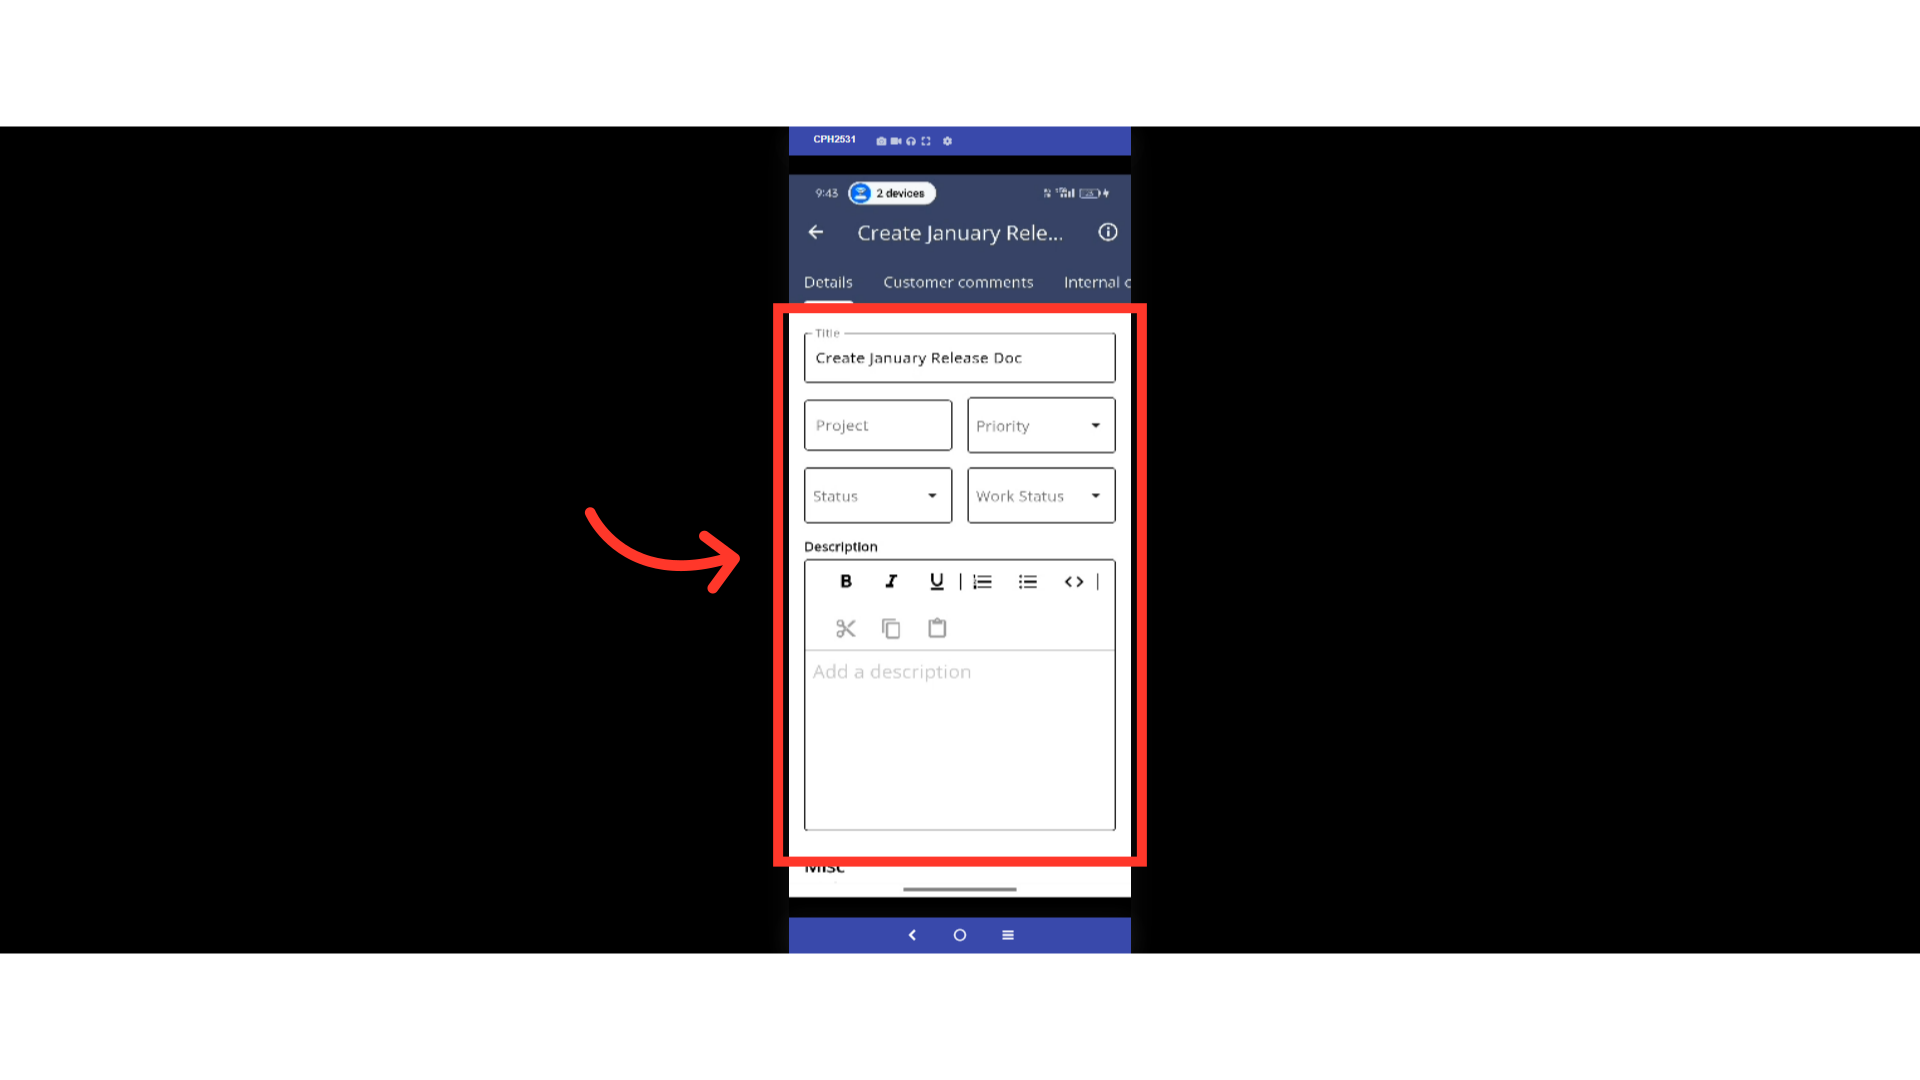
You can scroll down to view and fill in other details. Information added is automatically saved.