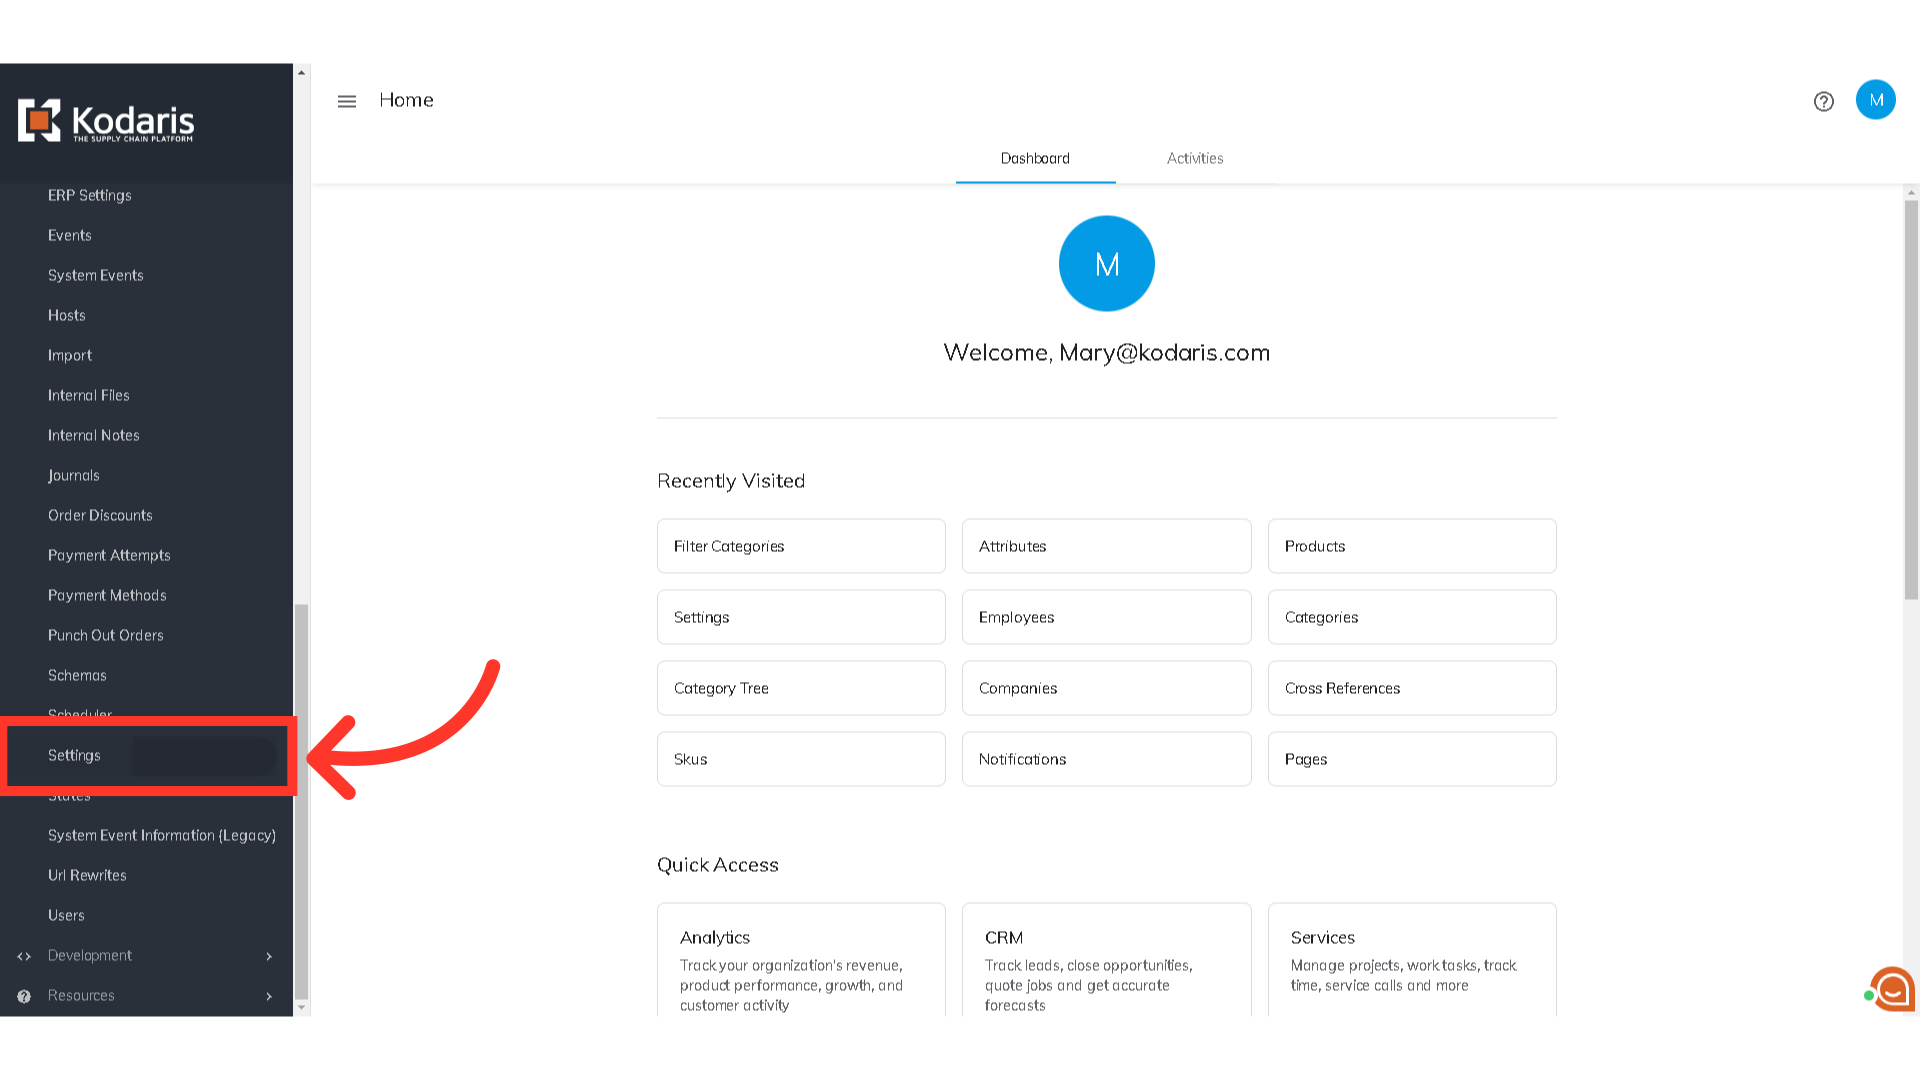
To add the square footage display feature to products on your website, you first need to follow a few steps in order to add the feature to products. First you will need to turn on the setting. Navigate to the "System" section in the operations portal.

Then, click "Settings". To access and edit settings, you will need to be set up either as an “administrator” or a “superuser”, or have the following roles: “settingEdit” and “settingView”.
Search for the "documentDBenabled" setting.
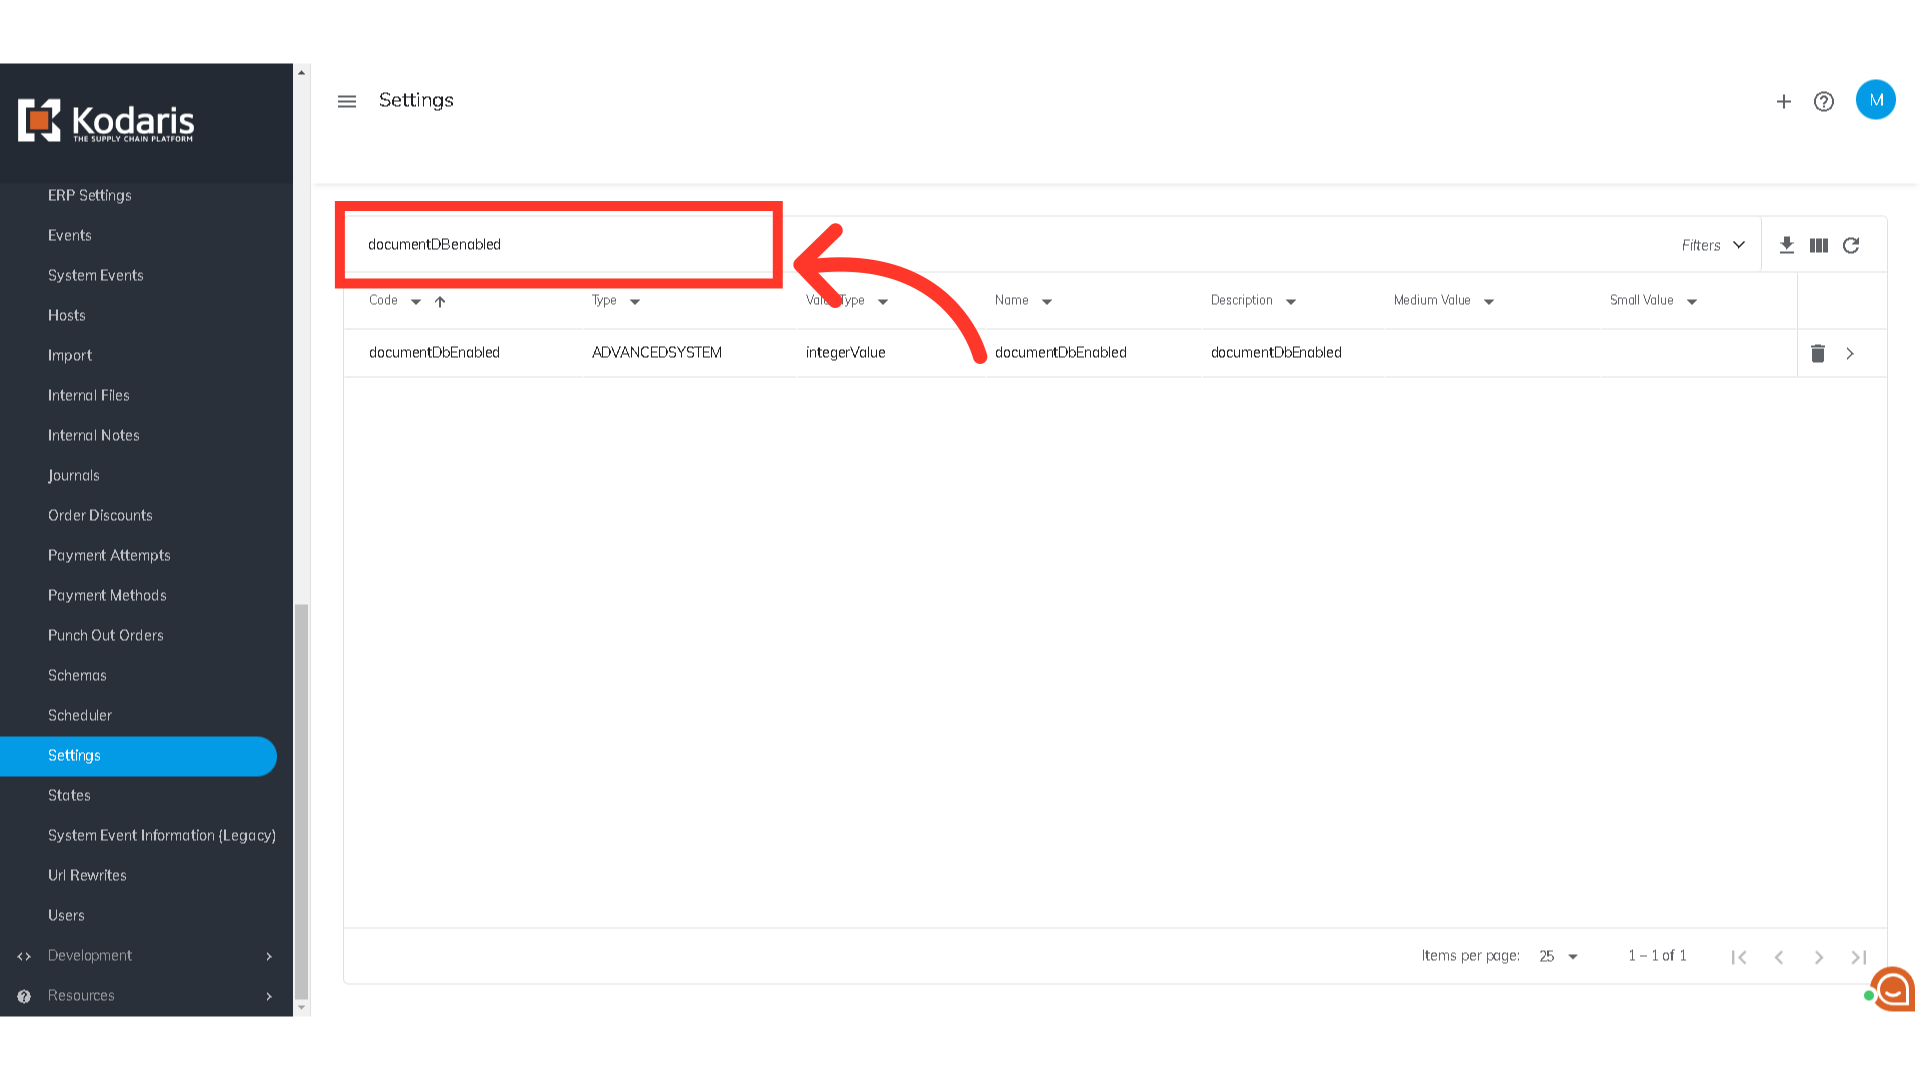
Then, click on the more details icon to update the setting details.

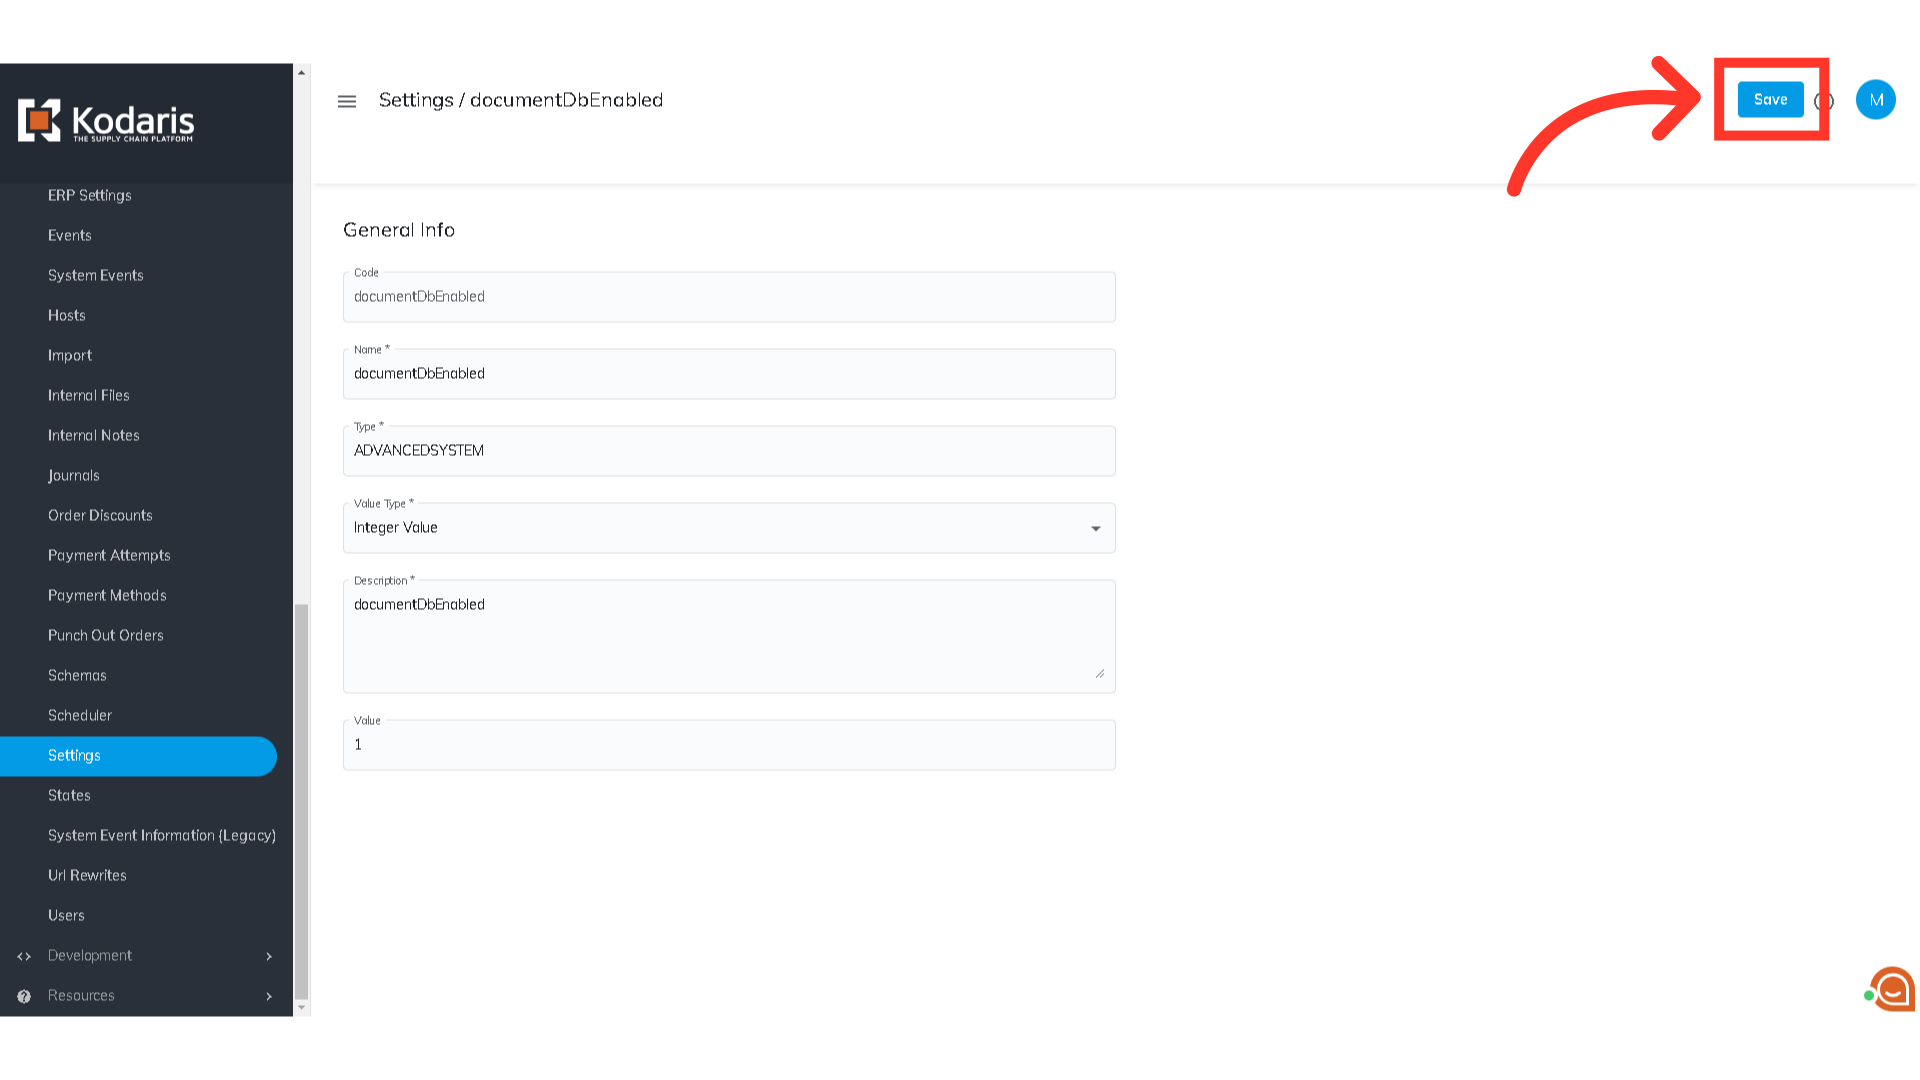
Enter "1" in the "Value" field to turn this setting on.

Click "Save".
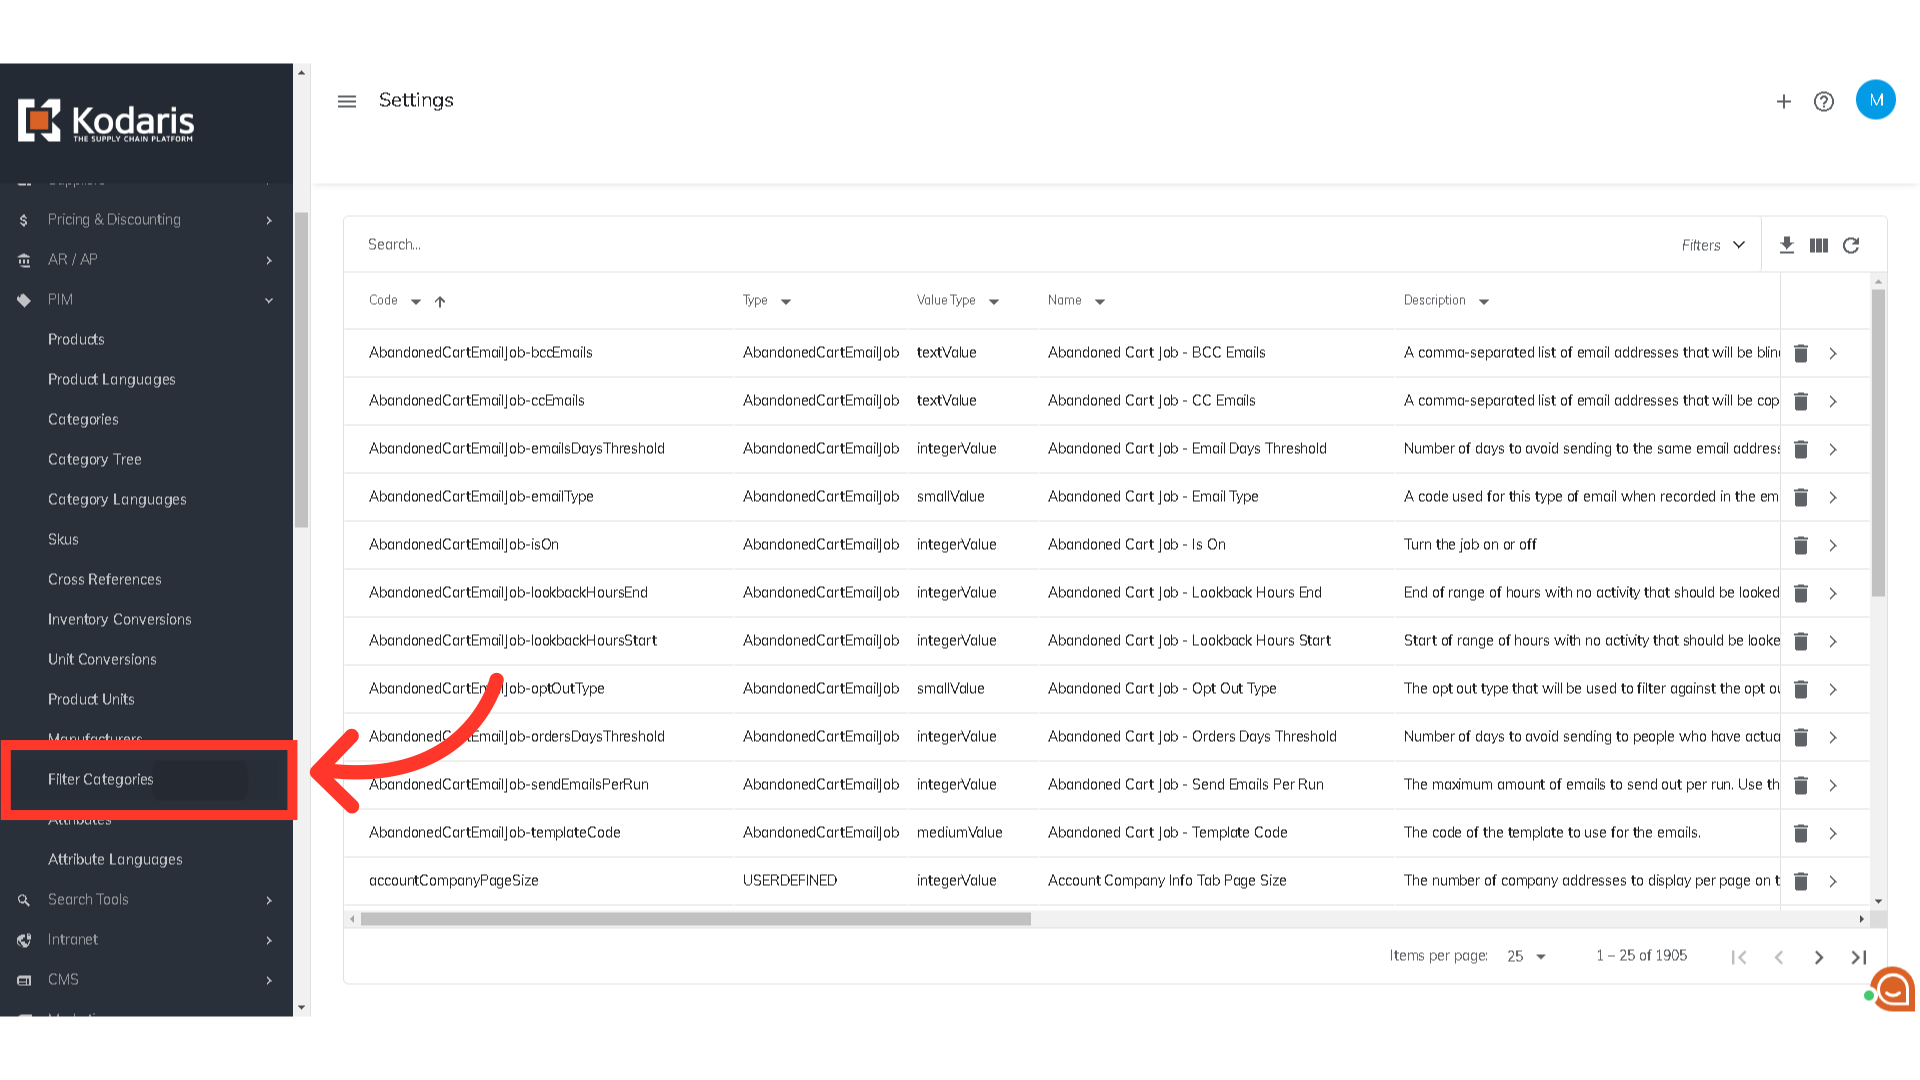
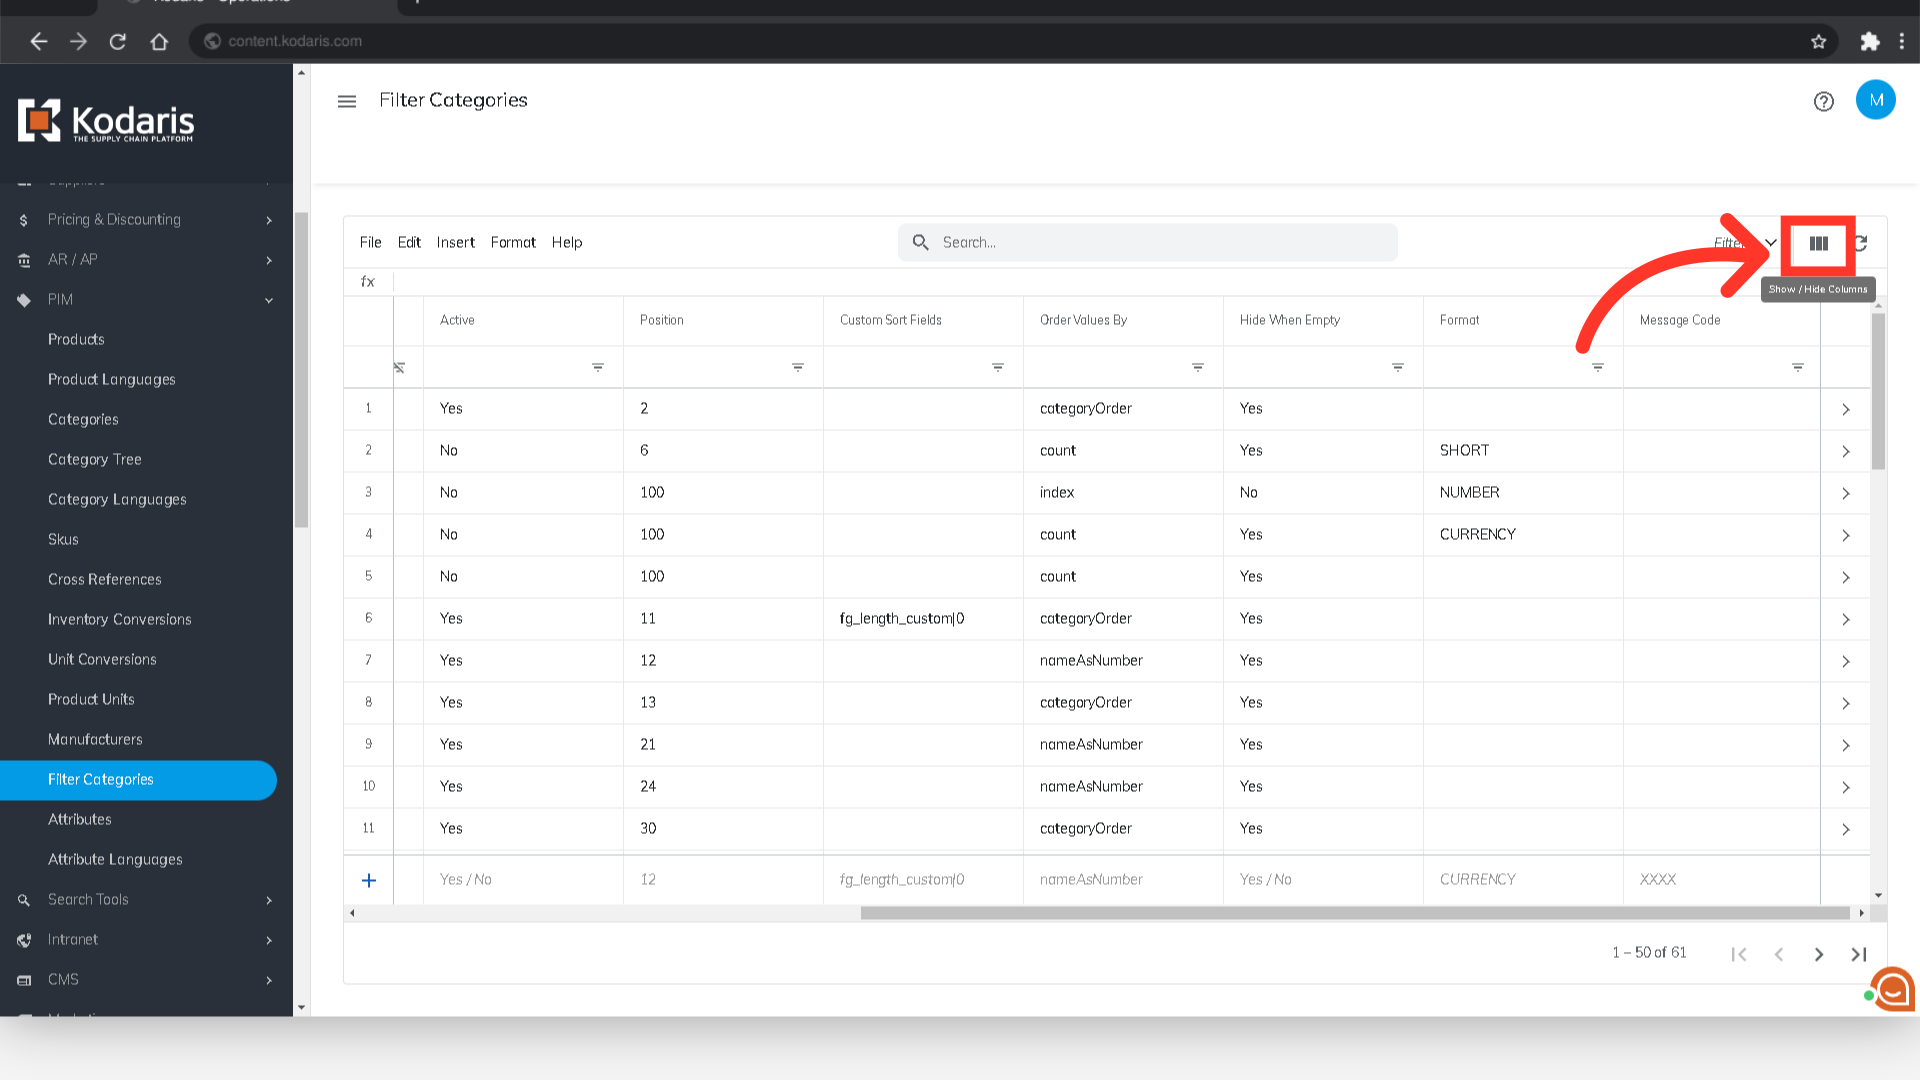
Once the setting is set up in the system, you will need to create a specific filter category for the feature. Navigate to the "PIM" section.

Click "Filter Categories". In order to access and update “Filter Categories” you will need to be set up either as an “administrator” or a “superuser”, or have the roles of: “facetGroupView” and “facetGroupEdit”.
Click on the "Show/Hide columns" icon to adjust the grid view.
Select "Searchable" by checking the checkbox.

Add the new filter category by entering the needed details in the "Add a row" fields.
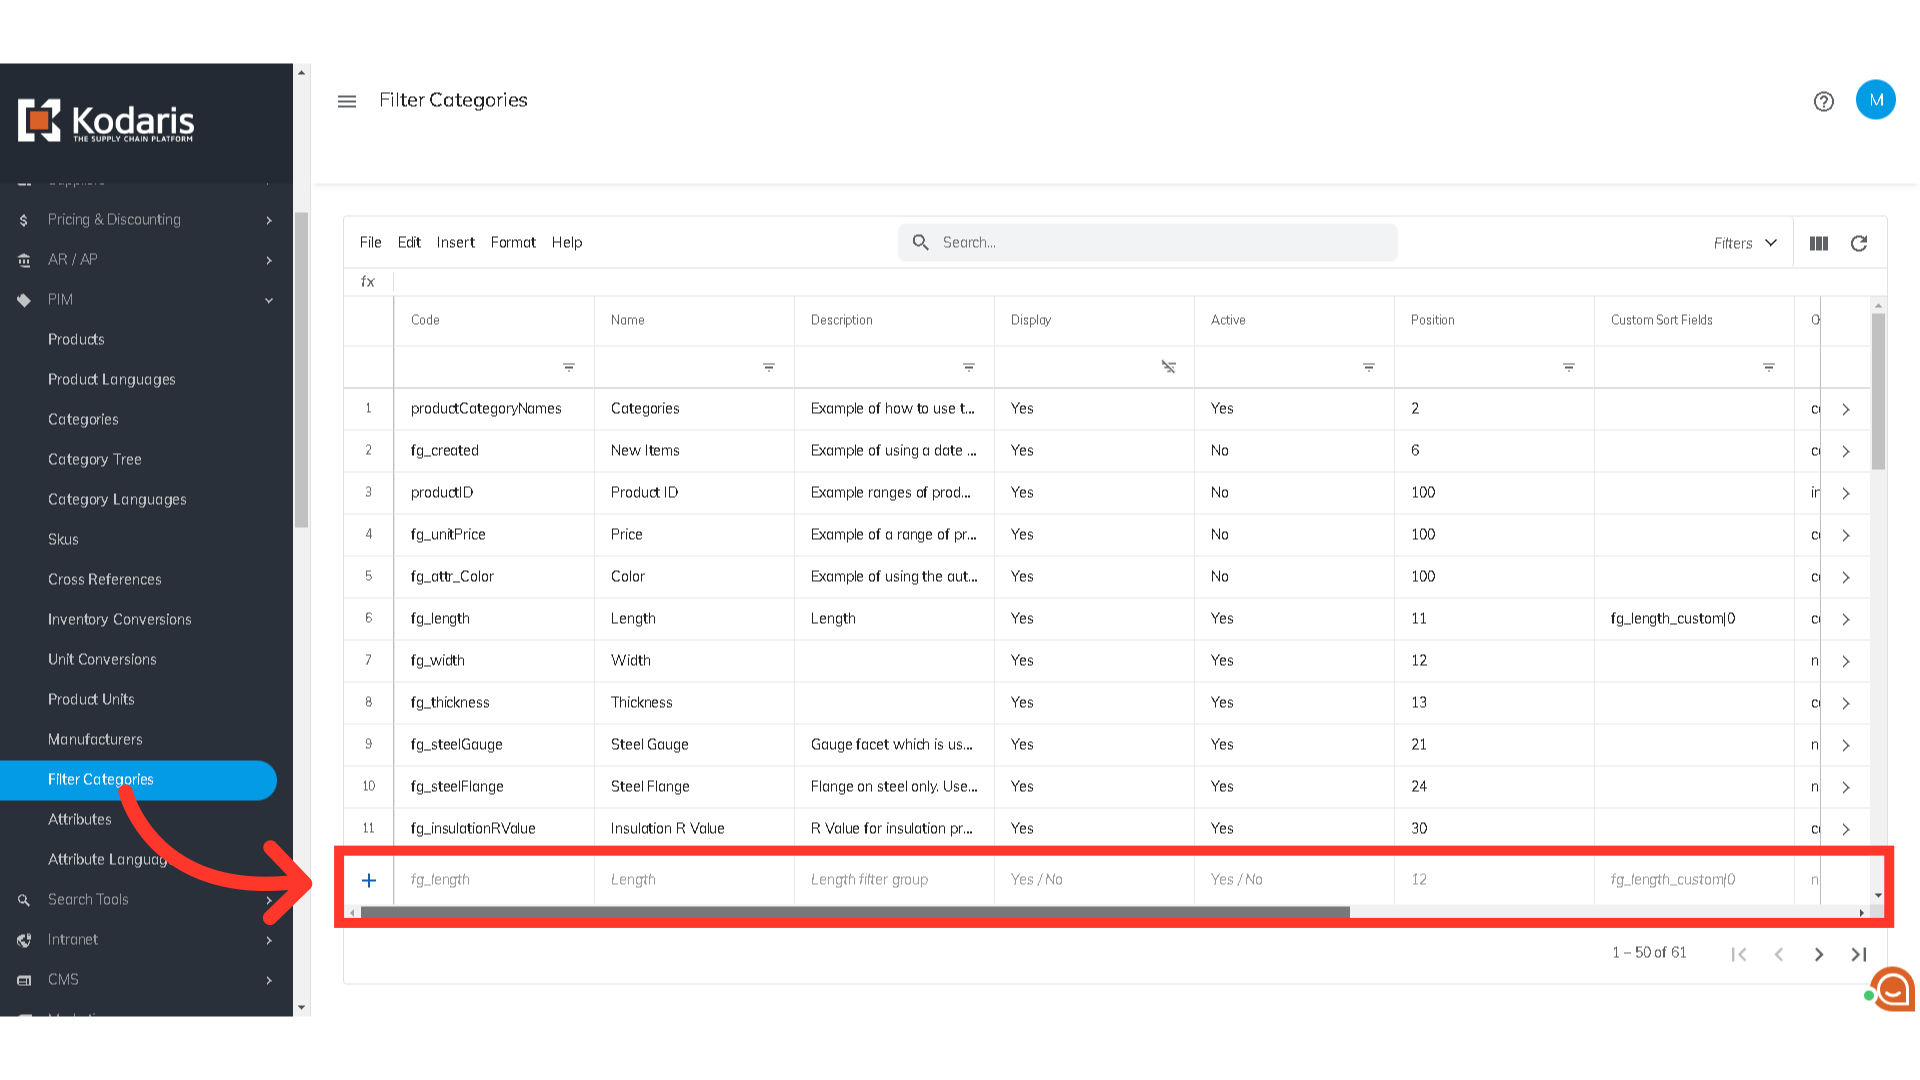
Enter "fg_displayFootageCalculator" in the Code column.

Select the "Yes" option in the Display column.
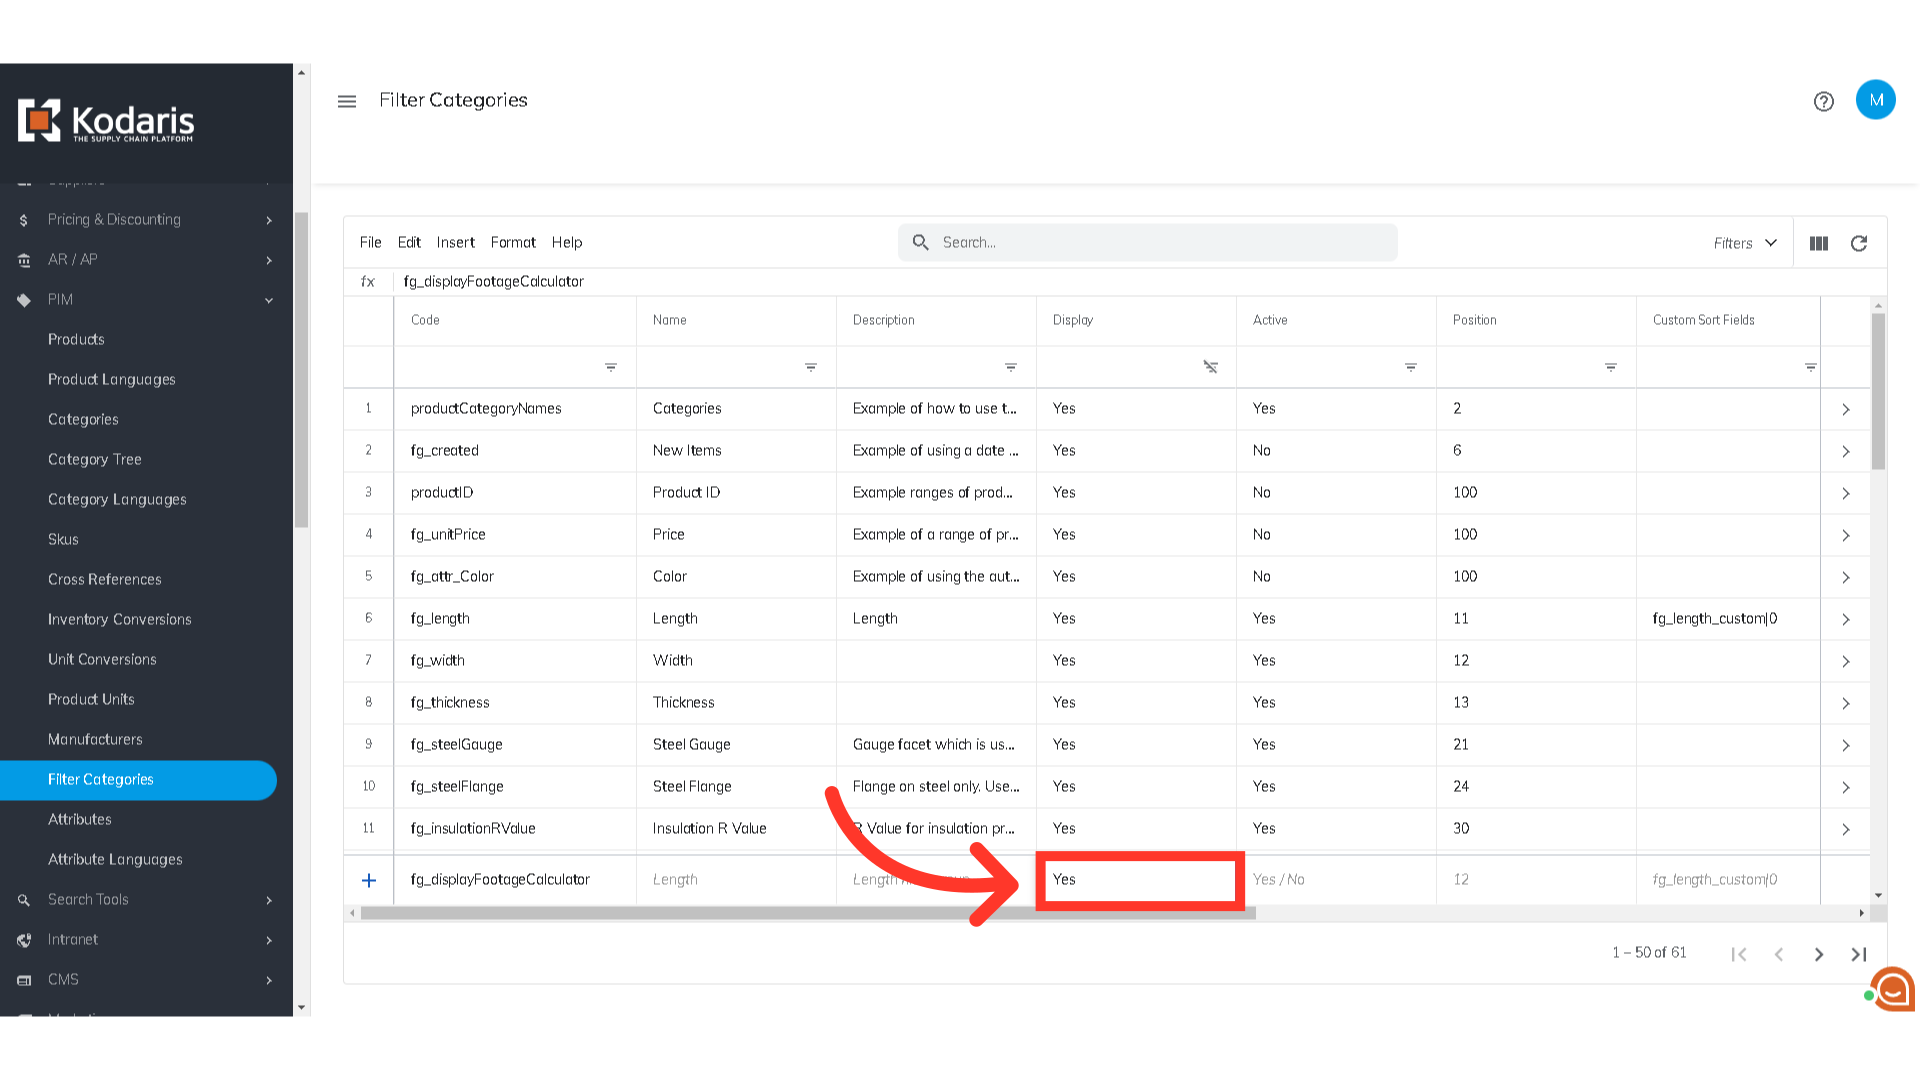
Select "Yes" in the Active column.

For the Searchable column, select "No". Then, hit Enter on your keyboard to add the row to the grid.

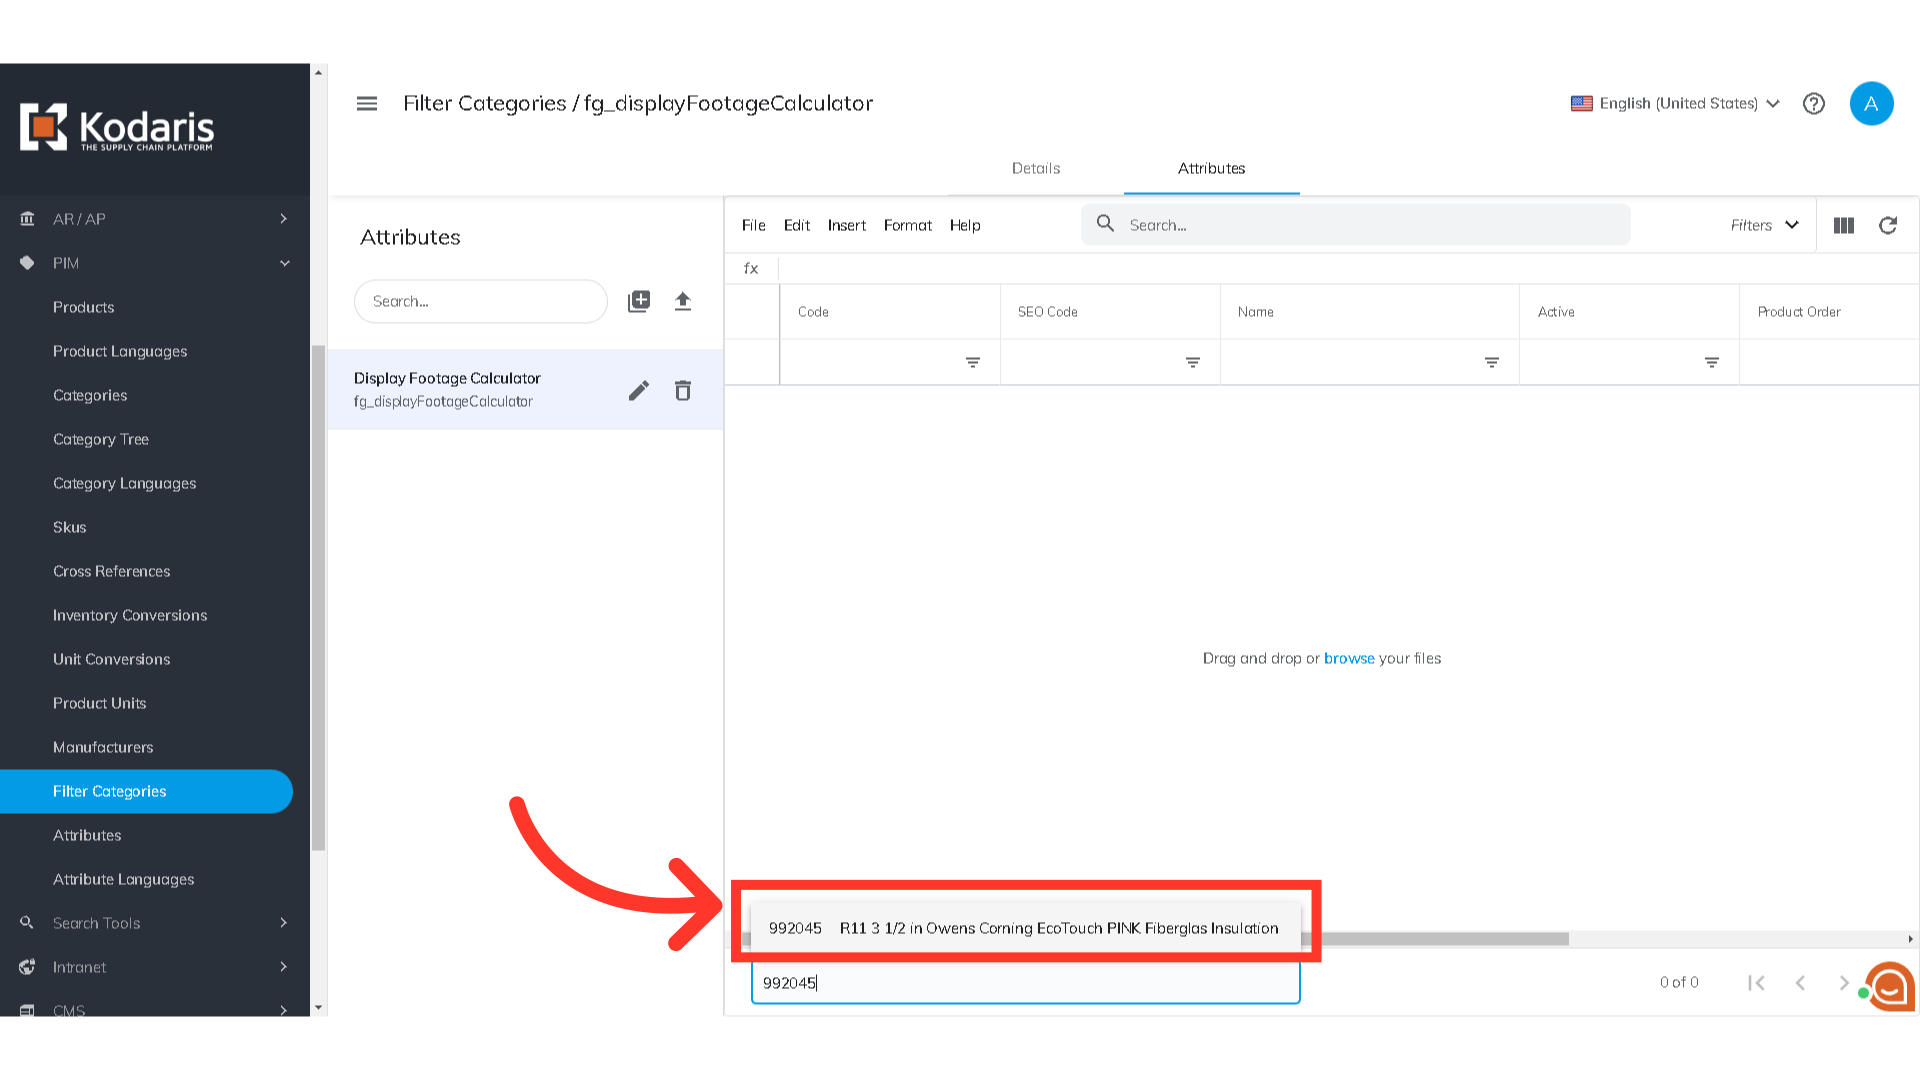
Now that we have added the filter category that is needed for this feature, we will need to add the needed attribute.

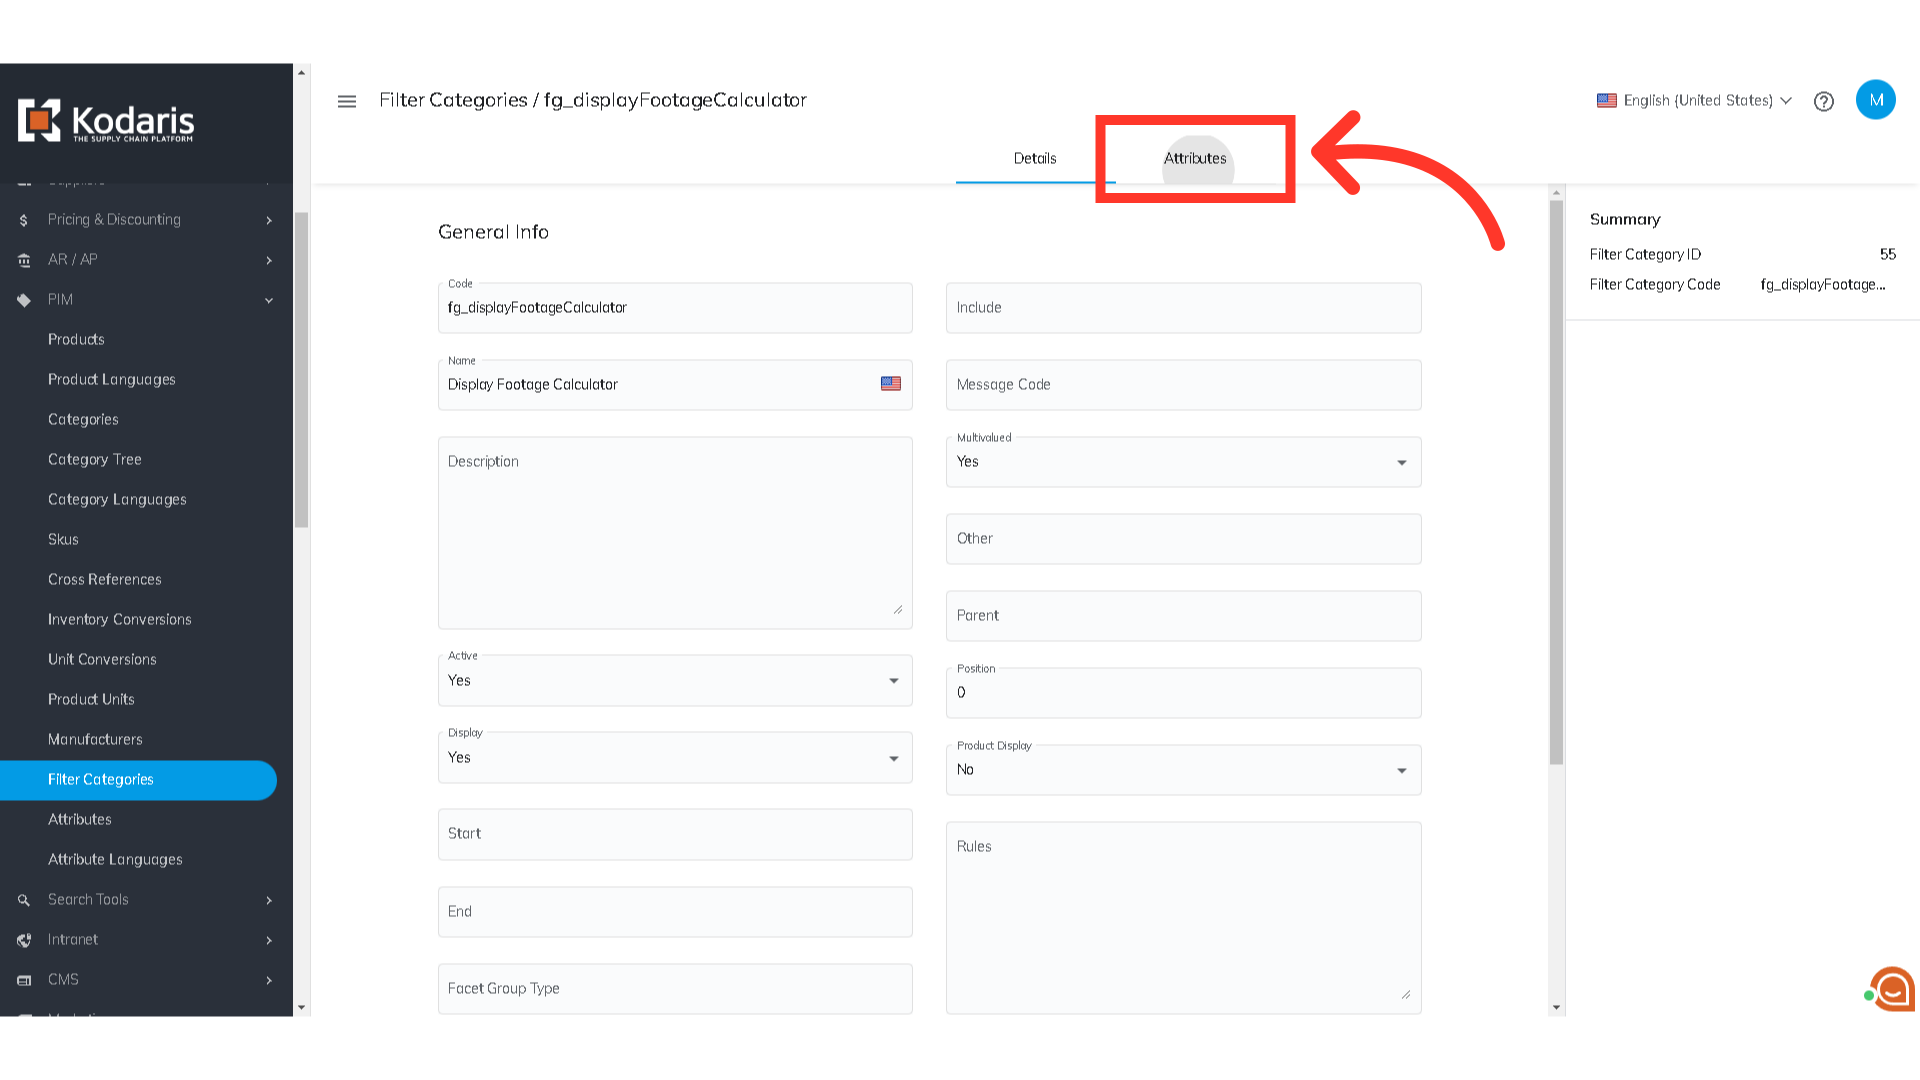
Click on the more details icon of the "fg_displayFootageCalculator".
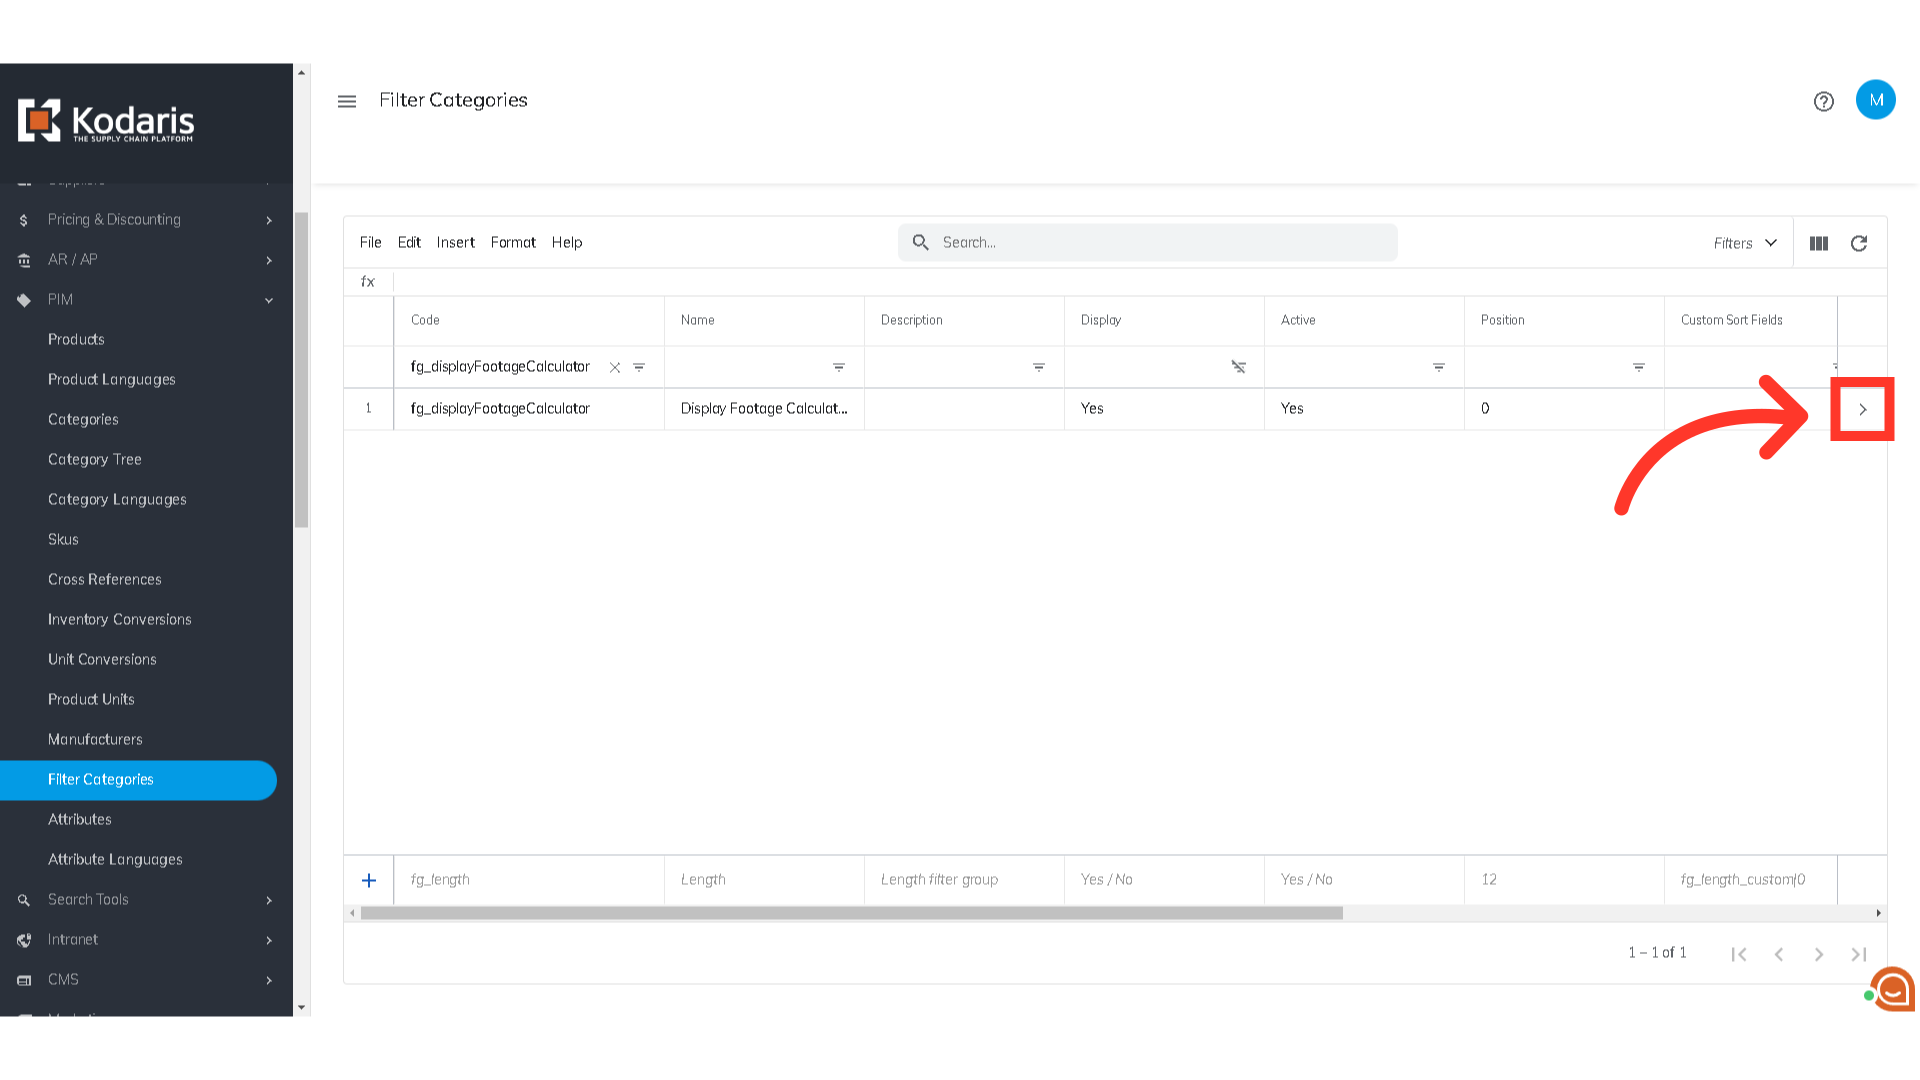
Select the "Attributes" tab.
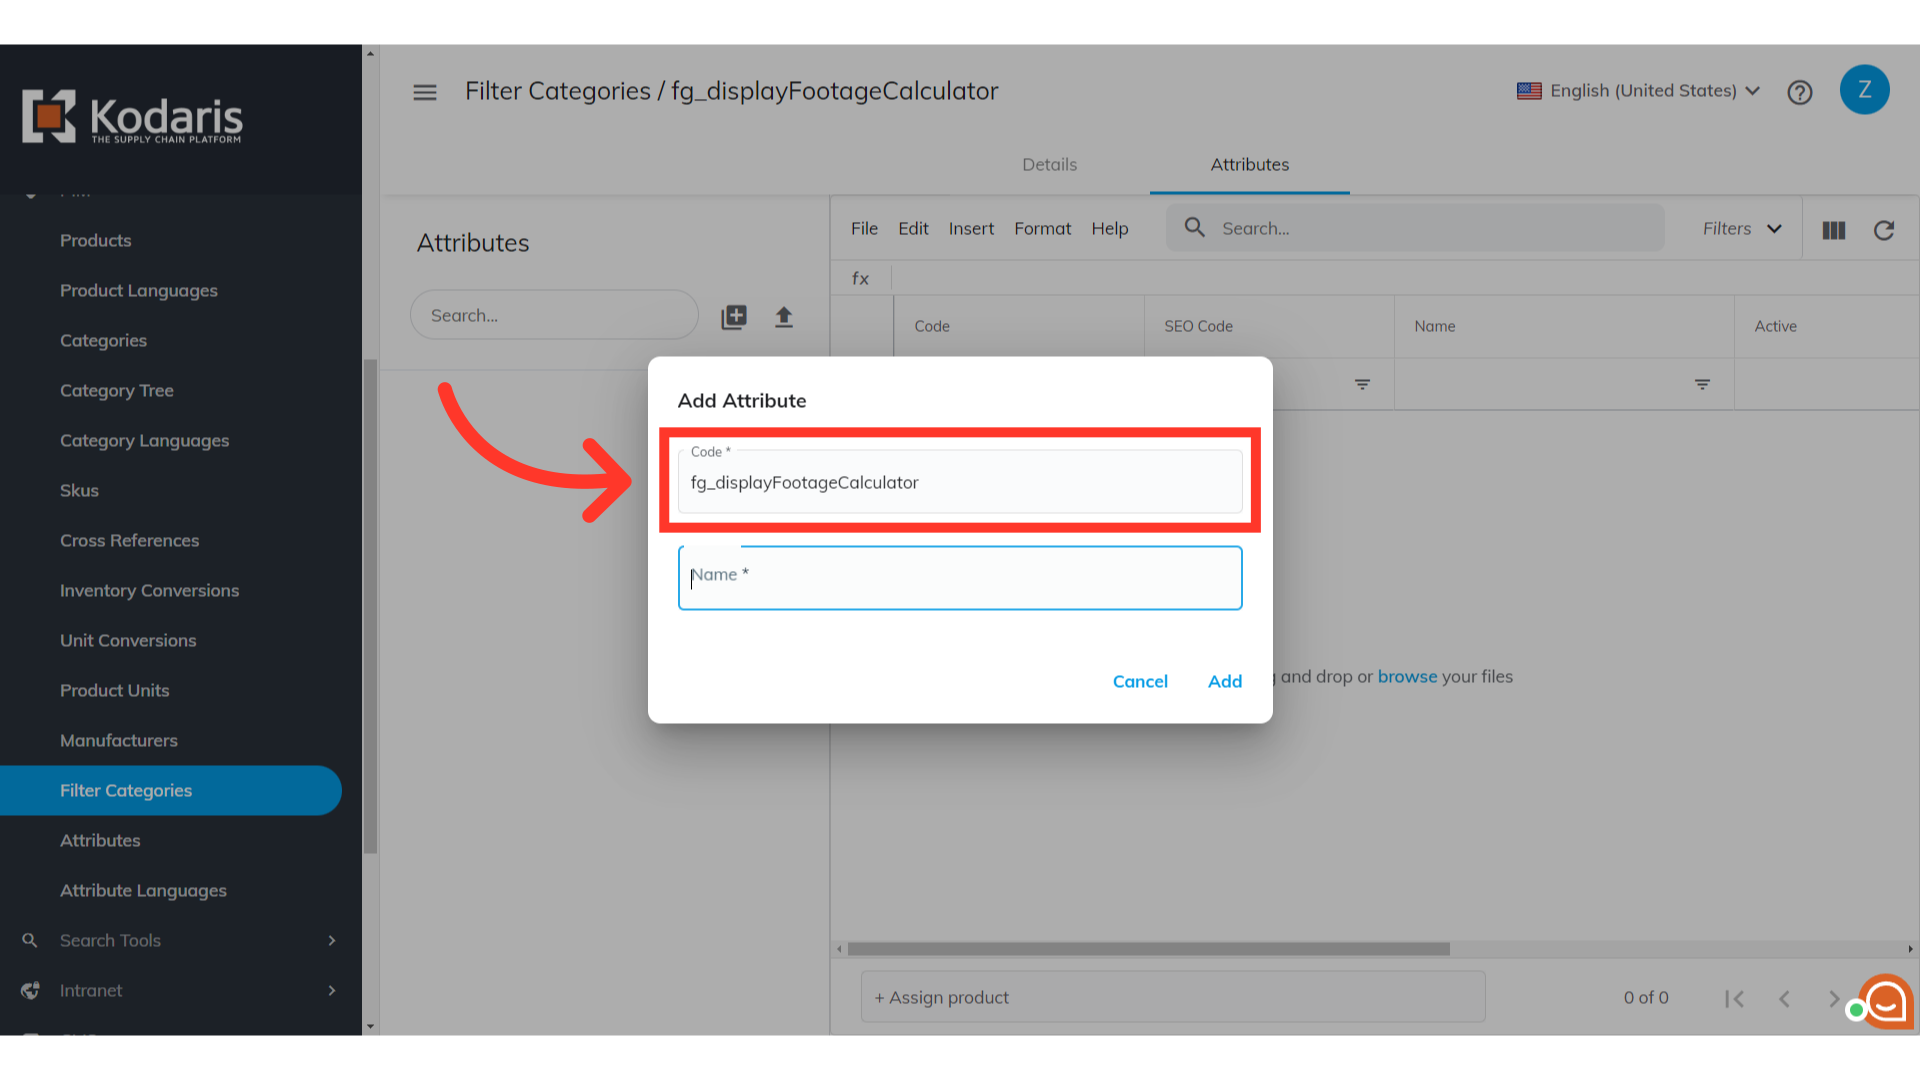
To start adding the attribute, click the "Add Attribute" icon.

Enter "fg_displayFootageCalculator" in the Code field.
Enter "Display Footage Calculator" in the Name field.
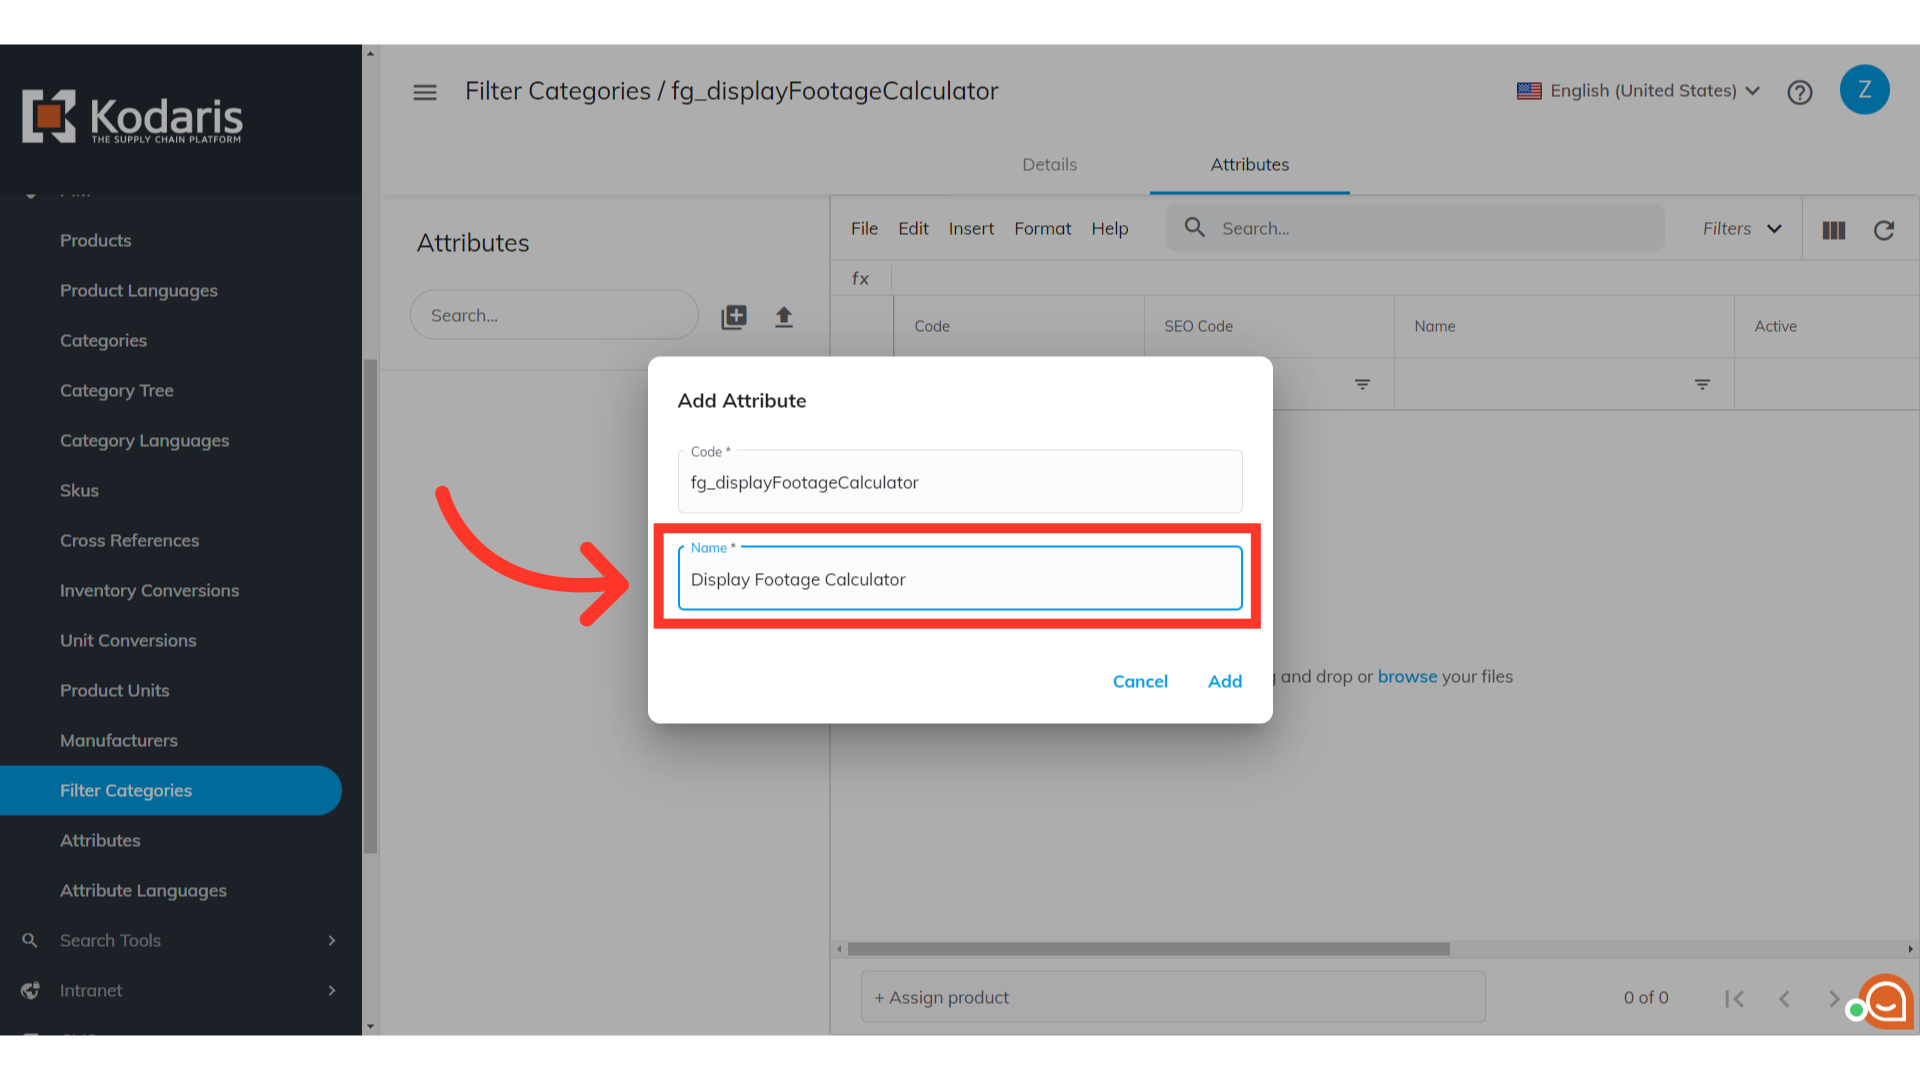
Click the "Add" button.

Now that you have added the needed attribute, you will be able to assign any products to the attribute that should have this feature.
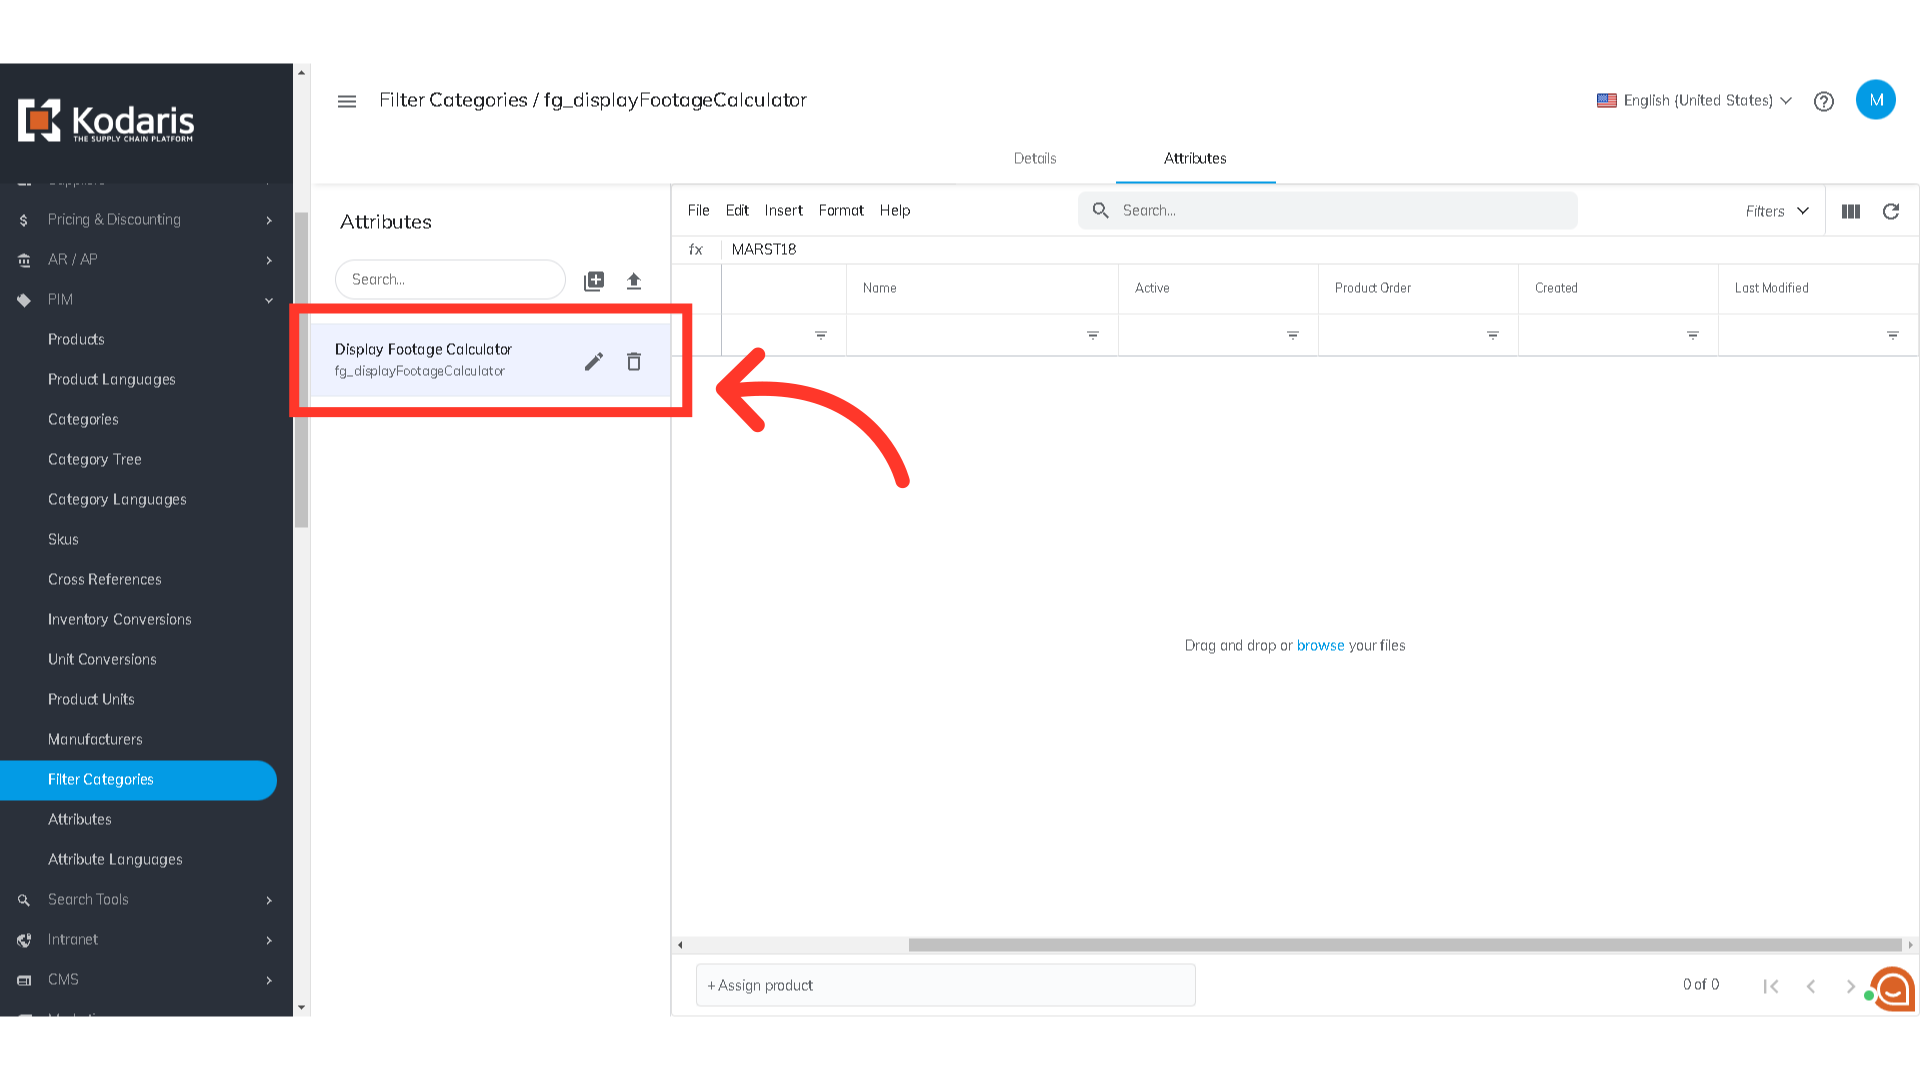
To assign products to this attribute, click the "+Assign product" field and use the type as you search feature to find and add products to the attribute. You can also assign products to this attribute by using the import function on this screen. This is covered in other help documentation.

You can also enter the product code or name to search.

Select the product to be added to the attribute, and repeat to add more products.
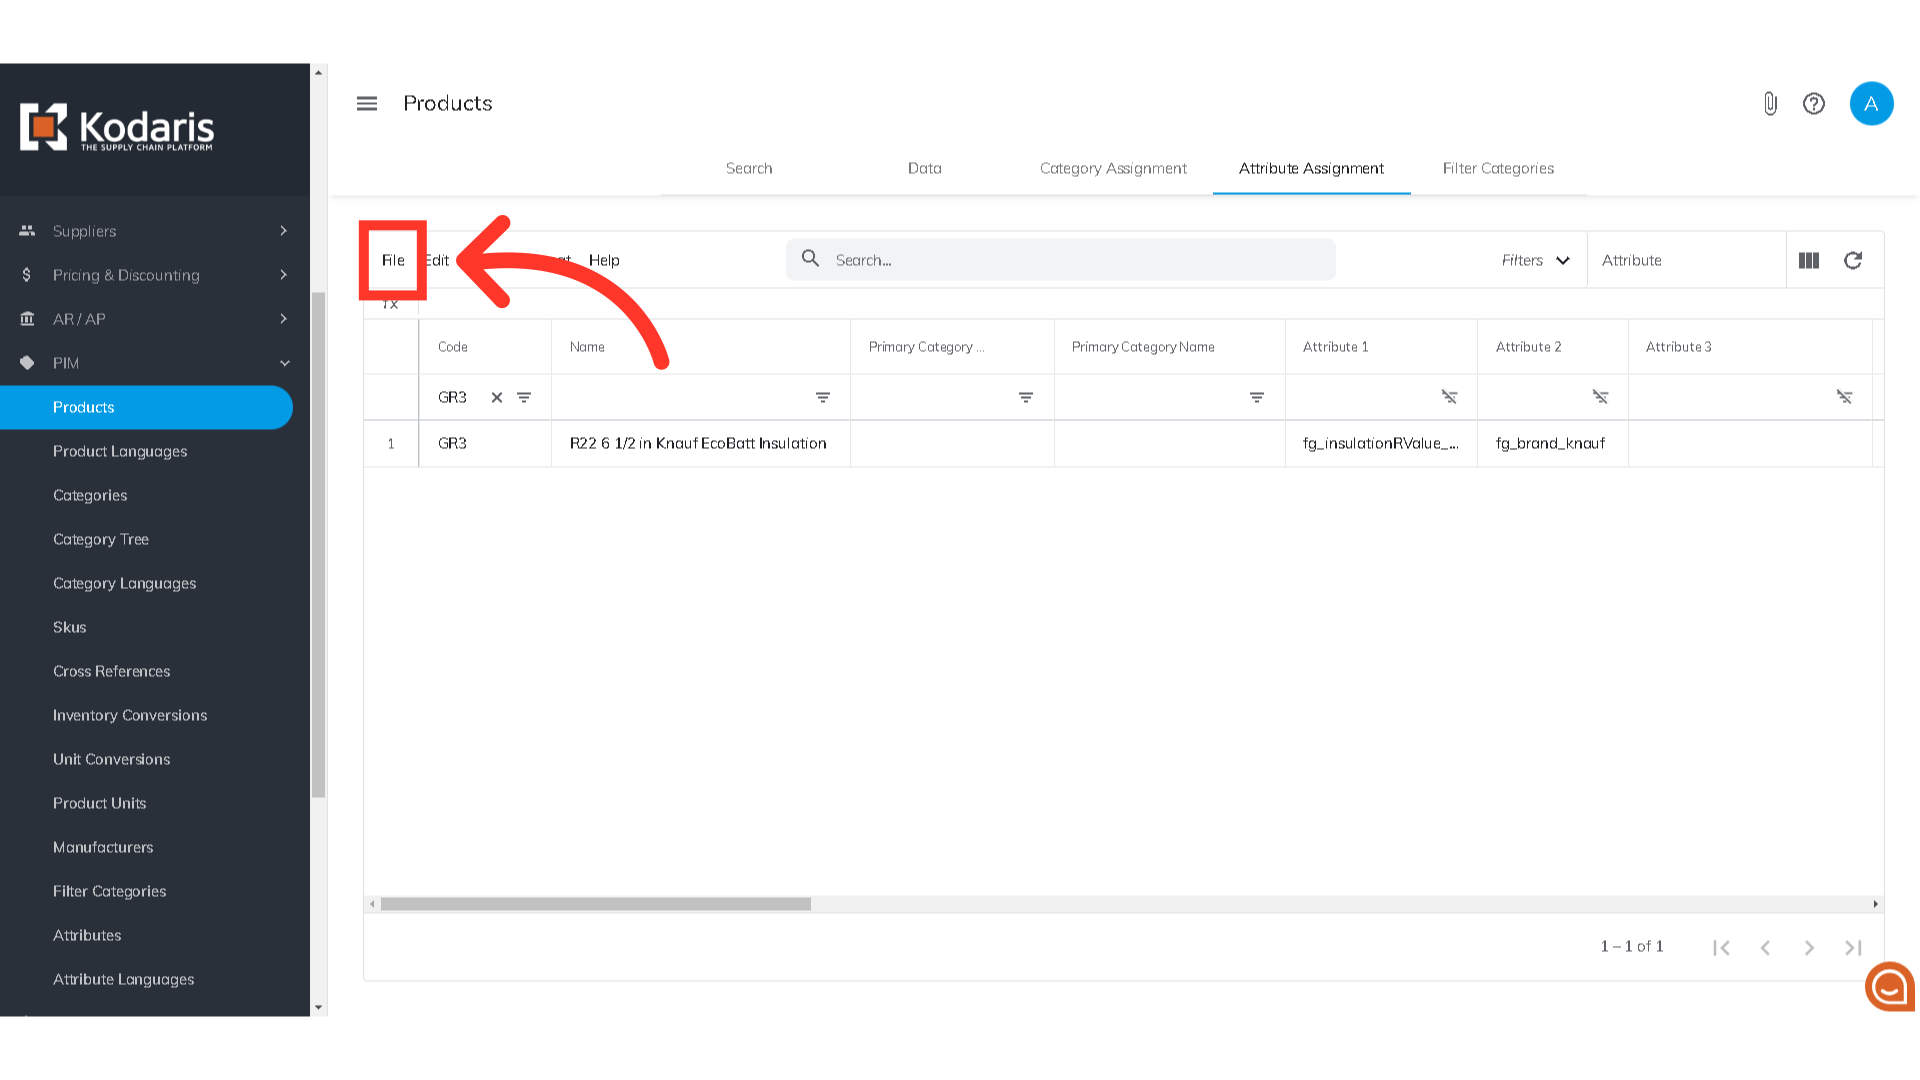
Another way to assign products to this attribute is by going to the "Products" screen under the PIM section.

Then, click on the "Attribute Assignment" tab.

Search for the products you would like to assign to the attribute.

In an empty attribute column, enter the attribute code "fg_displayFootageCalculator".

You can also mass assign products by using the import function on the "Attribute Assignment" tab and by following the help documentation on assigning attributes by import.
Now that products have been assigned to the square footage display, we can check the square footage calculator by searching for one of the products on your website.
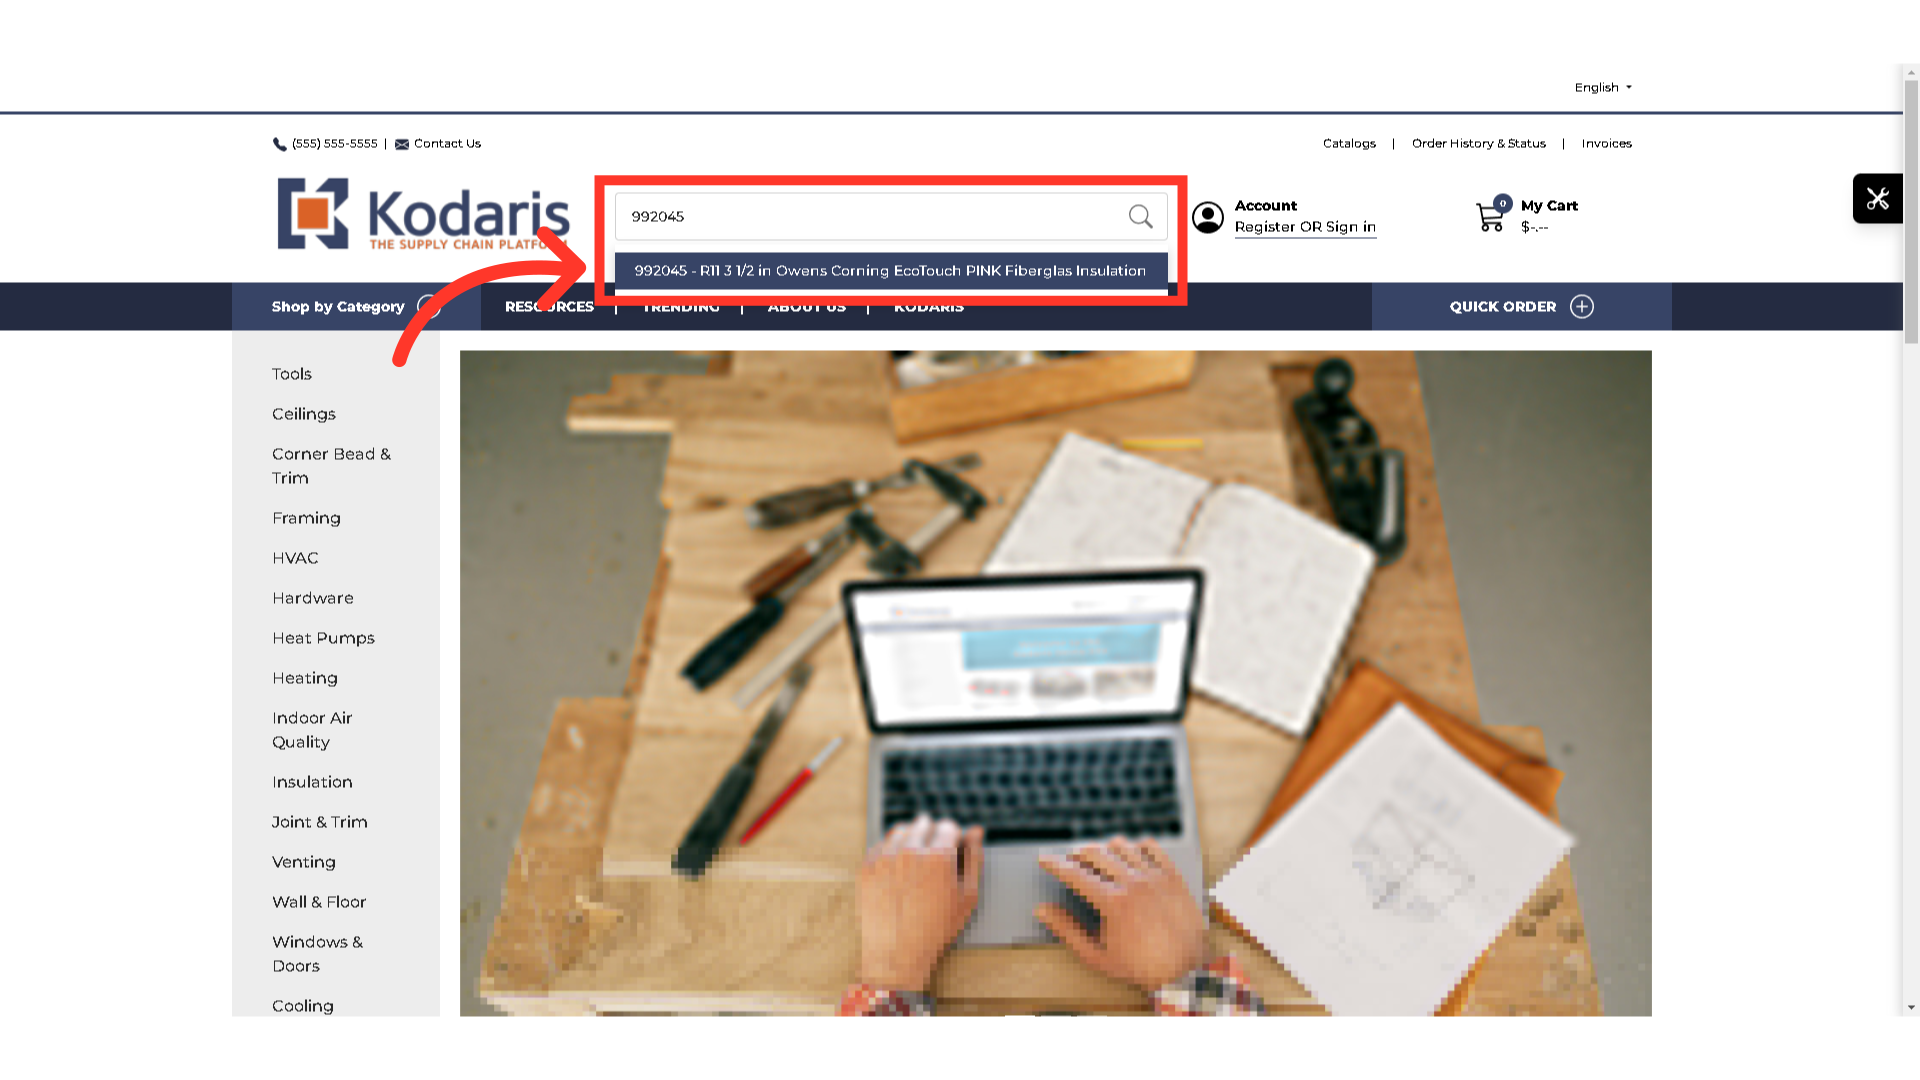
Then, click the product tile to see the details.

Click on the "CALCULATE YOUR NEEDS" button to utilize the Square footage calculator.
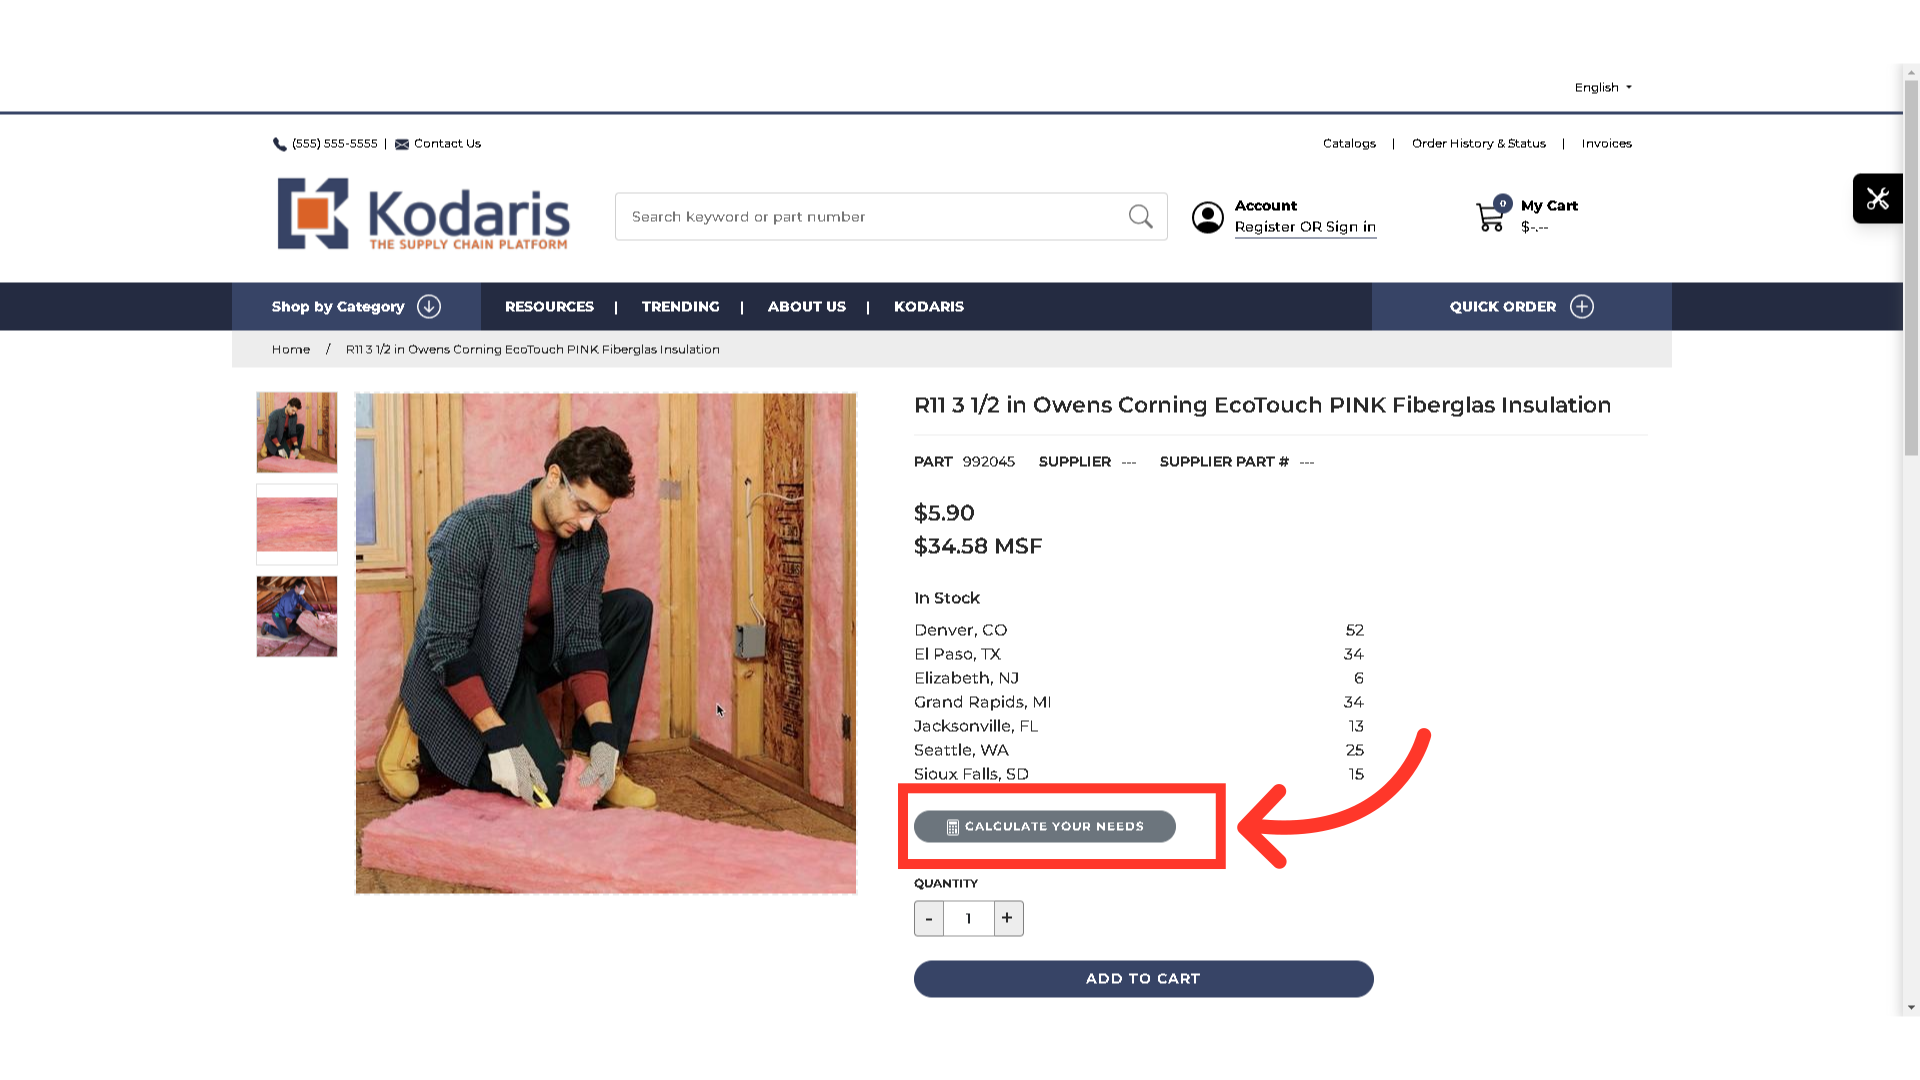
The square footage calculator will be shown as Option 2.

In the box, enter the amount of square footage that you need.
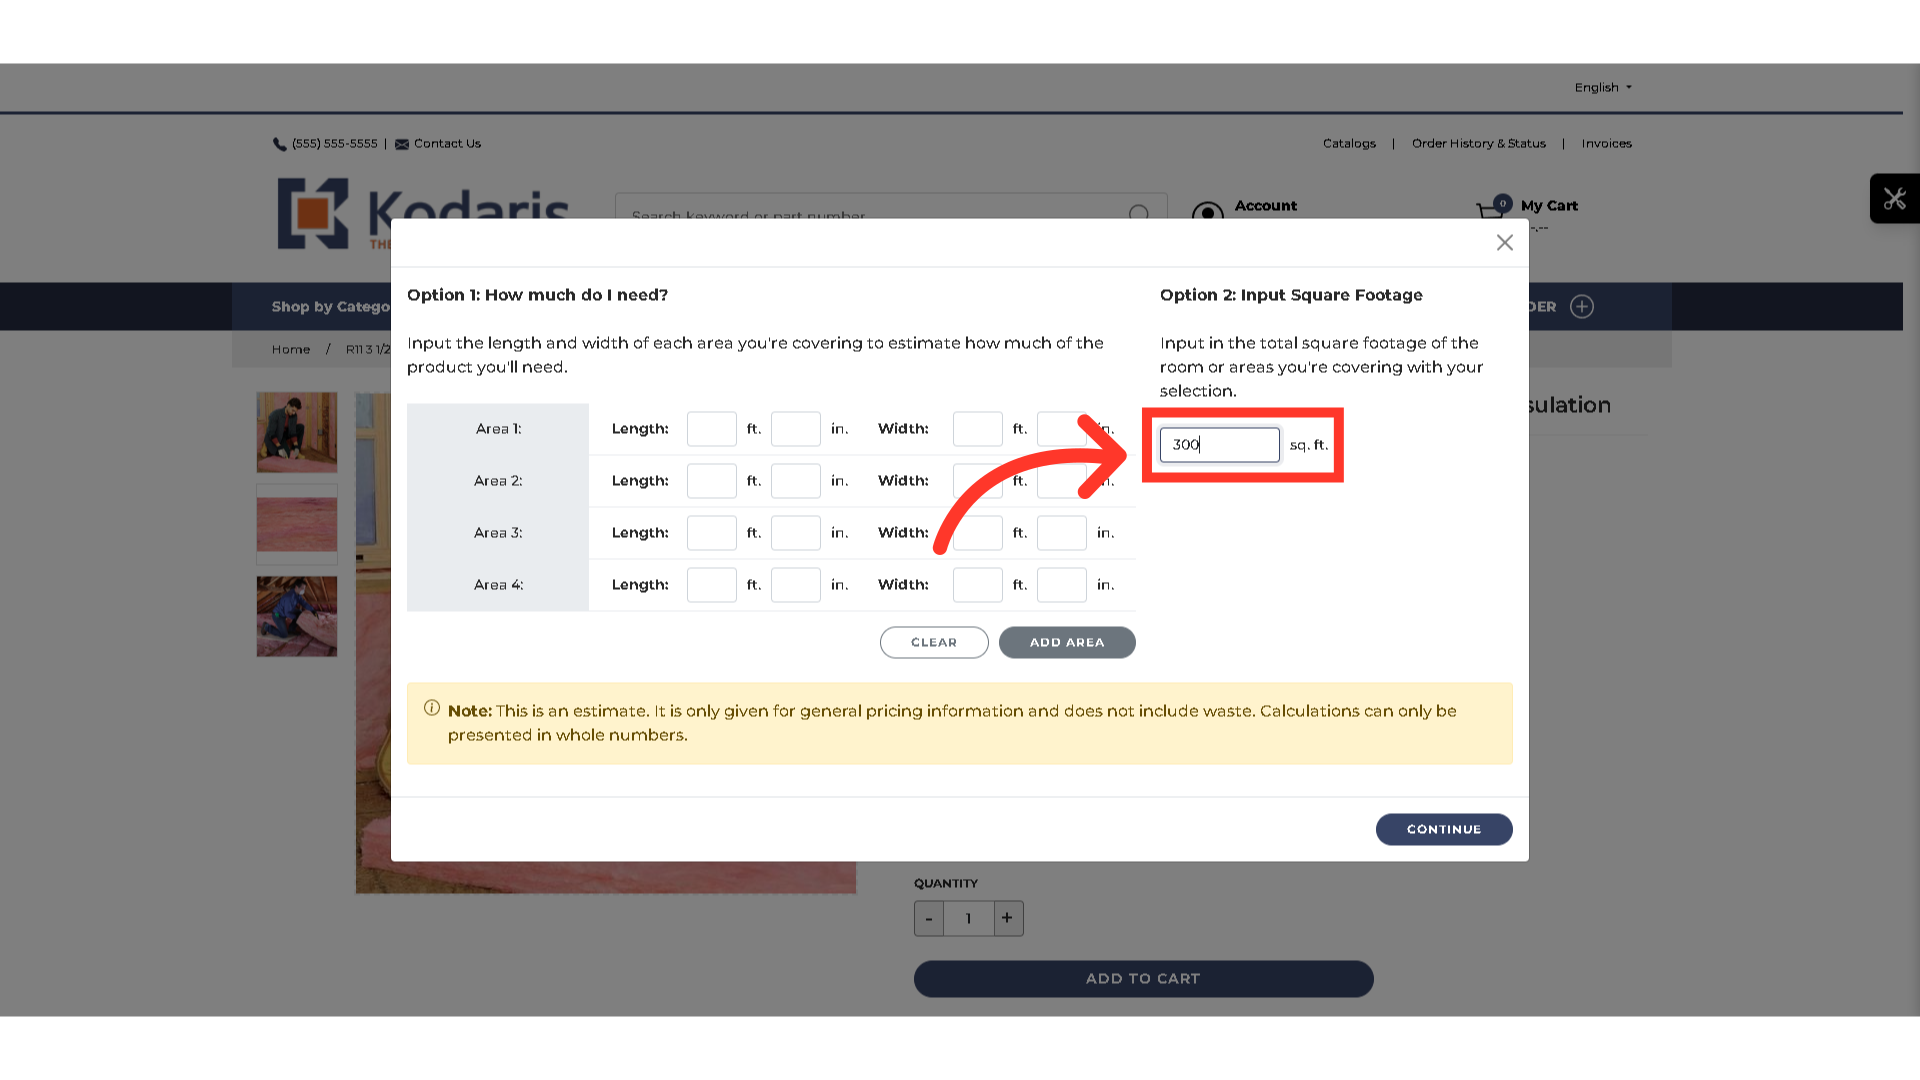
Then, click "Continue".

The product quantity will be updated automatically based on the calculation.
