To set up a product category banner on the commerce site, you will need to log into the operations portal. To set up a product category banner on the commerce site, you will need to log into the operations portal. In order to access and update a category banner, you will need to be set up as an “administrator” or “superuser” or have the roles of: categoryEdit and categorySettingEdit.

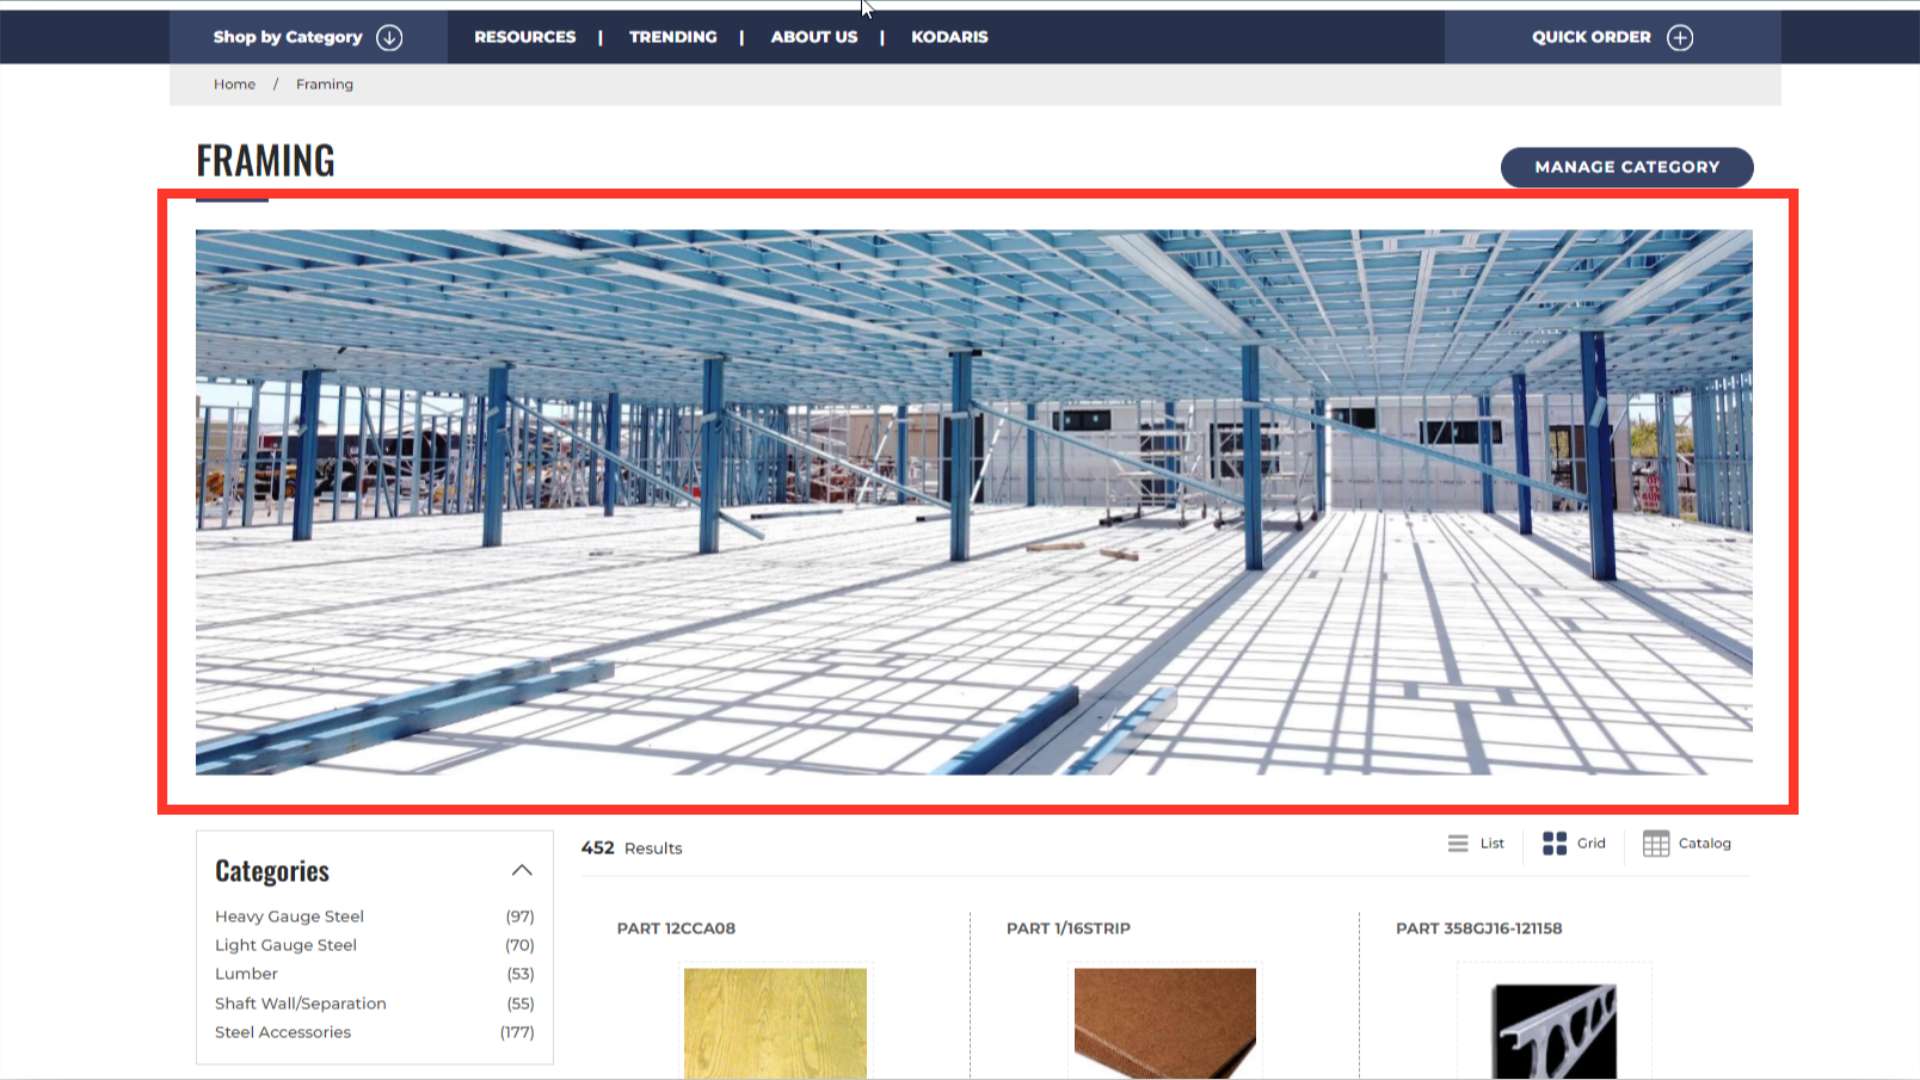
Once logged into the operations portal, you can select a category that you would like to update. In this case, we are going to add a banner to the "Framing" category.

On the category screen, click the "MANAGE CATEGORY" button.

A "Manage Category" dialog box will appear. Scroll down until you see the "Banner" section.

By default, a category banner is not displayed in the category page. Since you would like to display a banner, set the "Display" field to "Yes".

Next, click "Choose File" on the image field to select an image from your computer. A dialog box will be shown prompting you to choose a file. An optimized image for web display would not be wider than 1500px.
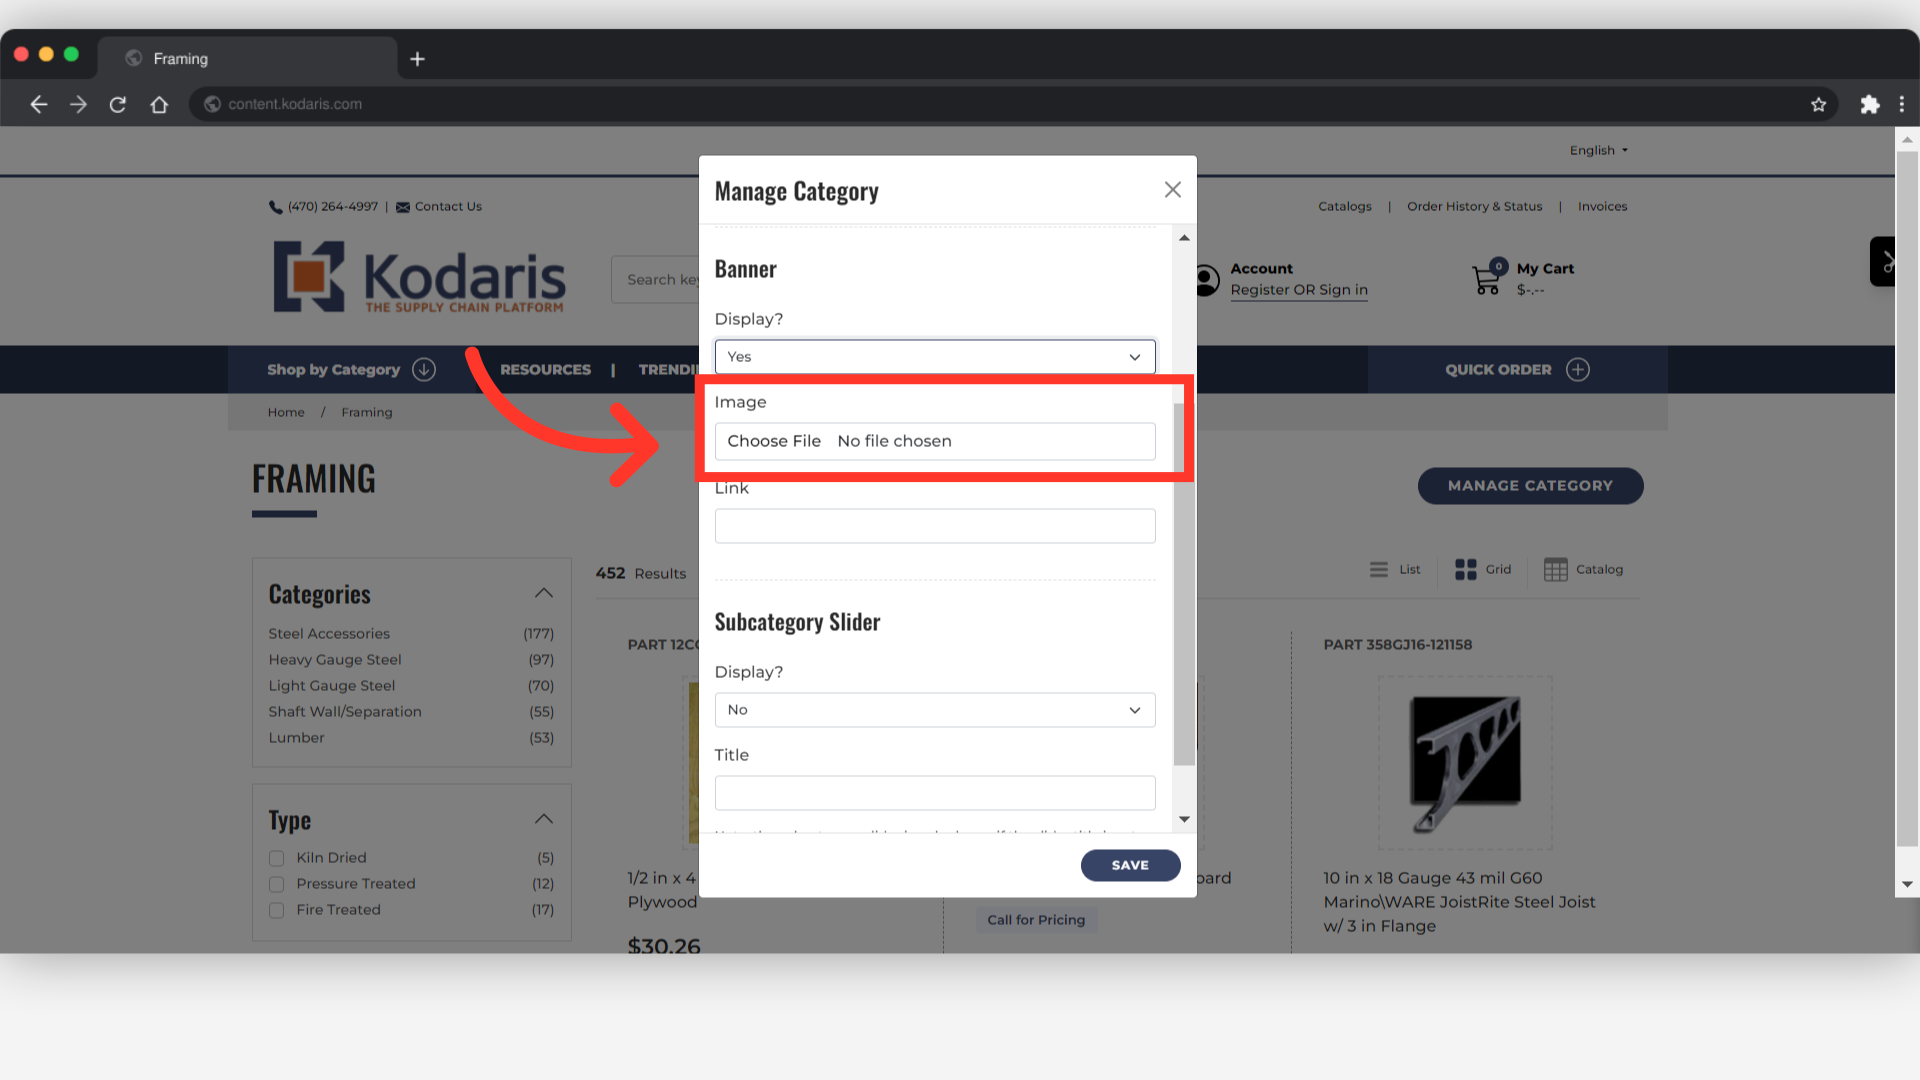
If you would like users to be redirected to a specific page when they click on the banner, simply add a URL to the "Link" field.

Lastly, click the "SAVE" button to apply the changes.

The banner should now be displayed in the category page.