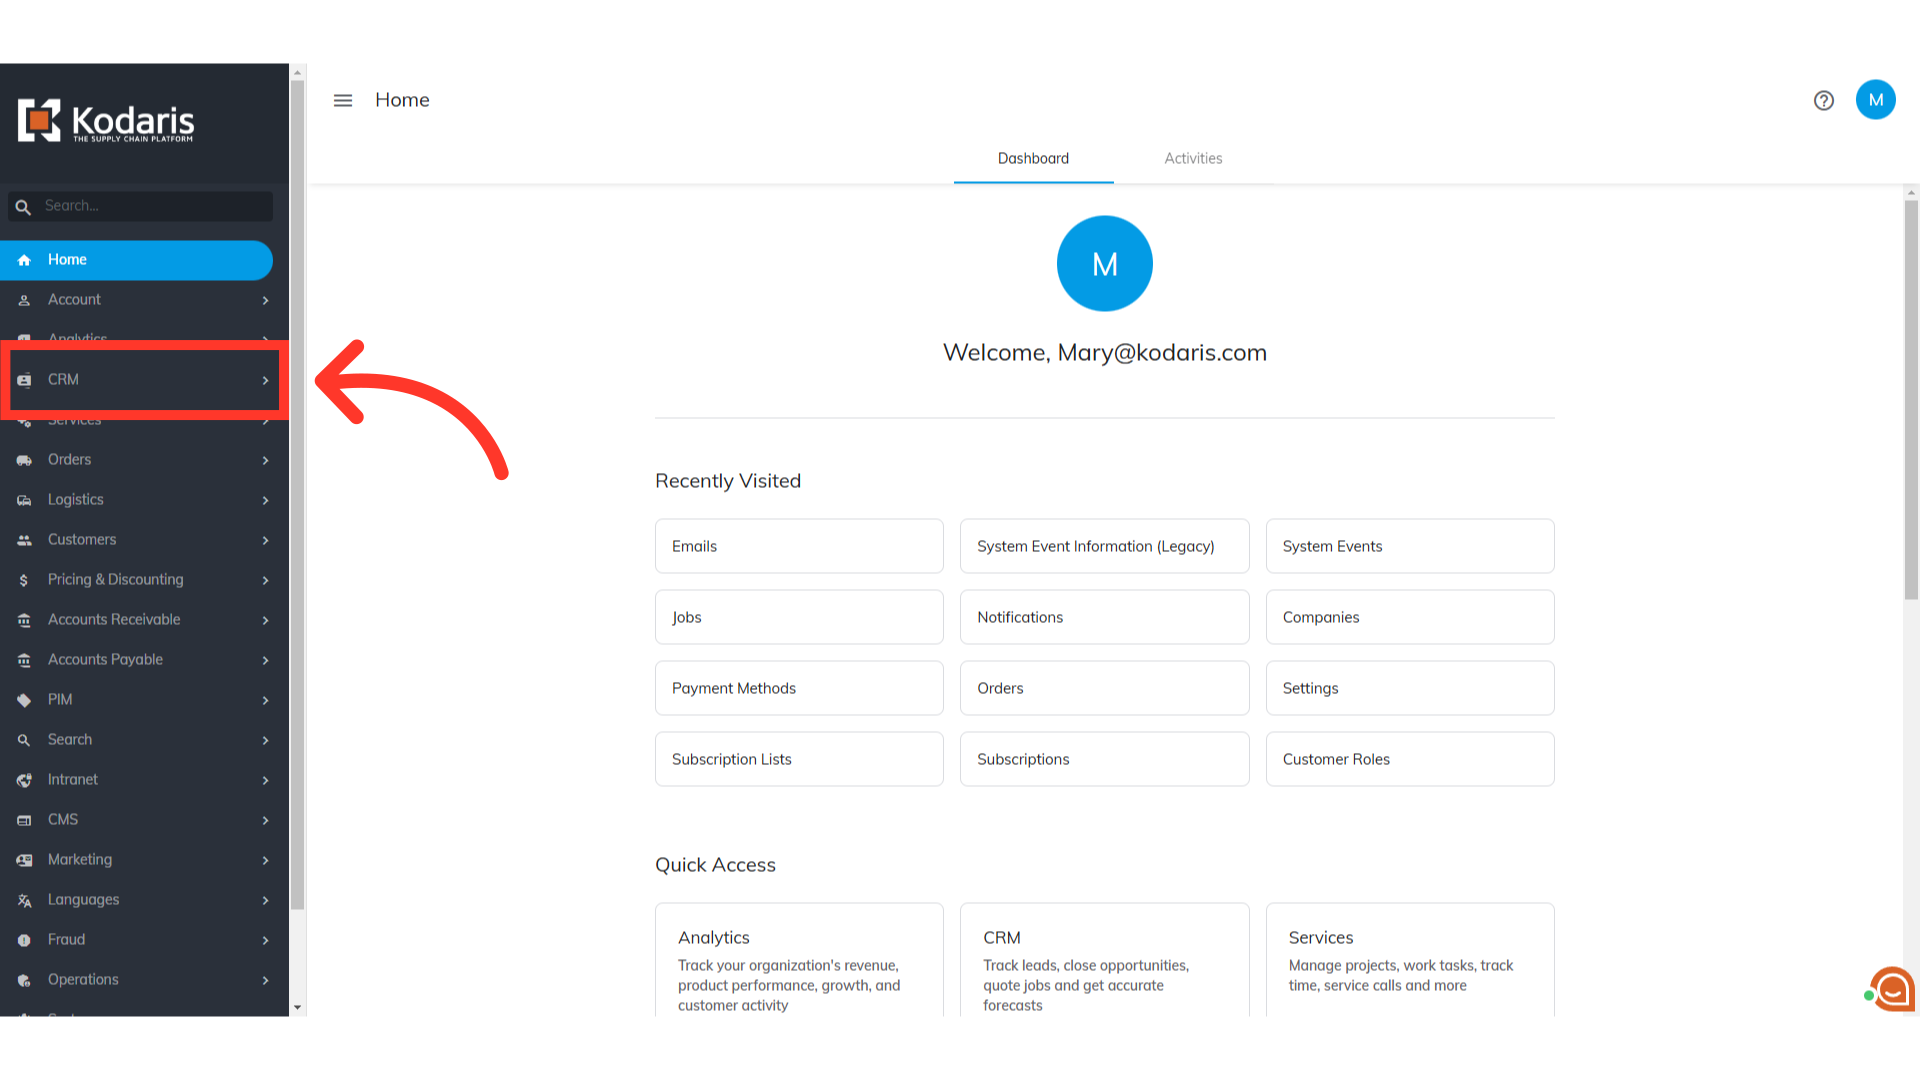
An option to save an ACH account as a payment method on the company's account is available in the operations portal. This feature offers a secure way to store the payment method so you don't need to request it multiple times from customers. To comply with payment regulations, an agreement signed by the customer stating their account can be debited must be kept on file and can be attached to the company in the Operations Portal. Here's how you can vault an ACH Payment Method. First, navigate to the "CRM" section.
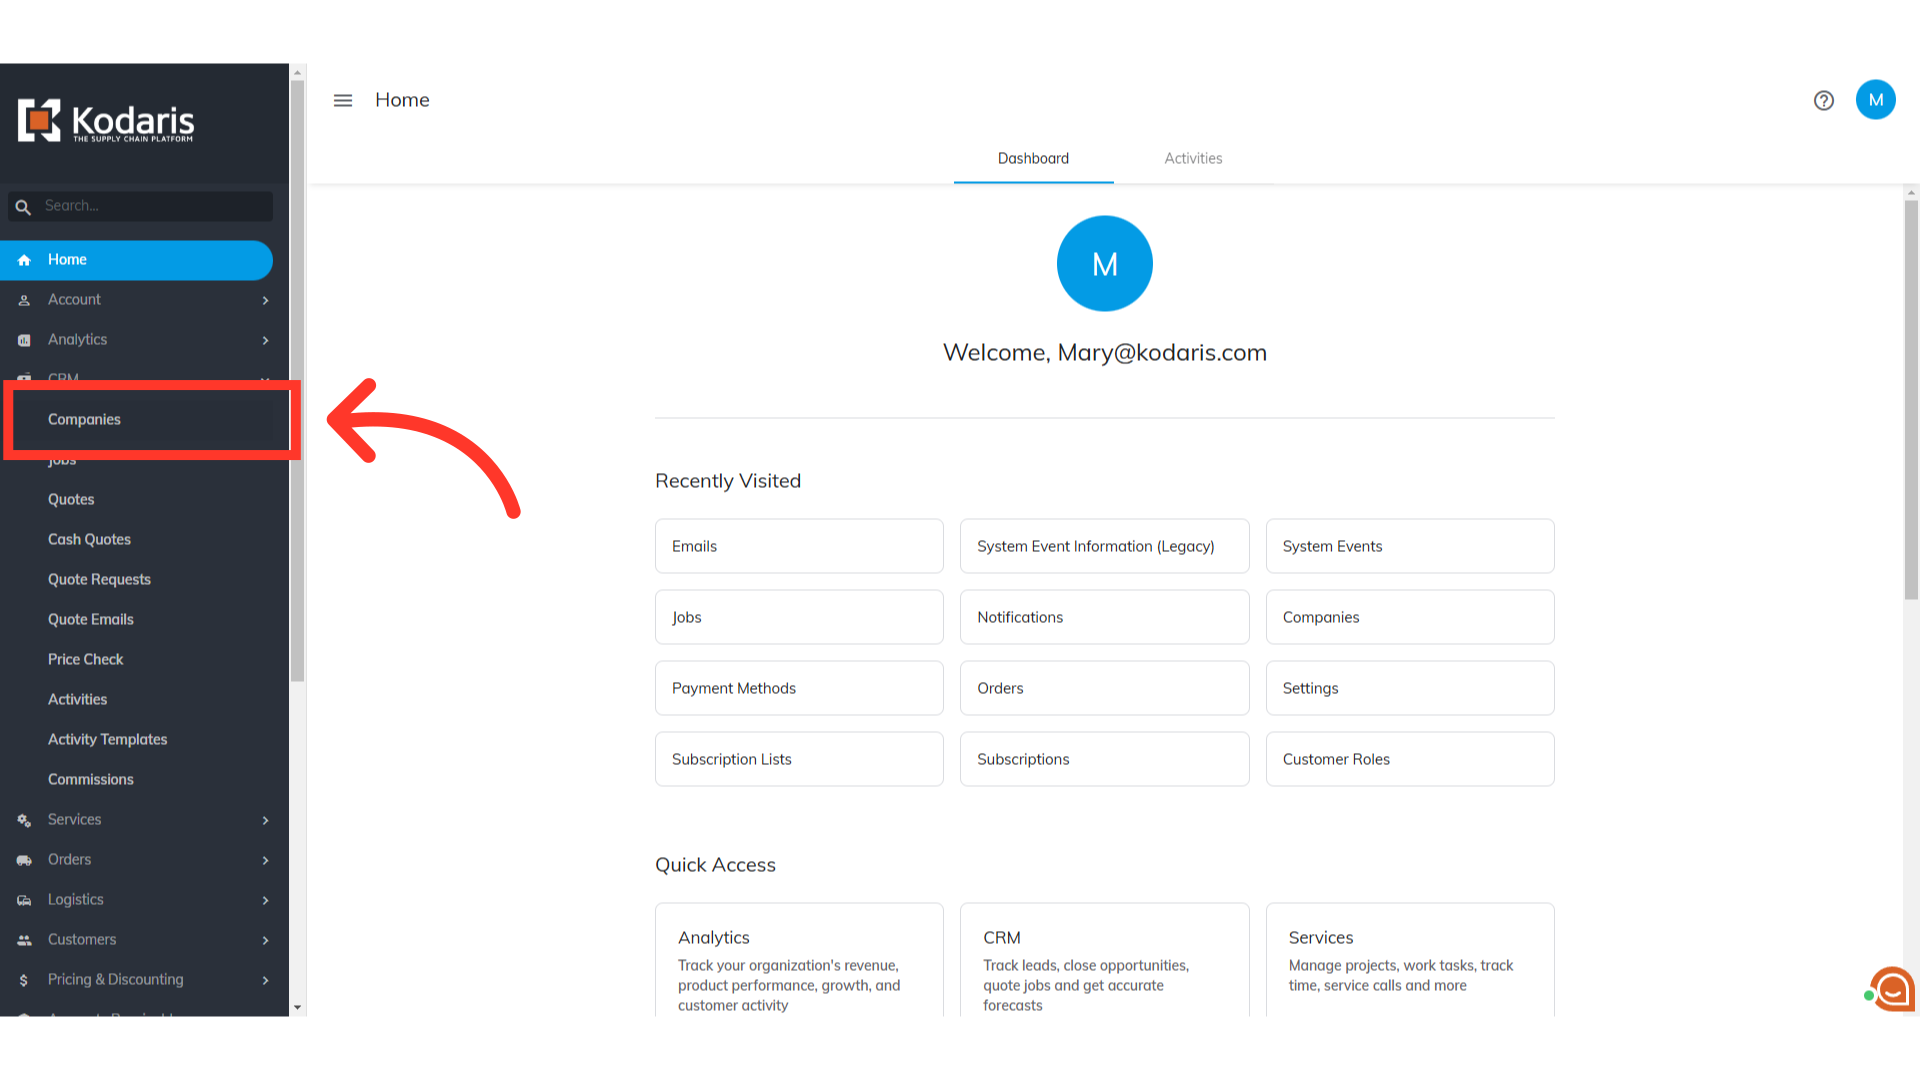
Next, click "Companies". In order to access "Companies" you will need to be set up either as an "administrator" or a "superuser", or have the appropriate roles: "companyView and companyEdit", or "crmCompanyView and crmCompanyEdit". Just a reminder, "crmCompanyView and crmCompanyEdit" access only allows employees to view companies that are assigned to them.
Search for the company you would like to update. Enter company name or code in the search field.

Click on the more details icon to open the company settings page.

Click the "Issue a Charge" icon to issue a charge on the account.
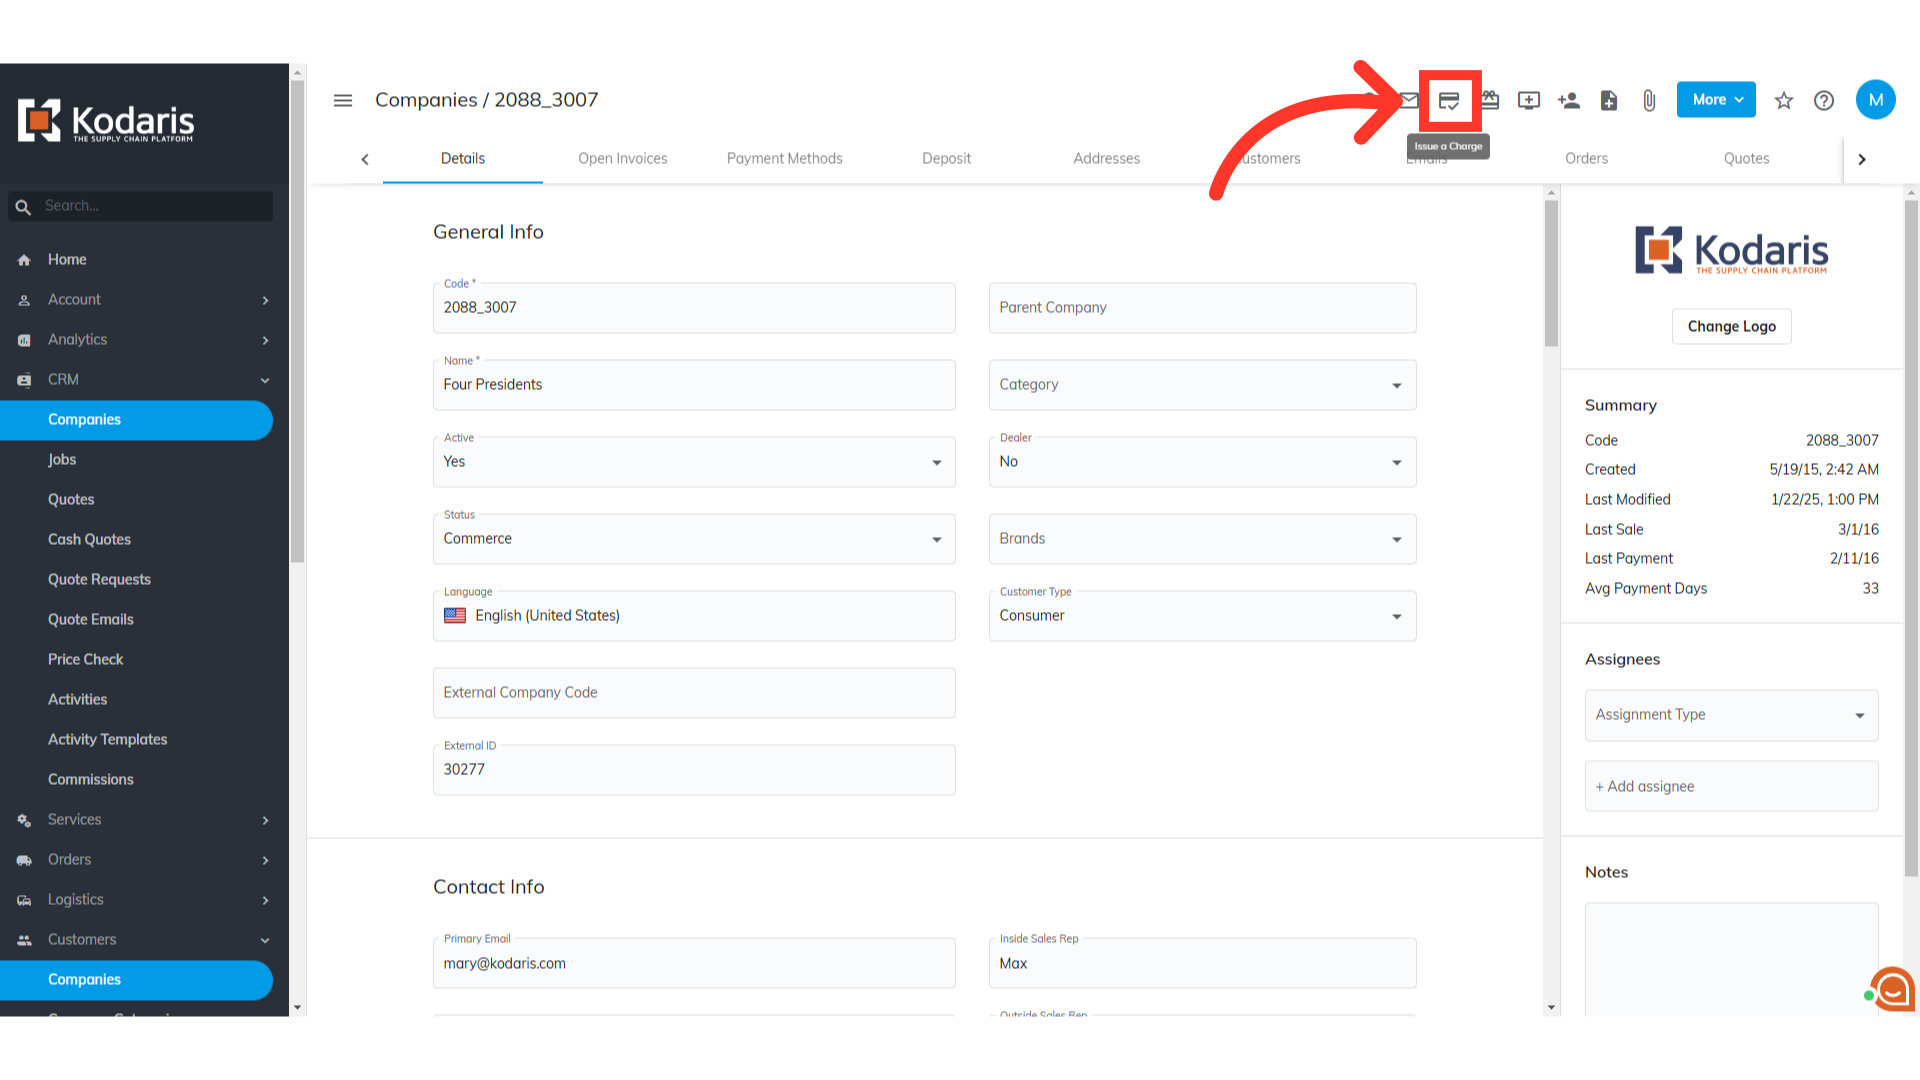
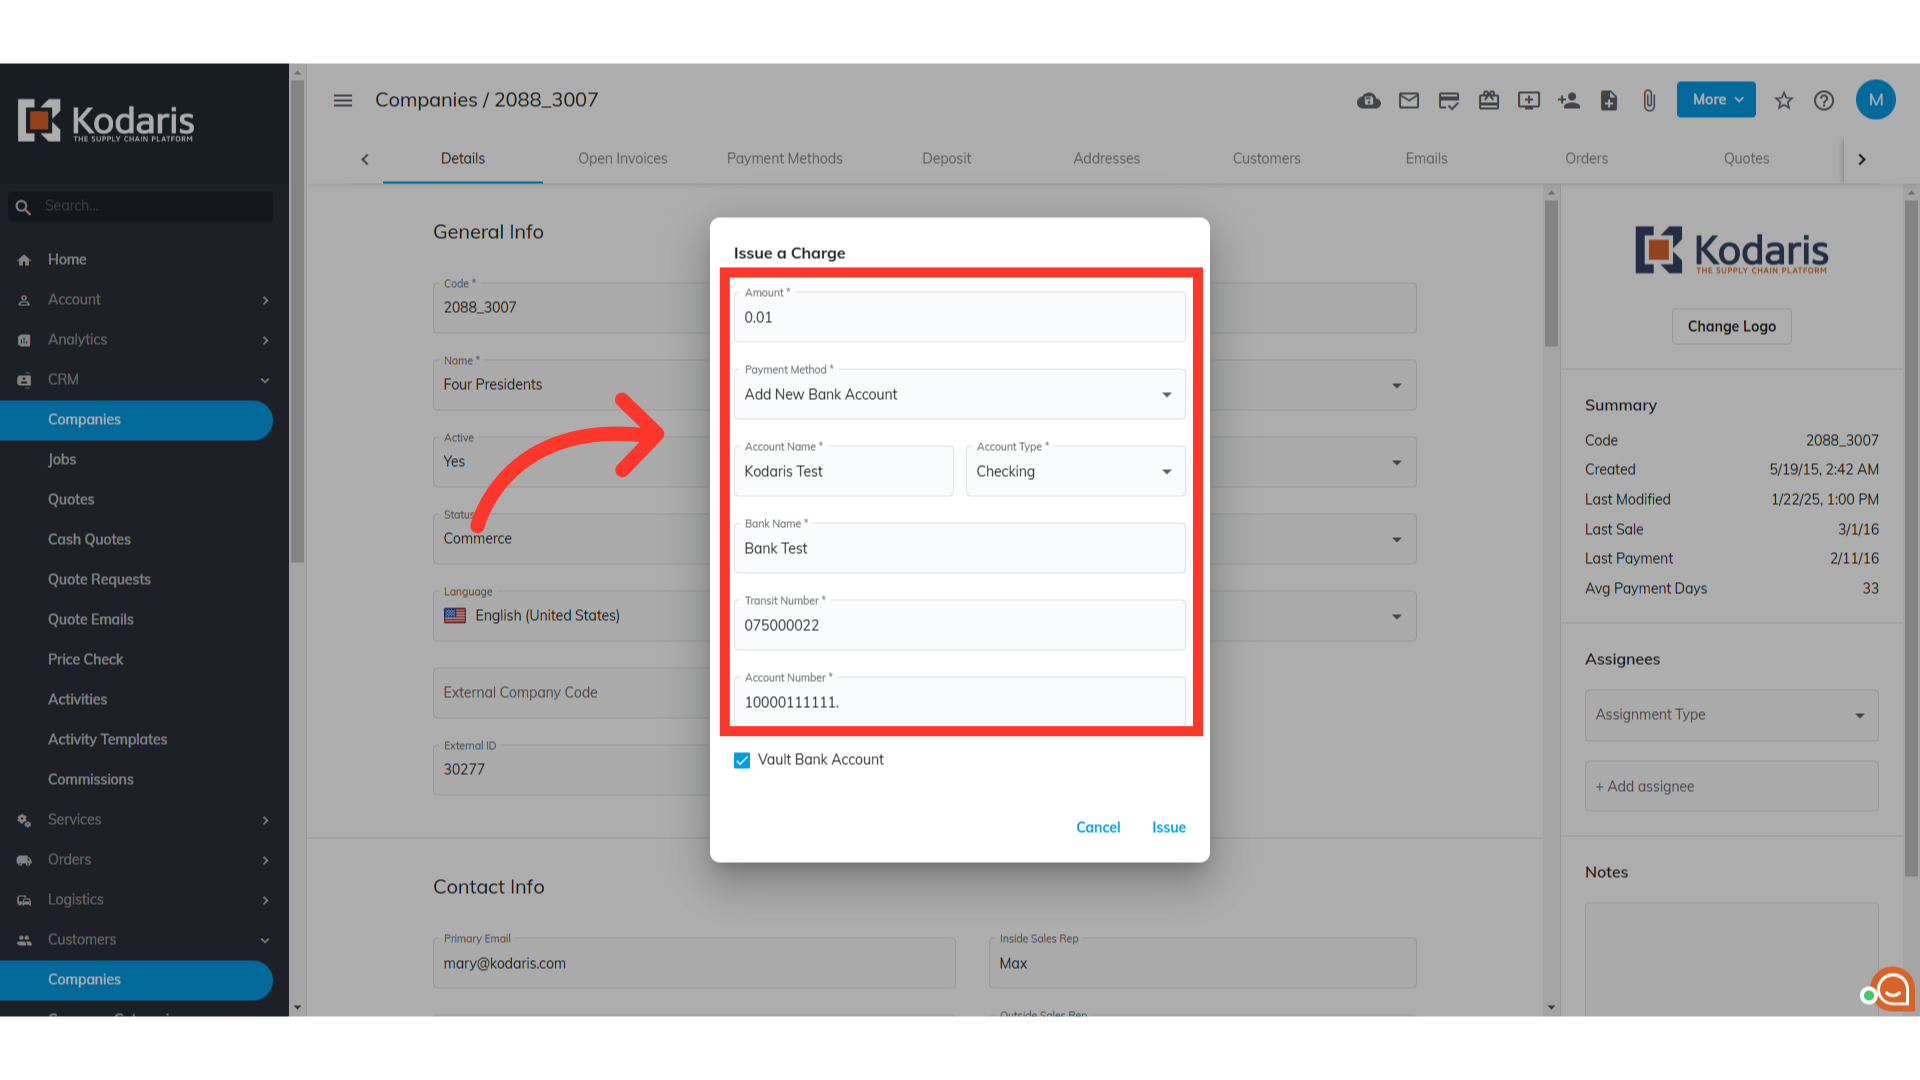
The "Issue a Charge" dialog box will display. Enter the charge amount in the "Amount" field.

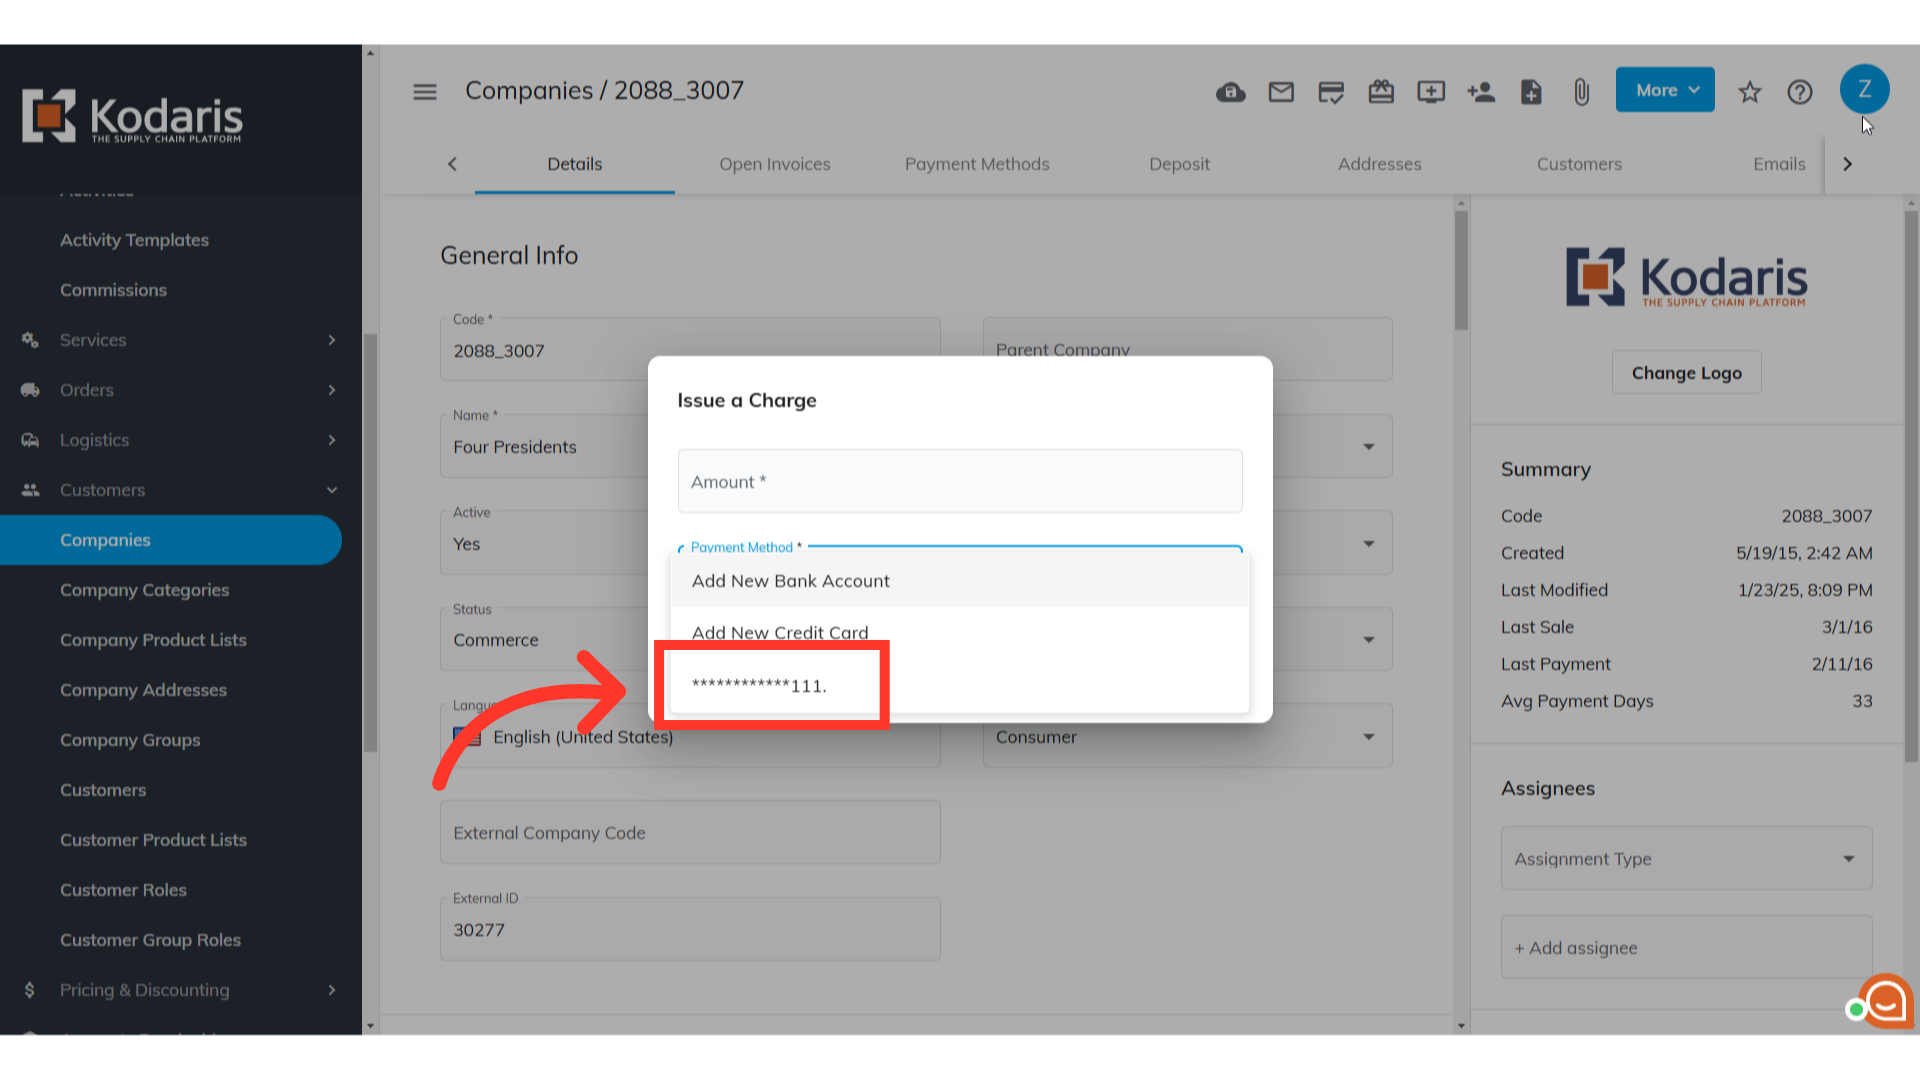
Click the dropdown icon to select a "Payment Method".

To add an ACH payment method, select the "Add New Bank Account" option.

Fill all the details.
Make sure that you click on the "Vault Bank Account" checkbox to confirm adding this payment method under the company account.
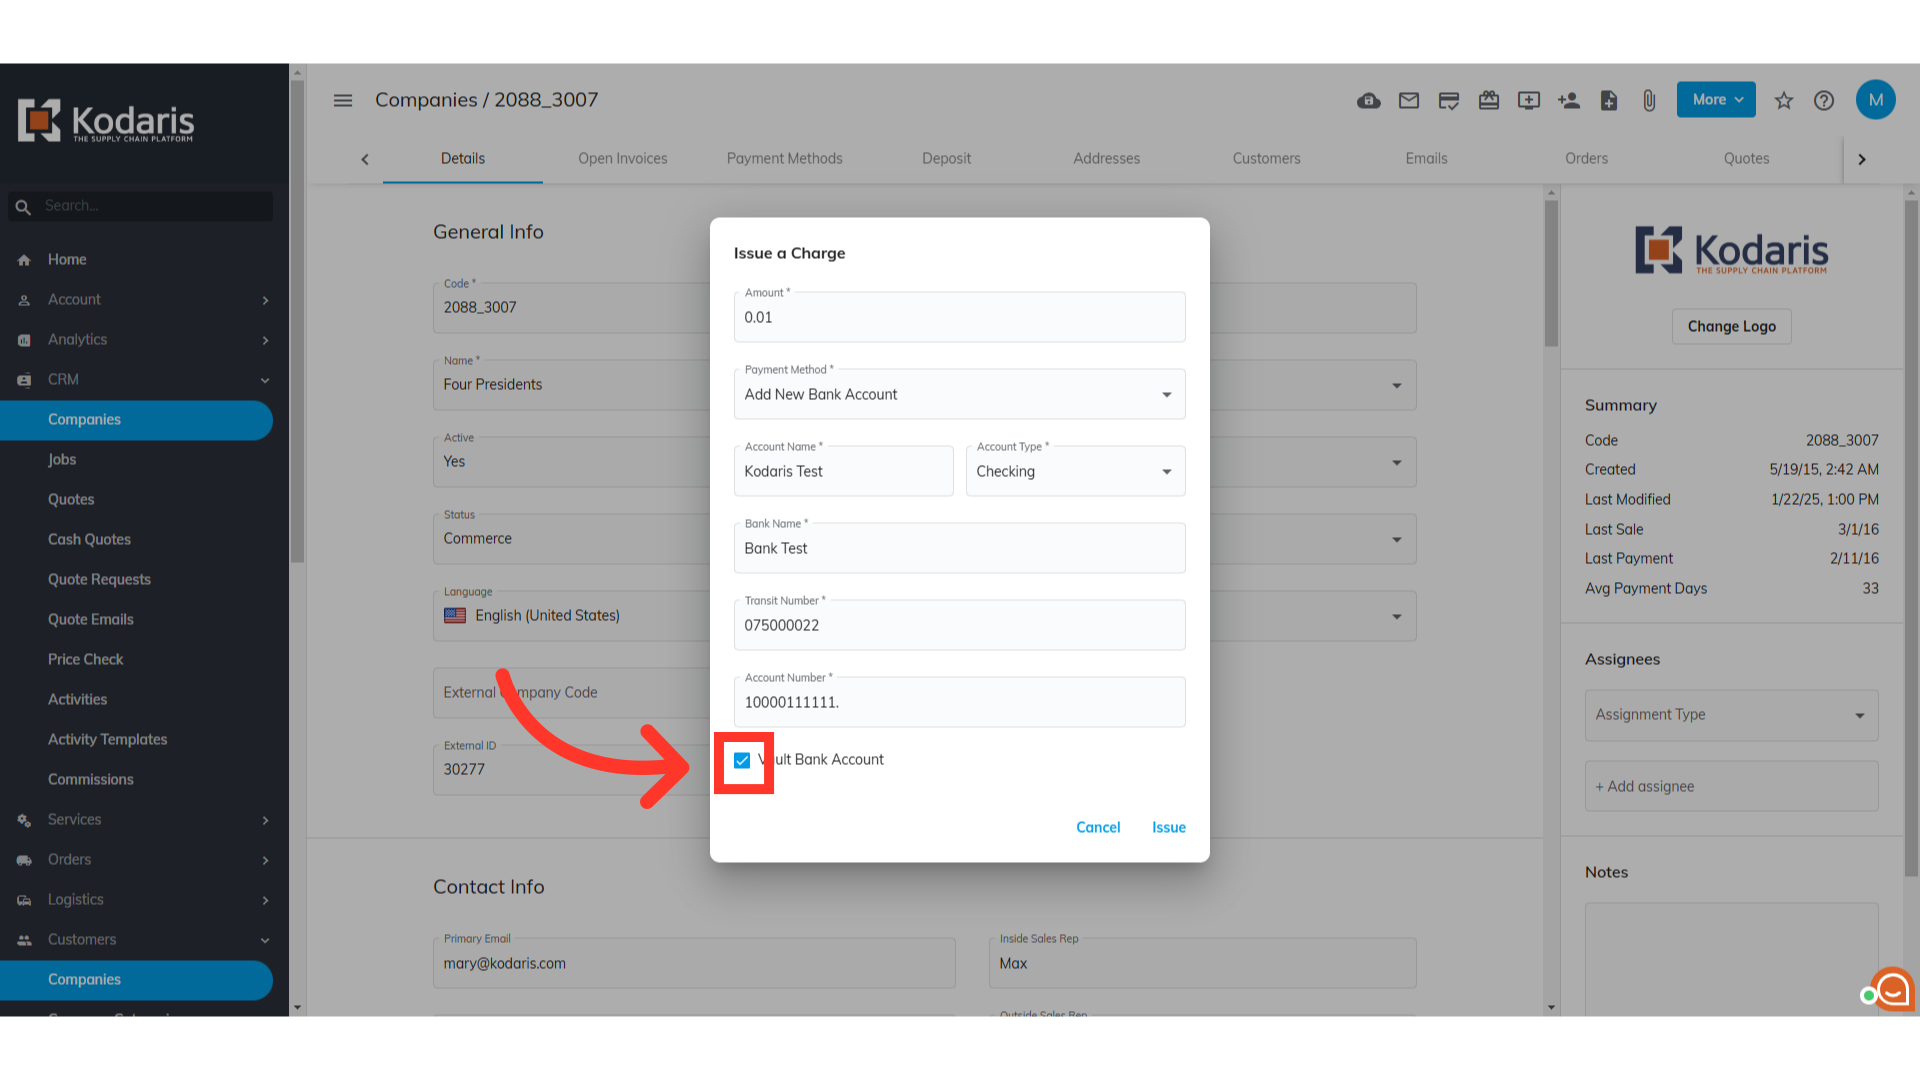
Click "issue" to confirm issuing a charge to the account.

A confirmation message indicating that the charge has been successfully issued will appear at the bottom-left corner of the screen. The payment you also used in this payment is now saved under payment methods.

Now that you've saved the payment method, you can select it the next time you issue a charge to the company.