Adding images and media files can be done a few different ways in the portal. In addition, there are several ways to streamline the process depending on how you update your product information.
The examples below show the options of using the data grid screen, the product detail screen, and the search screen for adding files to products. The process is the same for all screens.

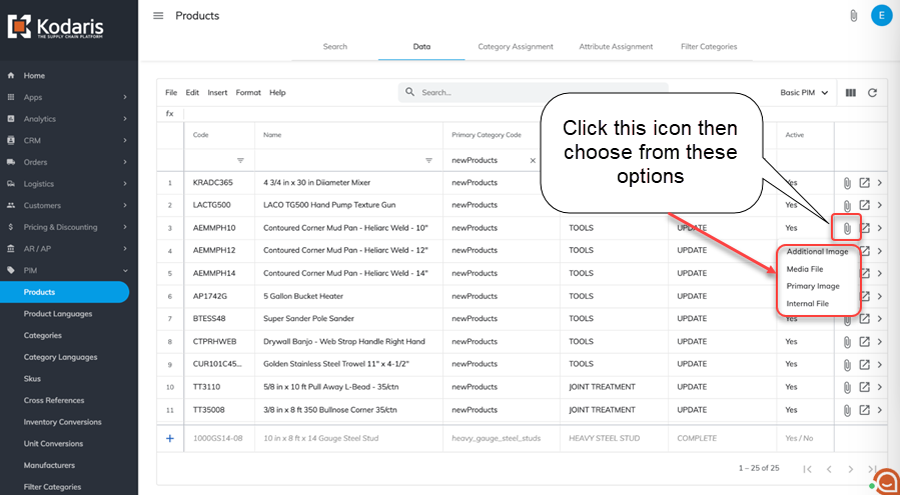
By working in the data grid screen, you can quickly add files to several products. To add files to products in the data grid, click on the "Attach File" icon to view and choose from the various options. As you can see in the data grid view, an Attach File icon is on every product listed.
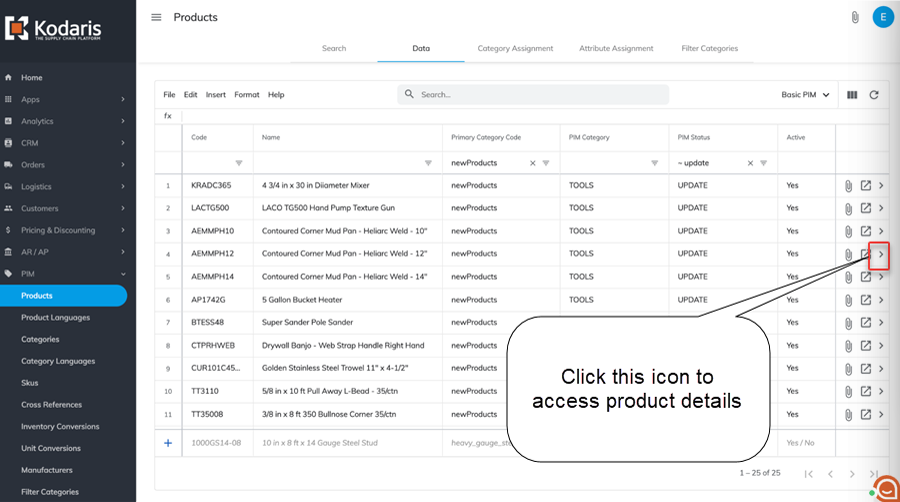


You can also add files to products on the search screen – when clicking on details of a product, it will take you to the product detail screen. Then, click the "Attach File" icon at the top of the screen to view and choose from various options.
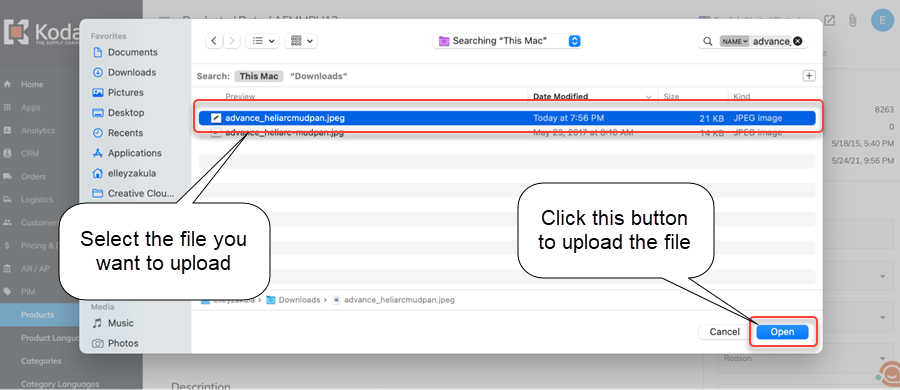
Once the desired option is selected from the dropdown, you will choose the image or file from your computer and upload it. This is the same for both the data grid screen and the product detail screen.
When uploading image files, the system will automatically resize the image to include the image's thumbnail, medium, and large versions.
To view the image and files on the commerce site, just click the preview icon on the screen that you are currently using. For example, this could be the data grid screen, the product detail screen, or the search screen.
You can also view the individual images and files added to each product by viewing the details and selecting the "Public Files" tab.
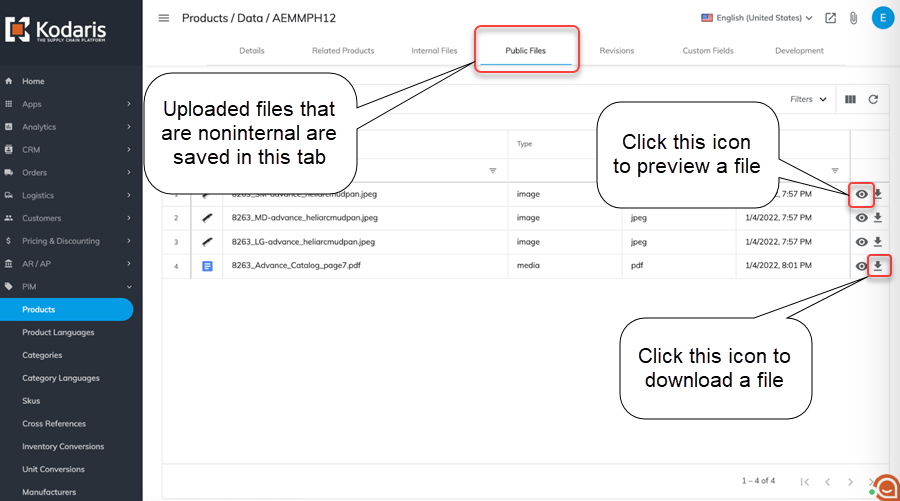
Here, you can download the files or view the uploaded files.

If you wish to delete an image in the portal, please delete all three versions of an image.
To replace a primary image, click on the "Attach file" icon and add a primary image. This image will take the place of the previous image.