To have your products appear in a specific order within a category, you will assign a number value in the Order field.
The closer the number is to 0, the higher on the page the product will appear, such as Product A having a value of 0 will appear at the top, while Product B with a value of 5 will be listed below the Product A.
Remember, each product gets only one value in the Product Order field, so confirm that the value you assign to that product places it in the correct order on all the pages it appears on. If needed, further filter your products down to a specific category to ensure the products will show in the order you want.
As a best practice, we recommend using values like 0, 5, 10, 15, 20, etc. as it makes it easy to manipulate the product order without having to redo the entire thing if/when a new product is added.
Update Product Order By Details Screen
Navigate to “Products” from the PIM section in the Portal
Select the Search tab
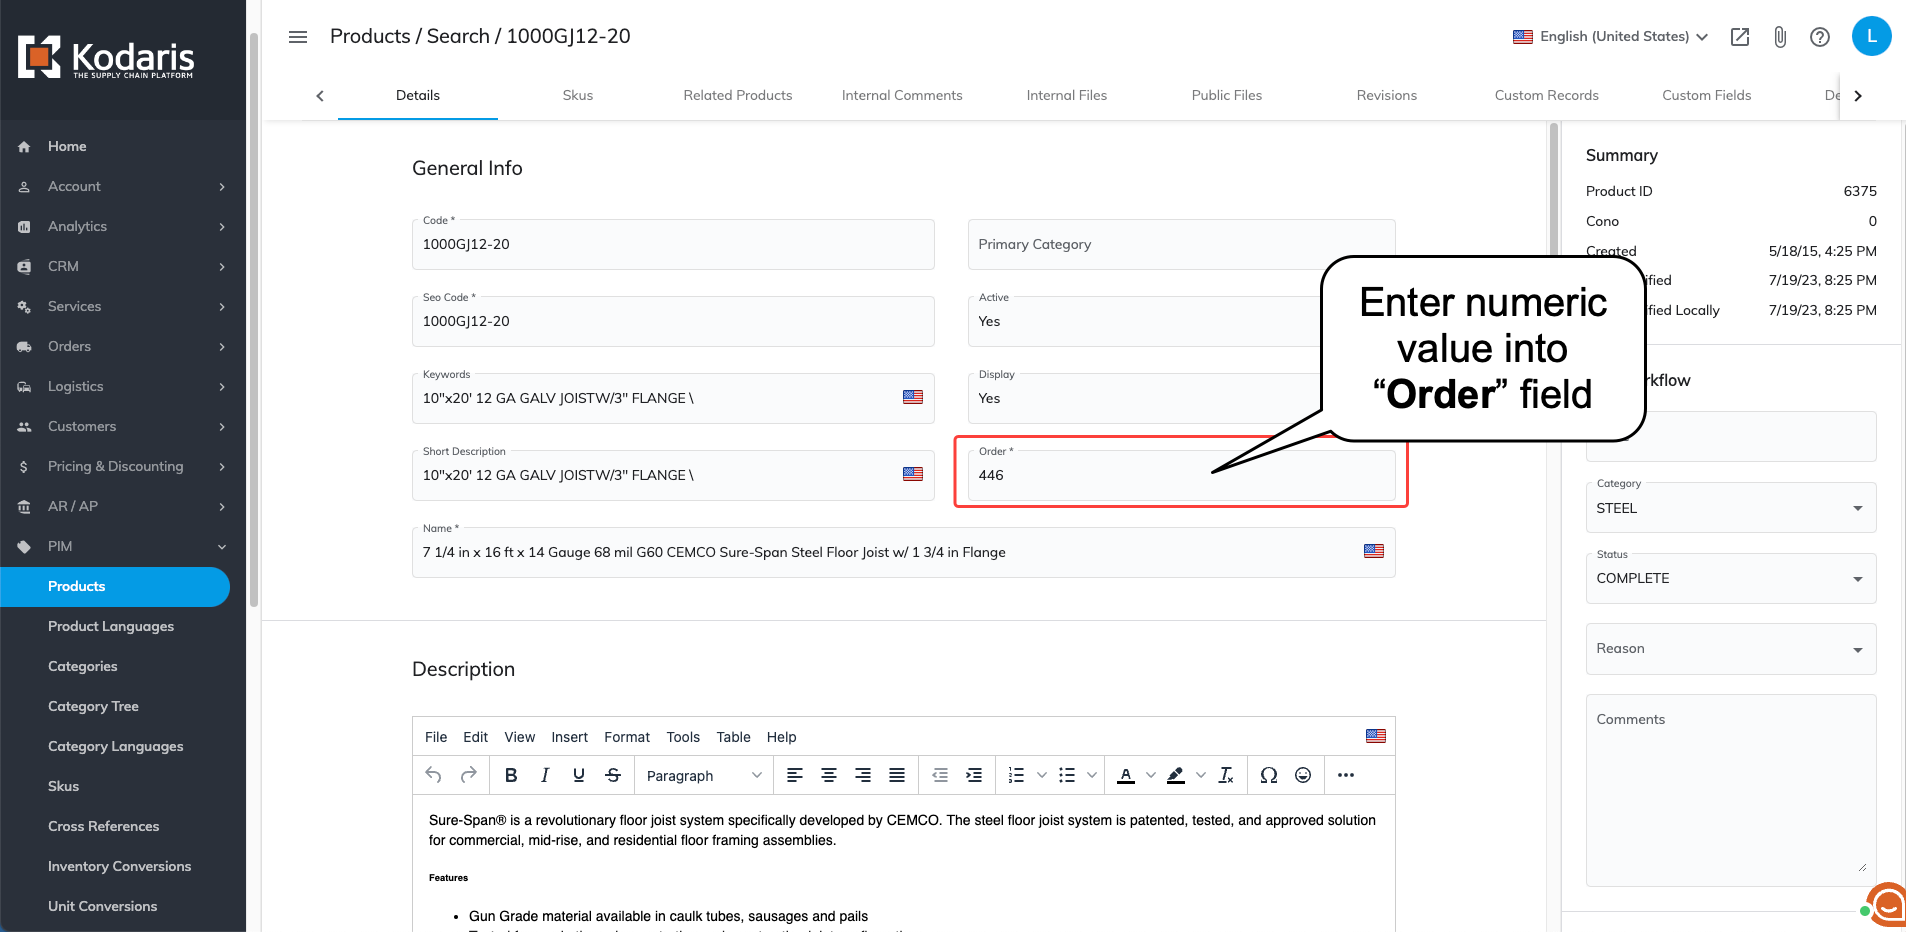
Locate the product you would like to update, then click on the details icon to the far right
On the Details tab, enter in a numeric value to the Order field.
Update Product Order In The Data Grid
Navigate to “Products” from the PIM section in the Portal
Select the Data tab
Find the product or products you desire to update, by doing one of the following steps:
Use the Search option to type in the Code, Name, or other identifying factor
Enter in a search term directly to the Filter field in a specific column
Filter by one of the columns, such as Product Category
Use the Filter field to search for a specific term
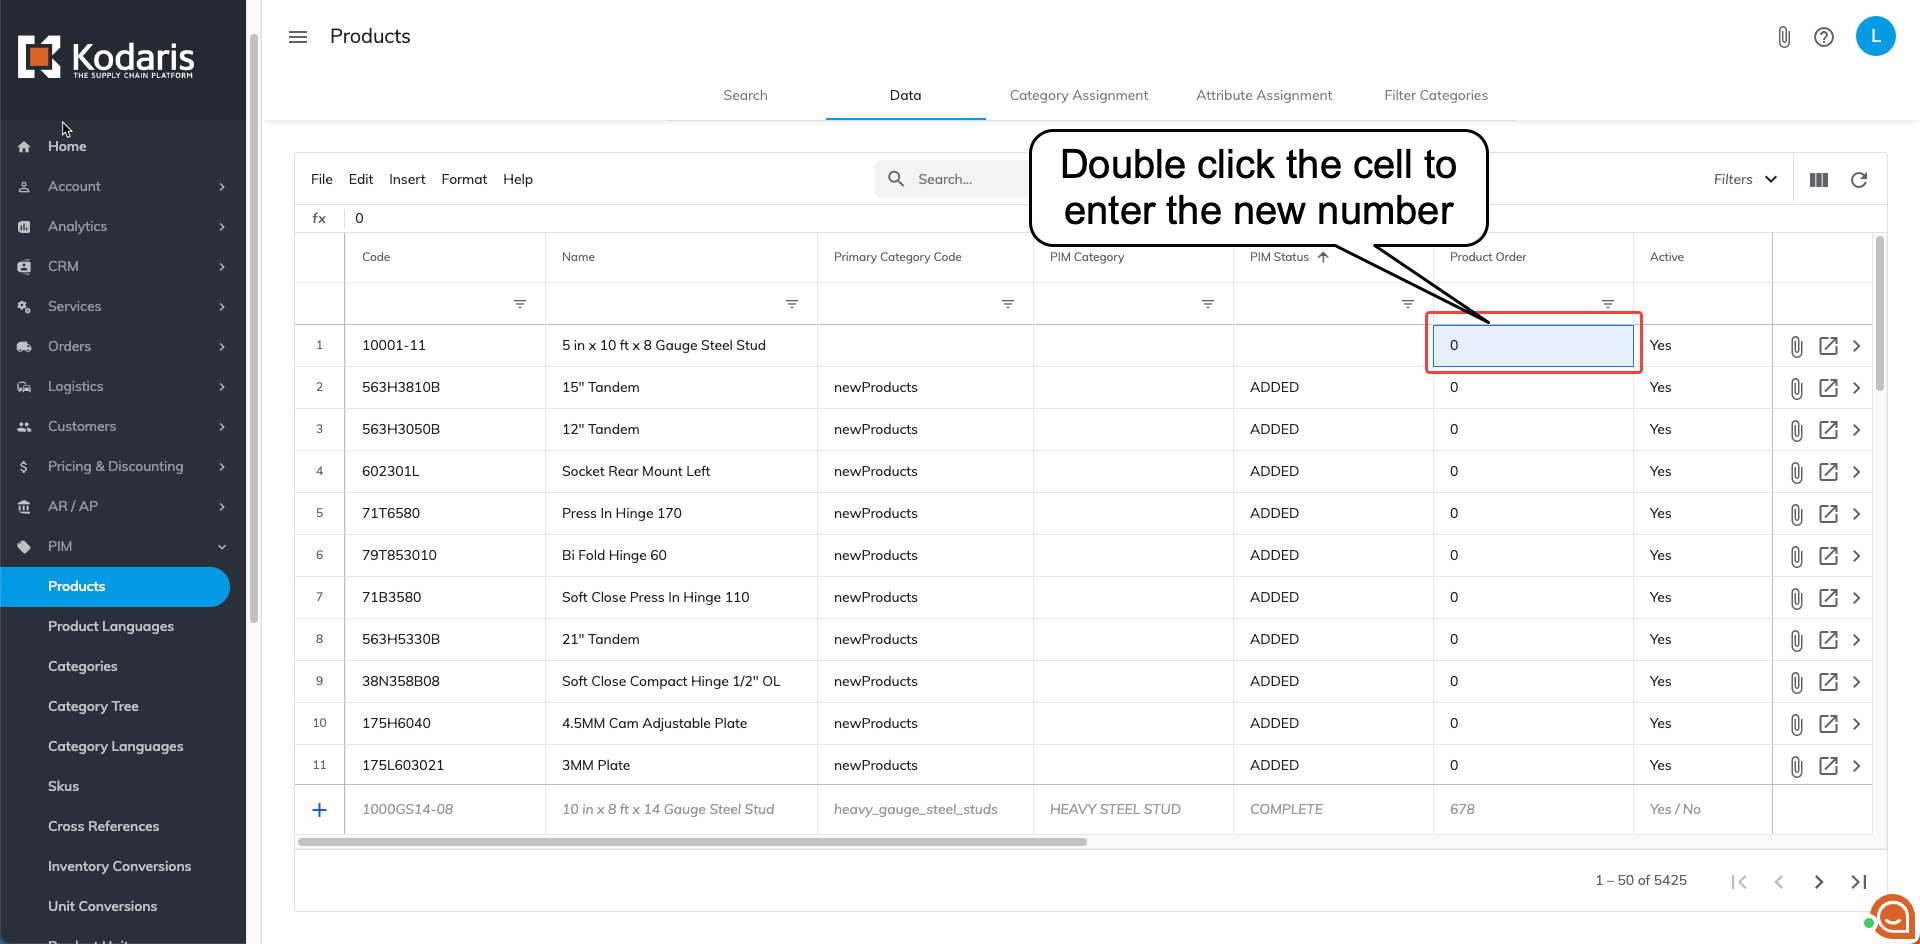
Using the "Show/Hide Columns" icon, select the Product Order
Go to the Product Order column for the product or products you want to adjust and double click the cell to enter the new number
Update Product Order By Importing
In order to import your new product order, you first need to export.
Navigate to “Products” from the PIM section in the Portal
Select the “Category Assignment” tab
Click the “Show / Hide Columns” icon
From the list, click the Product Order field. Make sure the Code field is also shown as it is the identifying field to match the data as well as each of the Categories.
Go to “File”
Select “Export”
Note: Your export will include a header row which is needed for importing. You can also export Product Order from the data tab and attribute assignment tab.
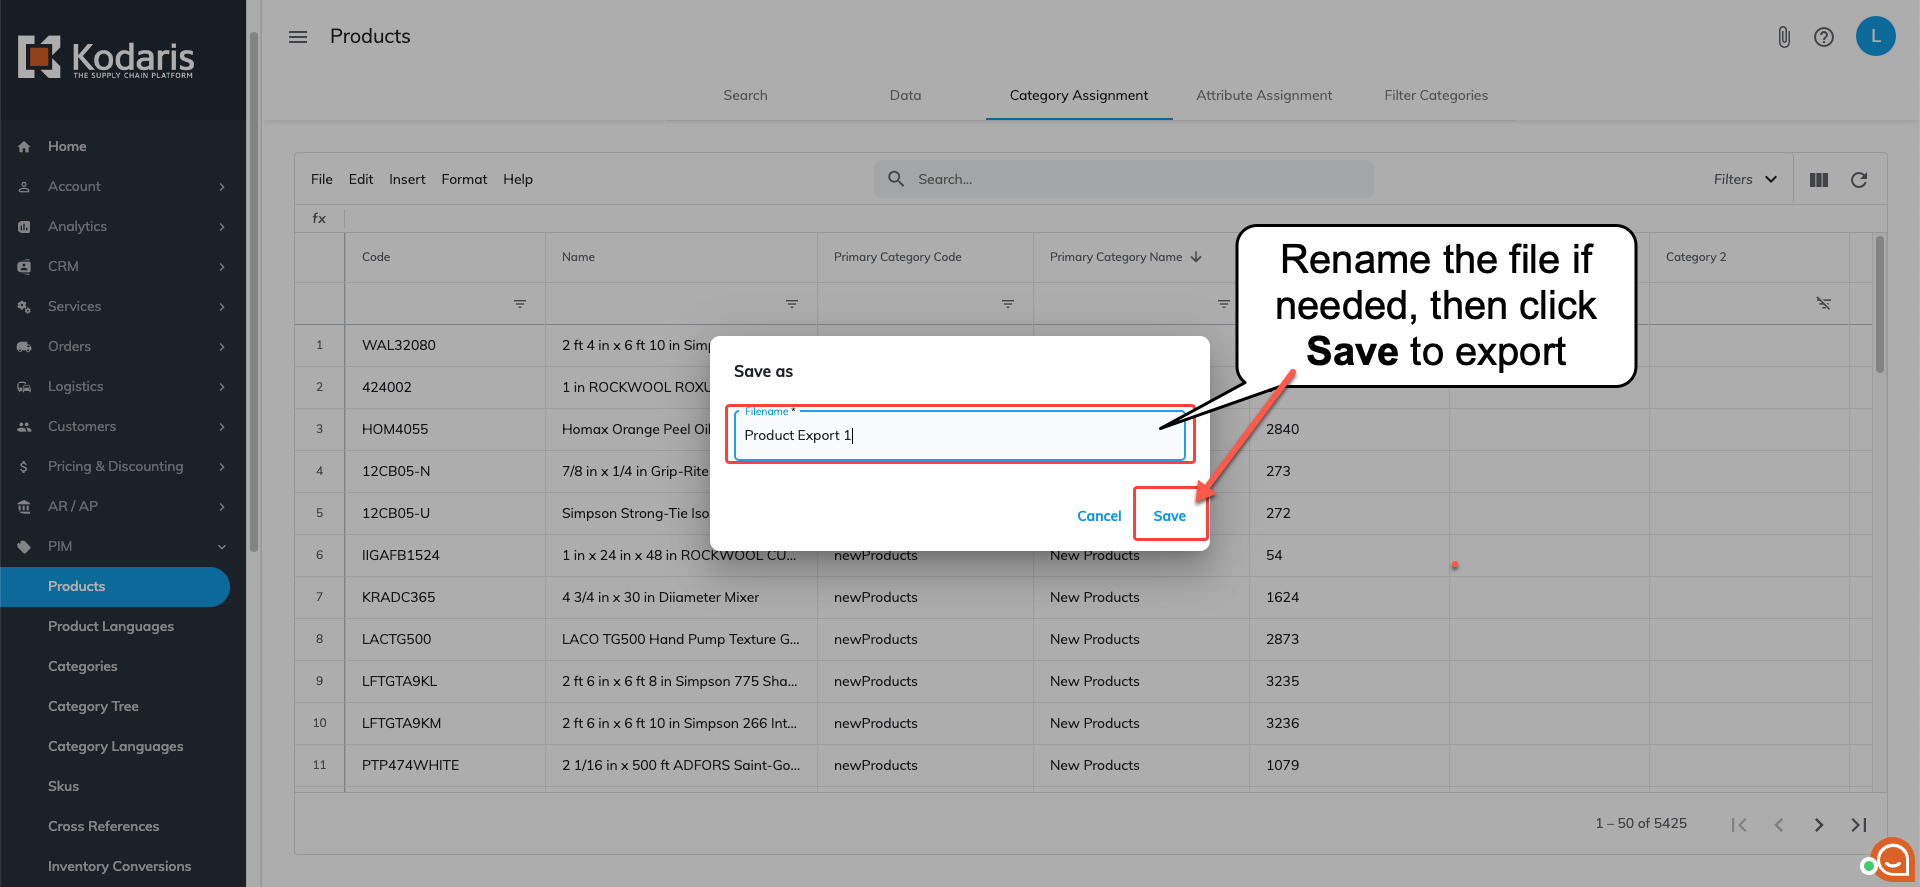
“Save as” dialogue box will appear
Rename the filename if needed, then click “Save” to export the file
Note: If you are exporting a large amount of data, it may take a small amount of time to complete the export. The file will download and save to your computer.y take a few minutes based on how much information you are downloading.
Now that you have your exported information, assign a numeric value to each product in the spreadsheet. You may want to do this one-by-one, or sort by category to ensure your products will show up on the eCommerce site in the order you desire.
Once the sheet is complete, export or save the spreadsheet as a .csv file and you are ready to import the product order file.
1687_produ
Navigate to “Products” from the PIM section in the Portal
Select the “Data” tab
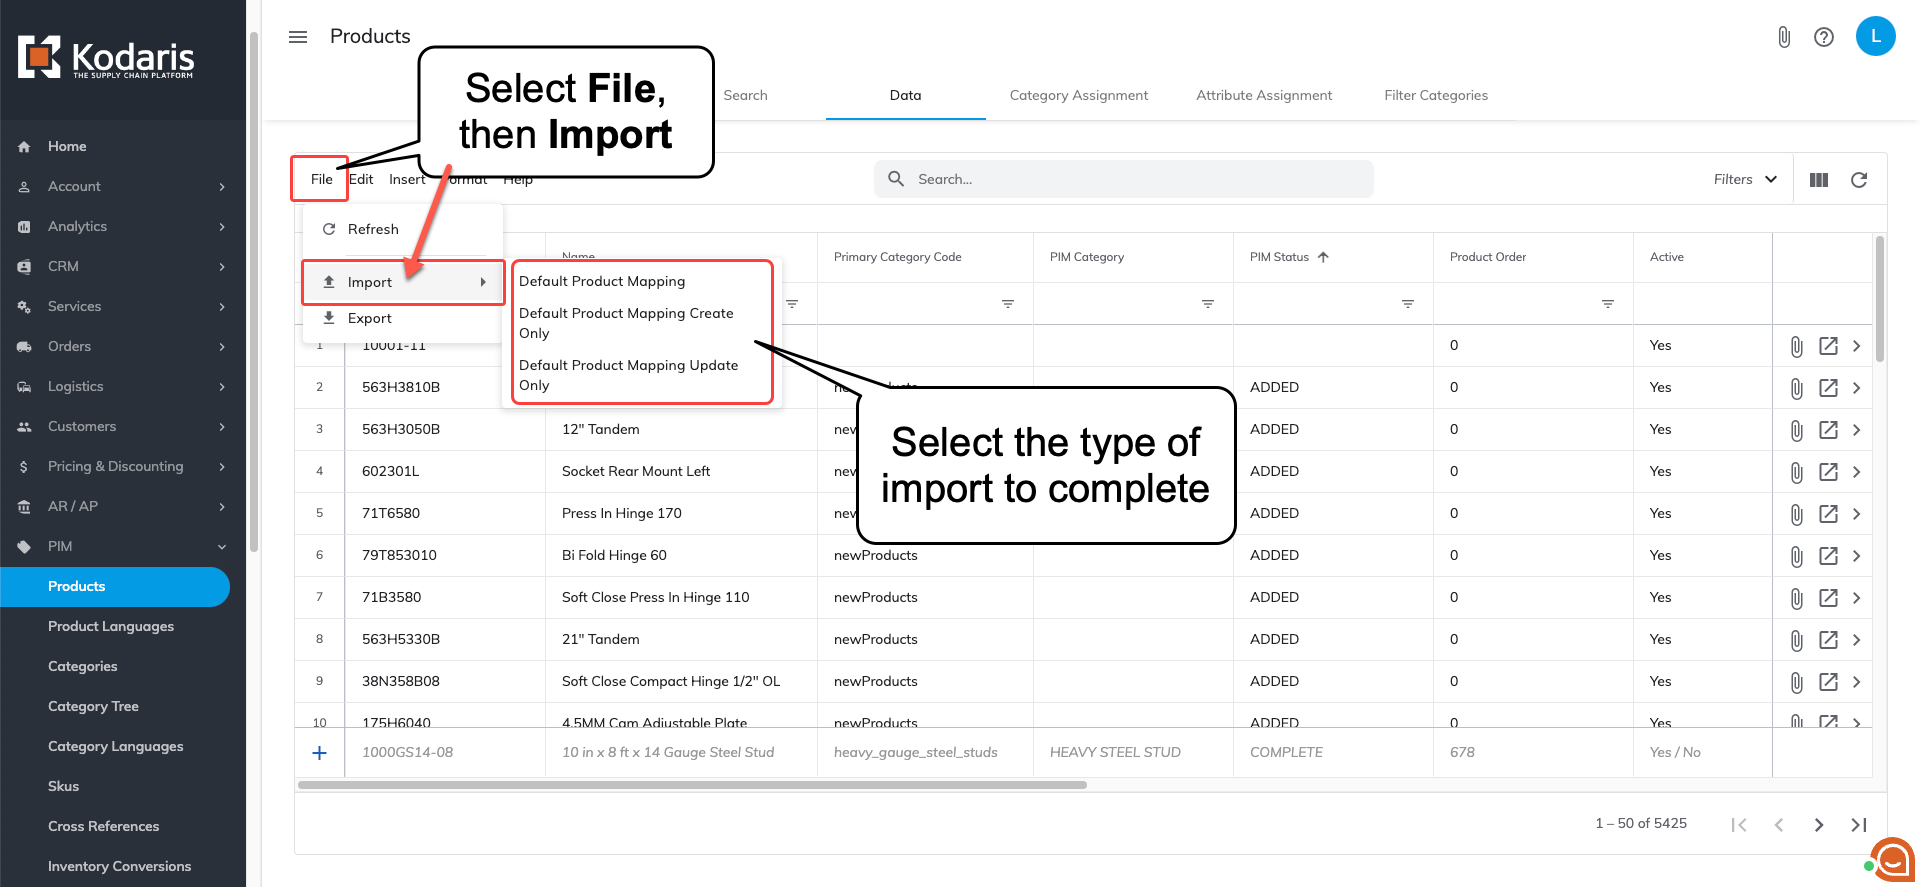
Choose "File" > "Import" > and select one of the following:
Default Product Mapping: import all products included in the .CSV file
Default Product Mapping Create Only: import only products from the .CSV file that do not already exist
Default Product Mapping Update Only: import only information for products that already exist from the .CSV file
Note: if you want to export a single category of products, navigate to "Categories" from the PIM section of the Portal.